Very often it happens that the whole prepared cream leaves on a layer and a covering of a cake, and on an ornament remains nothing. Either the cream was too liquid and just not suitable for decoration. The situation will be saved by a fast, absolutely inexpensive protein cream , such as a wet meringue, which is very simple to do, while at the same time ideally keeping the shape and coloring well. On the cake, the decoration dries up, is covered with a thin crispy crust, and inside it remains soft.
In the original formula of wet meringue cream there are several very important points:
- dishes and corolla must be absolutely dry and fat-free, any hint of fat and cream will not work;
- since yolk - this is also fat, very carefully separating protein, if at least even a drop of yolk has got into proteins, it is better to start the procedure first;
- in order for the protein to be whisked, we add a drop of salt at the very beginning;
- for whipping need a hand mixer or blender, the usual whisk with the task can not cope;
- To decorate with a cream it is necessary at once as soon as it has cooled down. After a few hours, the cream will change the structure and exfoliate.
Recipe for protein cream for decorating cakes wet meringue
Ingredients:
- sugar - 190 g;
- egg - 4 pieces;
- citric acid - ¼ tsp;
- vanilla.
Preparation
Put a pot of water on the stove and pick up the dishes, which are the size suitable for a water bath. This capacity should be quite large, with a margin, because the cream will increase in volume. In this dish, we carefully remove the proteins from the yolks, so that nothing else gets into the cream. Yolks can be used on cream, on shortbread dough or lemon kyrd.
Proteins slightly whisk and put on a water bath. Slowly add sugar and whisk, water while it should already gently boil. Shake for about 10 minutes. If the cream has become thick, there are traces of the corolla or the cream is collected behind the whisk, forming holes in which the bottom is visible, then it is already ready. Remove from heat, add lemonade and vanilla and whisk another 5 minutes to cool slightly, when the mass begins to separate from the bottom and the walls of the cream is ready.
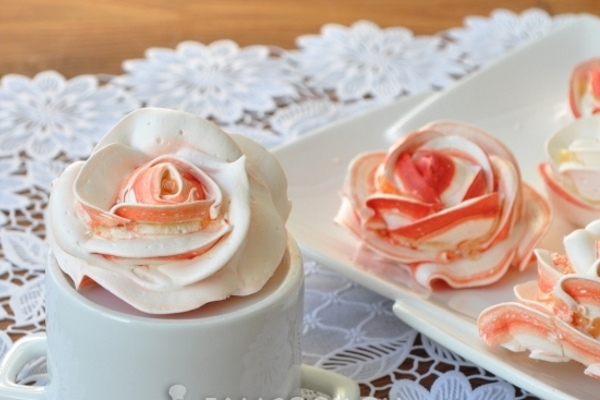
If the cream remains after the decoration, you can put it on paper and in a couple of days you will get dried jewelry, which can be stored in sealed containers.
Especially impressive are the desserts decorated with this cream. About the most popular element of design we will tell below.
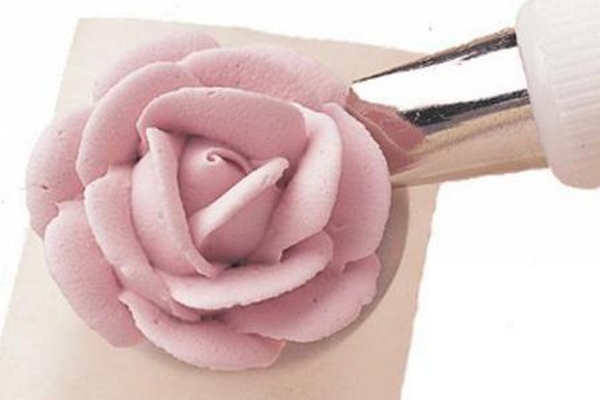
Roses from a wet meringue master class
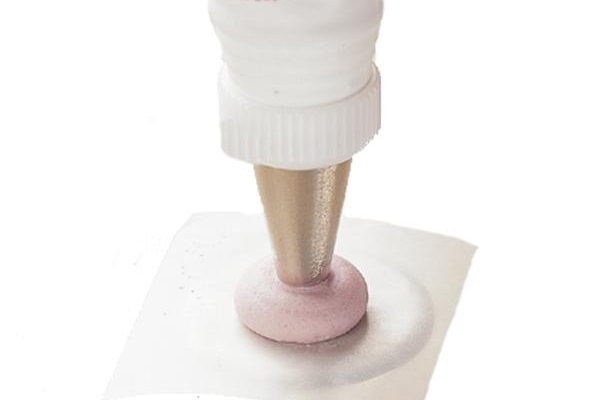
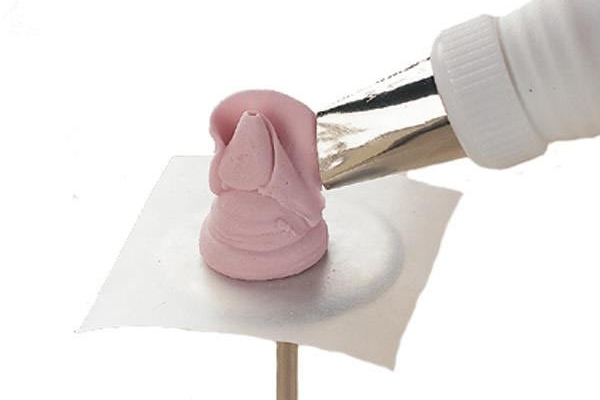
We make the base for the rose, hold the bag vertically, squeeze out a three-dimensional drop, gradually raise it and reduce the pressure.
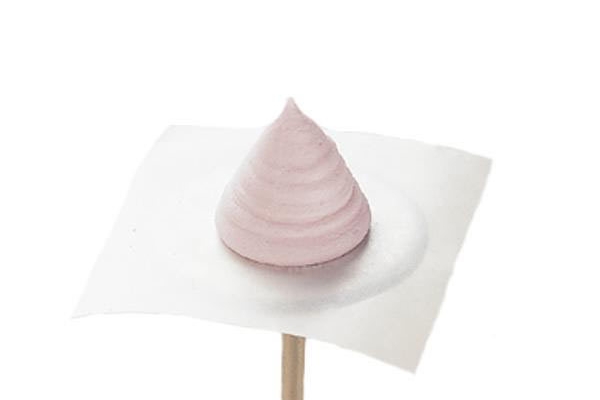
Sharp movement tear off the nozzle from the base.
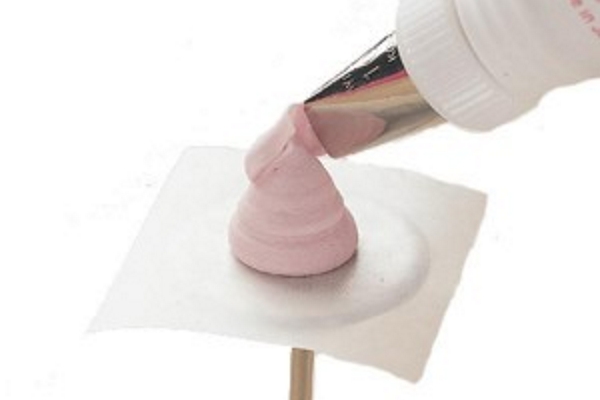
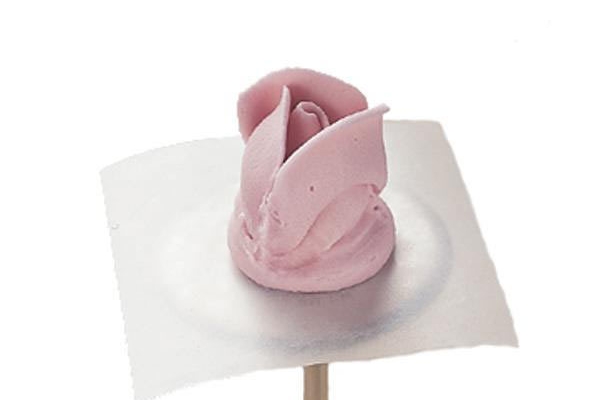
Make the center of the bud, the nozzle should be at an angle of 45 ° to the flat surface of the base. The wide end of the tip should touch the cone at or slightly below the midpoint, and point the narrow end upward and slightly inward.
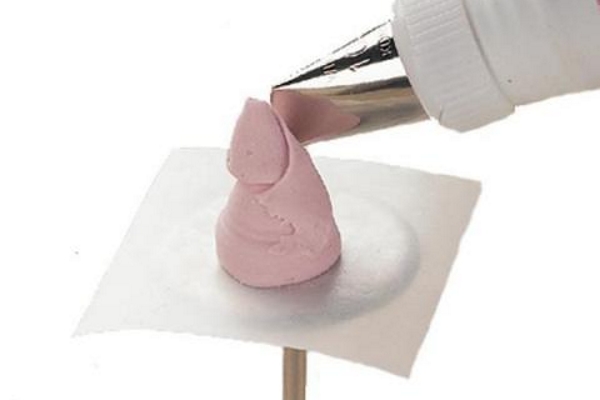
Now at the same time we compress the bag, move and rotate the tip of the nozzle. Slowly turn it, drawing a tape around the top of the base overlapping its crown, and then dragging it down to the starting point. You will get a kind of loop.
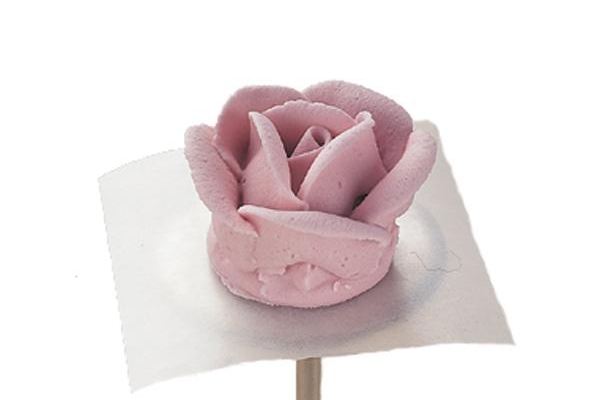
Now make the top row of 3 petals. Wide edge of the tip is put to the middle point of the bud so that it touches the cream, the narrow end straight up. Squeezing, lifting up, and then down again, thus getting a vertical petal.
And again, grabbing the edge of the first petal, squeeze out the second, and so on only 3 petals, and the latter should cover the beginning of the first.
Now the wide end of the tip is placed just below the center of the petal in the upper row, and the narrow tip is slightly bent from the top of the bud. In this position, we repeat the movements in a semicircle, making 5 petals.
Each subsequent overlaps the edge of the previous one, and the latter necessarily covers the beginning of the first.
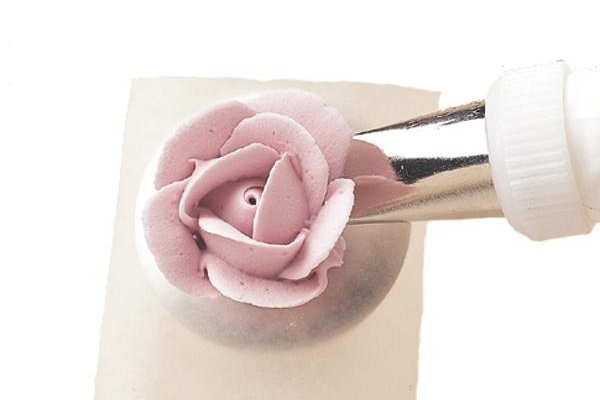
The lower row will be of 7 petals. The wide end of the nozzle is below the center of the middle row of petals, and the narrow end of the tip is inclined even more.
Repeat a total of 7 petals, as always the last overlapping the beginning of the first. So from a small point rose rose.
You can also paint inside one wall of the bag and keep it always on top, then the edges of the petals will become colored.