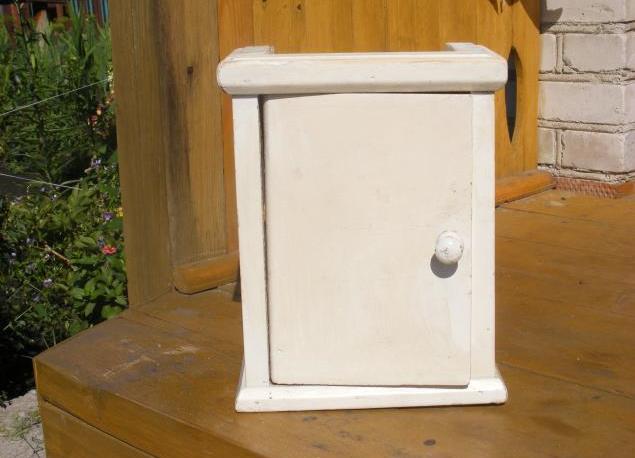
Decoupage is a very effective technique that allows you to ennoble and shine any product, from a simple casket to a large sideboard. Decorate in the style of decoupage, you can use both new and used furniture. As an example, let's look at the decoupage of the cabinet.
Master-class "Decoupage of the closet with your own hands"
To work on decoupage of the locker you will need the following materials:
- Napkins for decoupage with a suitable pattern;
- adhesive for decoupage (special or pva);
- acrylic or yacht lacquer;
- a wide synthetic brush;
- acrylic paints: brown and white;
- paraffin candle.
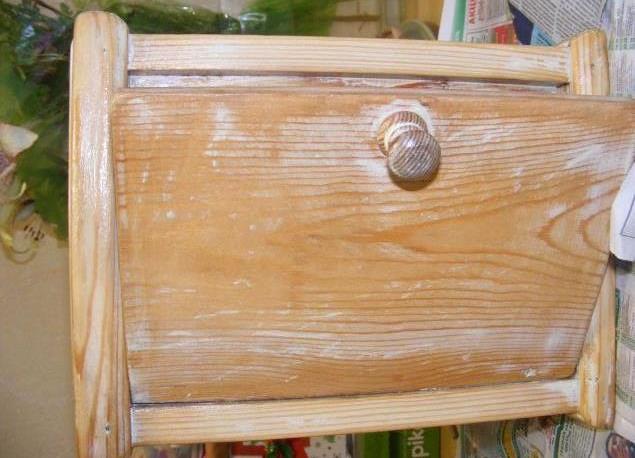
- In our time, you can buy wooden furniture specifically "for decoupage," that is, not yet decorated. It is easy enough to process it with sandpaper, leveling the roughness. If you decide to make a decoupage of an old wardrobe or kitchen cabinet, you must first get rid of a layer of old paint. In the photo you can see which locker was originally, before the paint was removed.
- After he has a good work on sandpaper, he will become like that. If this is necessary, the surface of the cabinet must be leveled with a putty.
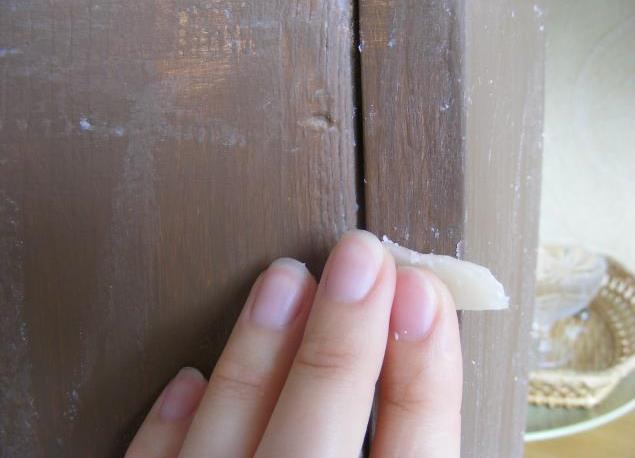
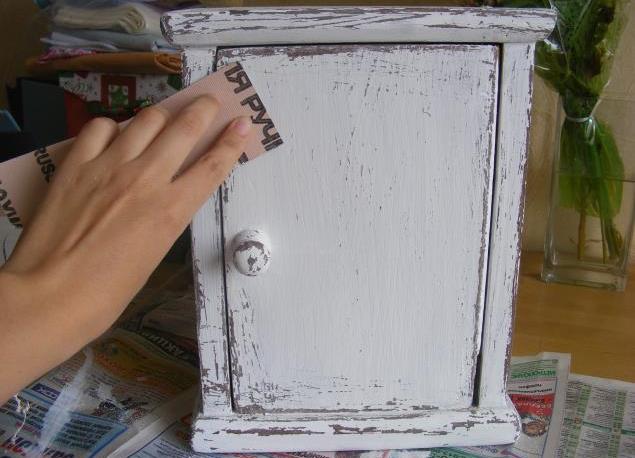
- Since our goal is to make a decoupage of the cabinet in the style of the shebbi-chic, you should take care of the "scrapes of time" in advance, creating them with the help of a usual paraffin candle. Apply the paraffin over the previously laid first layer of dark (brown) paint. Walk with soap in those places, which are usually touched more often - the handle on the door, corners, etc. The interior of the cabinet and shelves should be simply covered with brown paint.
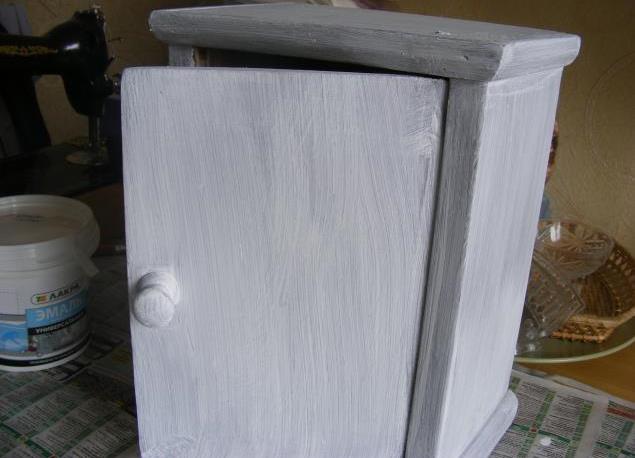
- Now we will pour the locker with white acrylic in 1 or 2 layers. To create a solid, dense coating is not worth it, even better it will be translucent. Nevertheless, try to paint the entire surface of the cabinet up to each corner and notch.
- Using a large nazhdachku, slightly walk it in those places that were "painted" with soap. The paint will easily come off them, revealing a layer of dark paint. Visually, it looks like rubbing on furniture, which was often used, while the product itself as a result will shine like new. The style of the shebbi-chic (or, as it is also called, "shabby chic") is used to give furniture the effect of antiquity.
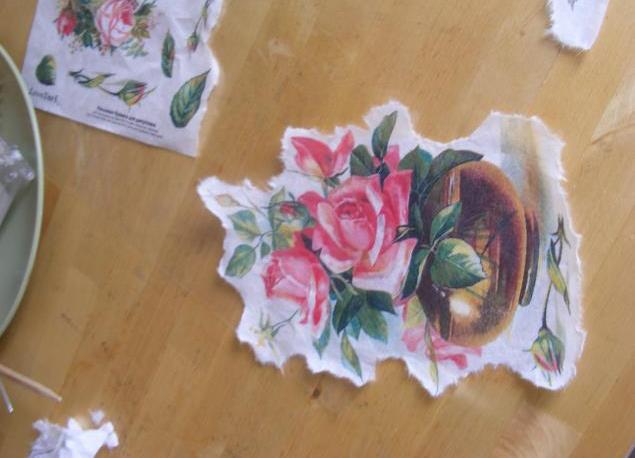
- In order to decorate the locker with flower patterns, cut out, or even better - gently tear the desired motif from the napkin (first remove the two lower layers from the napkin, leaving only the top layer, with the pattern). The ragged edge will smooth the transition from the background to the picture, giving it a naturalness. Prepare the necessary number of motifs and attach them to the product to assess how well they will look. Do not forget that paper napkins have the property of stretching after gluing.
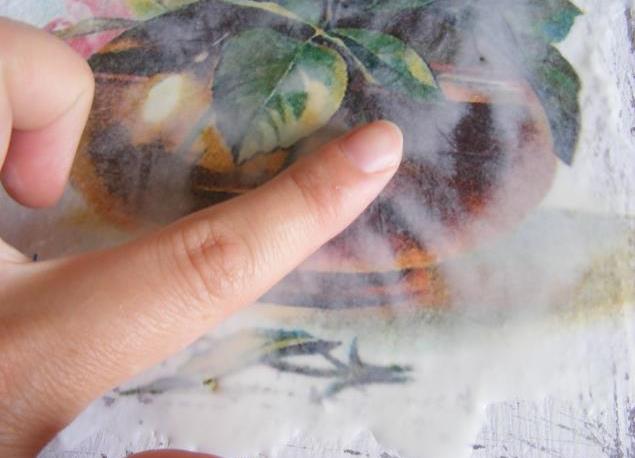
- Attach the motif to the surface of the locker, dab the brush in the glue and gently but surely move the napkin, pressing the brush out of the air bubbles from under it. Do this as quickly as possible, as the napkin very quickly soaks. After sticking all the motives, leave them for several hours to dry. Some masters use a hair dryer: if desired, the glue or varnish can be dried quickly to immediately proceed to the next stage.
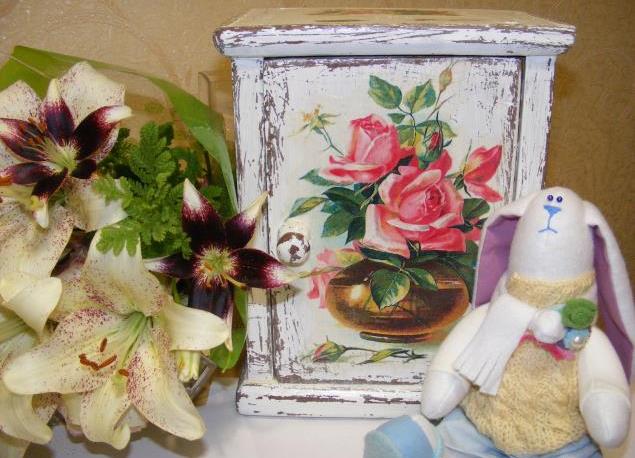
- We left the finishing touches. If there are wrinkles on dried napkins, they should be carefully sanded with fine sandpaper. If desired, the transition from the napkin to the background can be added to artistic acrylic paints, so that it is less visible. The final stage will be coating the product with varnish.
To complement a set of decorated furniture can be through decoupage of the dresser , table and chairs .