More recently, short tight necked necklace- chokers were at the height of fashion. Moreover, in the wardrobe each self-respecting fashionista simply had to have a set of choker-necklace and choker-bracelet. Today, although there is a tendency to return fashion to them, it is quite difficult to find these accessories on sale. Therefore, we offer you a master class, how to make a choker yourself.
How to weave a choker yourself?
The following method allows you to weave a choker both on your arm and on your neck.
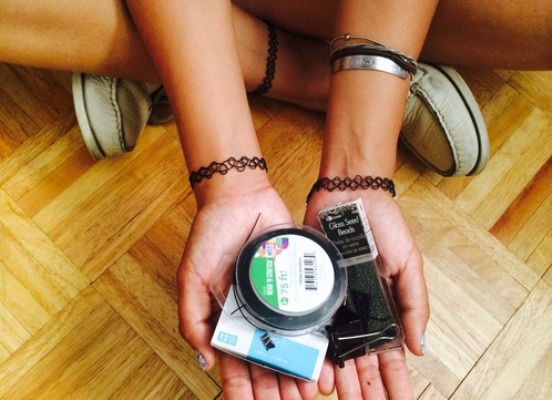
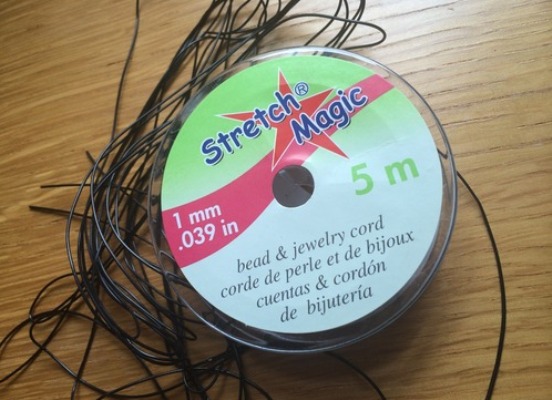
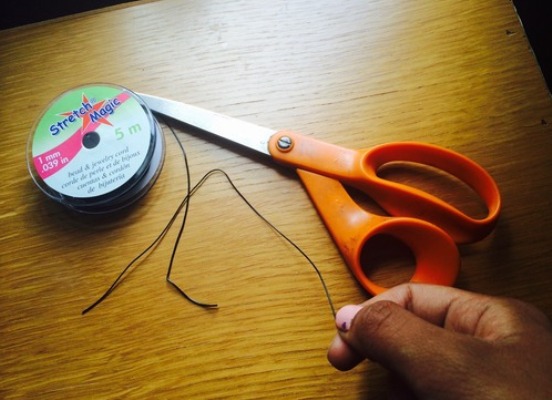
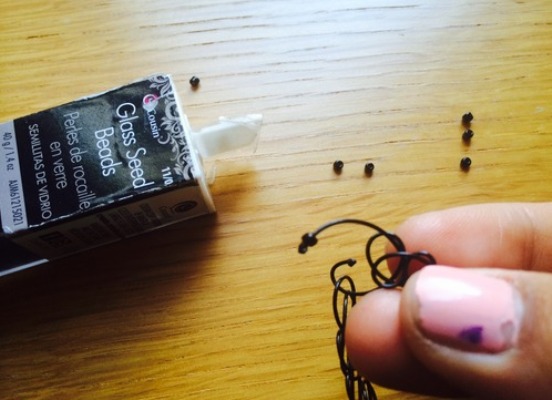
- Let's start by preparing all the necessary materials. First of all, for the choker we need a thin elastic fishing line.
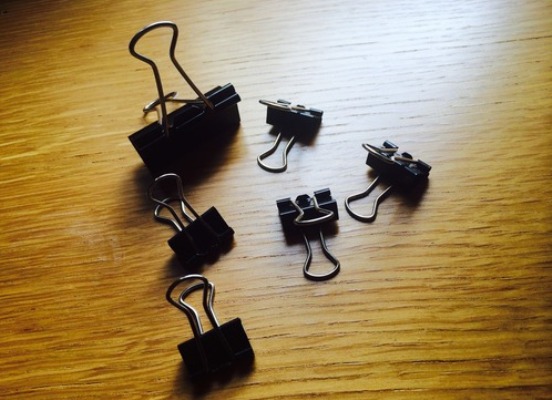
- To fix our weaving in the workplace, we use office clamps-binders.
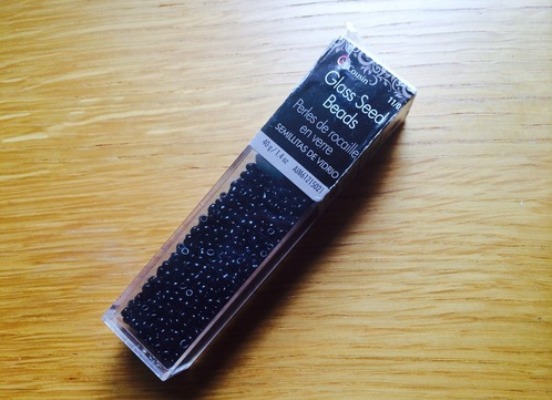
- And, if desired, you can weave in the choker and the beads - suitable for color or contrast.
- We measure the line of the required length. If we weave a necklace, then the length of a piece of fishing line should be equal to two neck girths, if it's a bracelet, then you need to measure two girth arms.
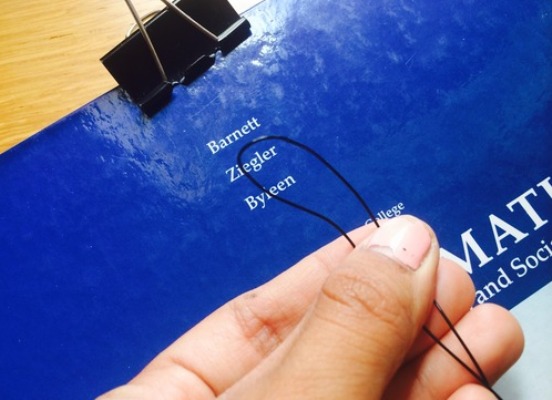
- Fold our piece in half and fix it with a binder.
- We pull the fishing line to avoid the formation of loops on it.
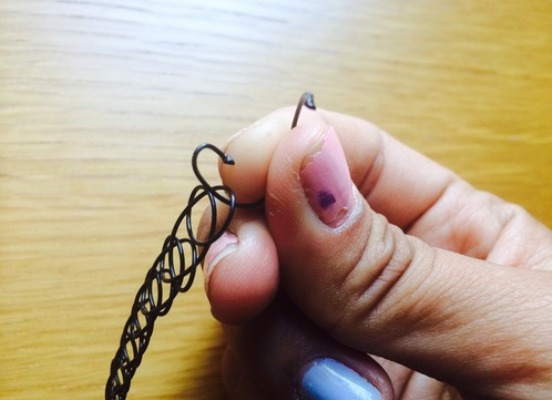
- Now take one end of the line and throw it on the other to form a loop.
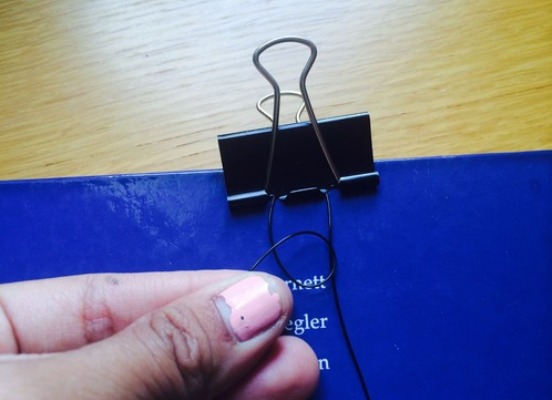
- Let's repeat this manipulation with the other end of the line.
- Continue the work until it reaches the desired length. If desired, after each loop can be weaved into the choker and beads.
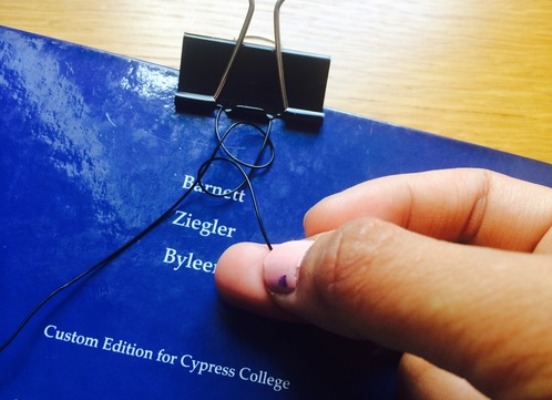
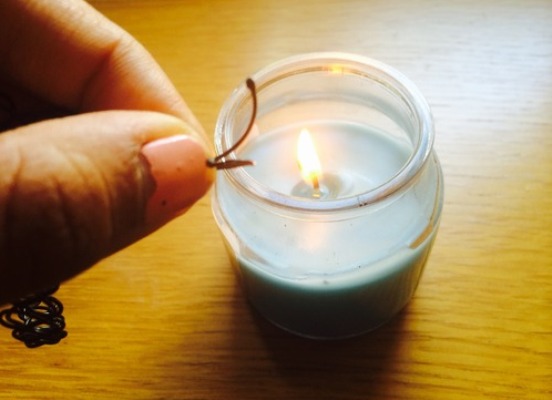
- When the work is done, we lock our choker into a ring.
- We scorch the ends of the line over the candle flame.
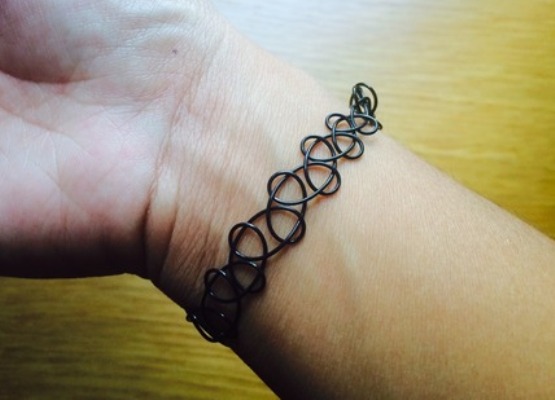
- We get here such a wonderful bracelet-choker, woven with our own hands.
How to weave a choker with your own hands - method # 2
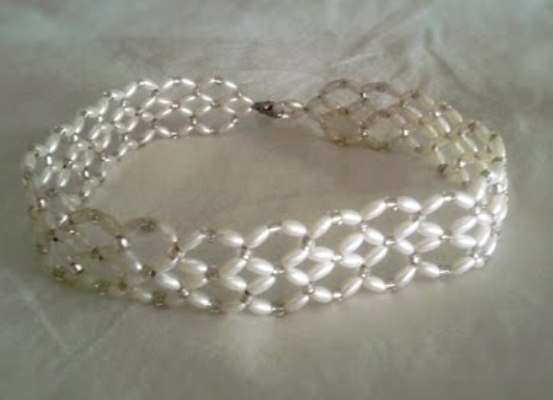
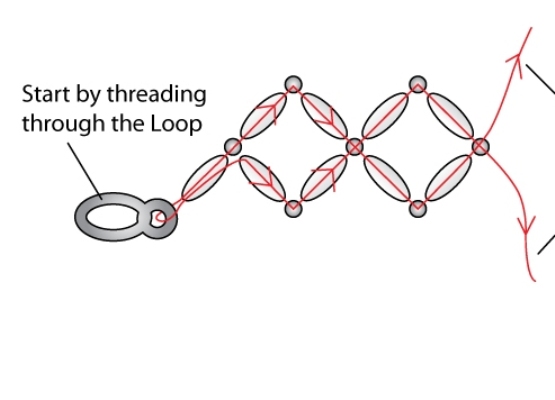
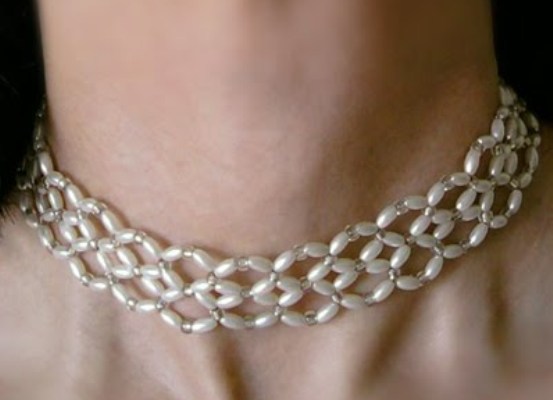
Now let's look at the scheme by which we can weave a choker from beads.
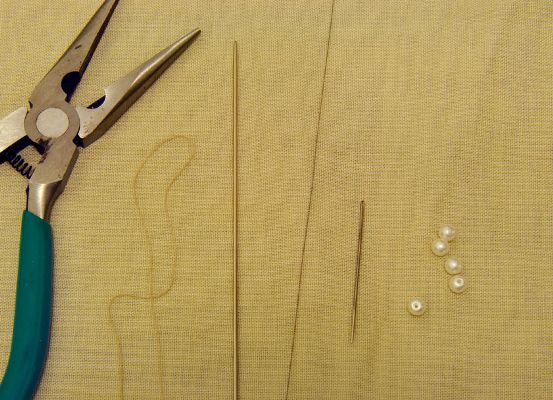
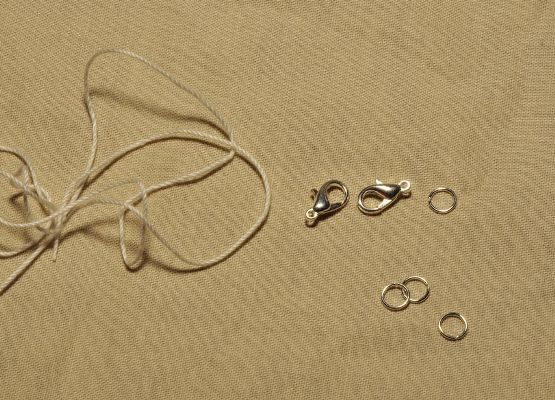
For work we need a thin line, oblong and round beads, as well as a lock for jewelry made of two halves.
Let's get to work:
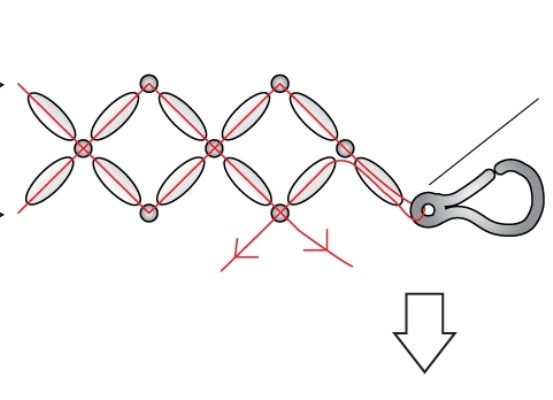
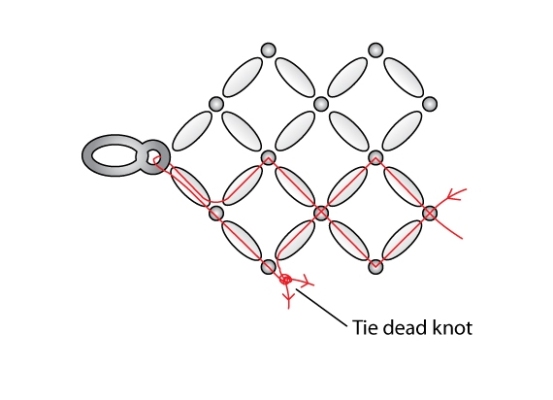
- Through the ear of the lock let's cut a piece of fishing line and begin to string the beads according to the scheme on both ends.
- Continue to work up to the required length, and then we will weave into it the second half of the lock.
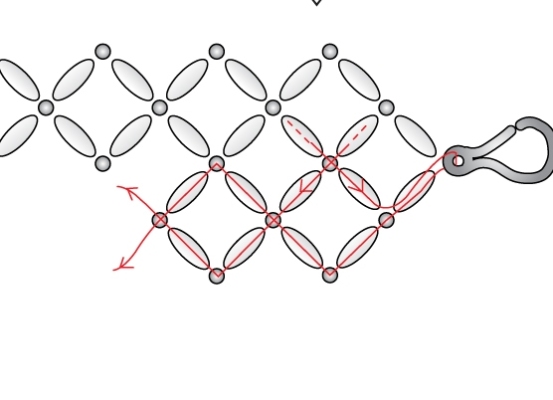
- After this, we continue the weaving of the choker in the opposite direction according to the scheme.
- Having reached the first half of the castle we will tie the ends of the line with a knot and cut off all unnecessary.
- As a result, we'll get this unusual necklace-choker made of beads.
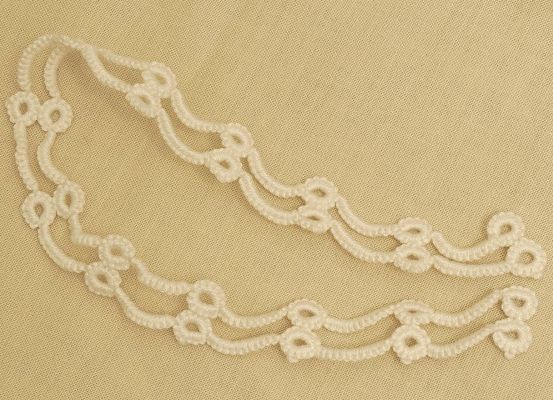
How to make a choker with your own hands - method # 3
This method will require some skills in the technique of frivolity, but as a result you will get an exquisite and very gentle necklace.
For work we will need:
- pliers;
- hook;
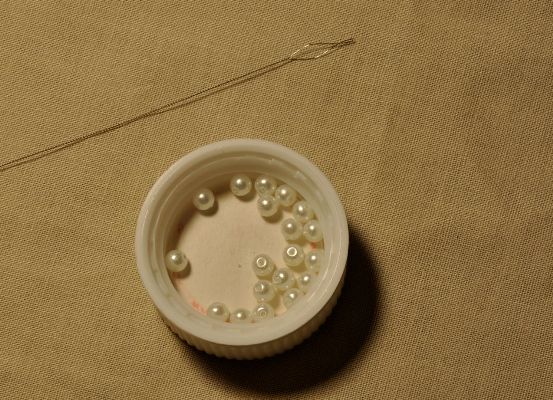
- sewing needle with a large eye;
- thin wire;
- thread;
- locks for jewelry;
- beads.
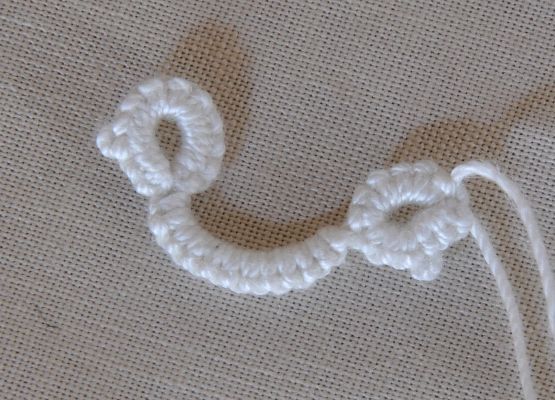
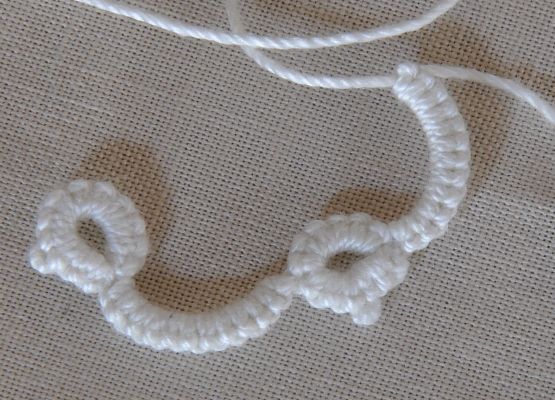
The basis of our necklace-choker will be a series of 13 rings and 12 connecting chains. The working thread for this must be a length of 150 cm.
Let's get to work:
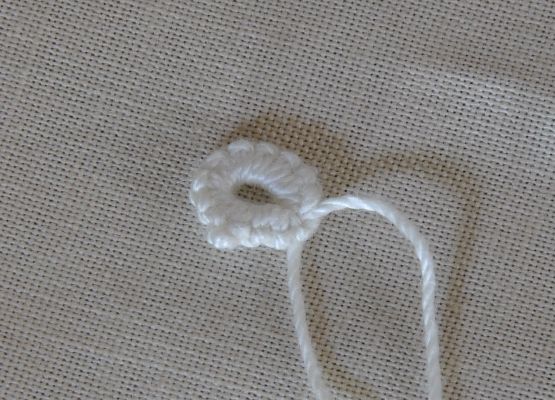
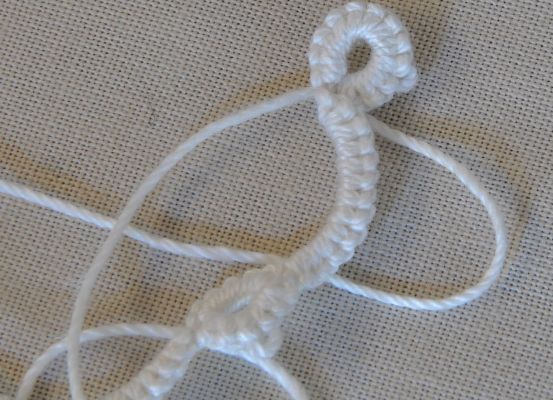
- We start with the first ring.
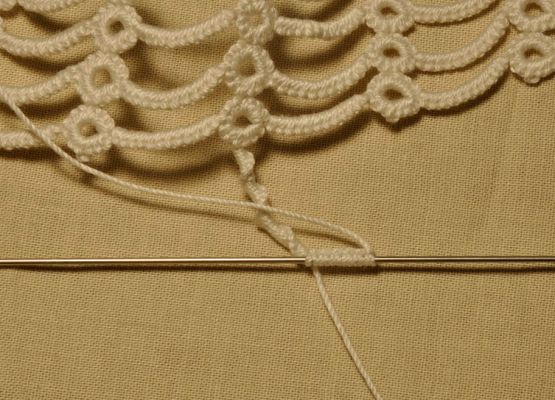
- After tying the connecting chain, we pass to the second ring.
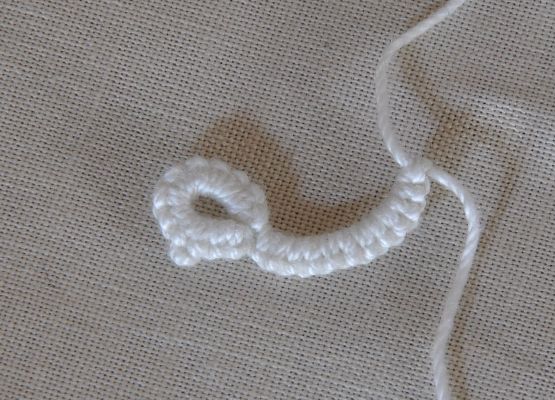
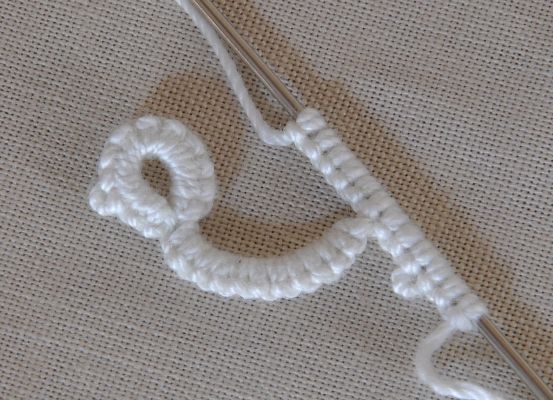
- In the same way, we untangle the third and all subsequent rings, connecting them with chains.
- We finish the series with a ring.
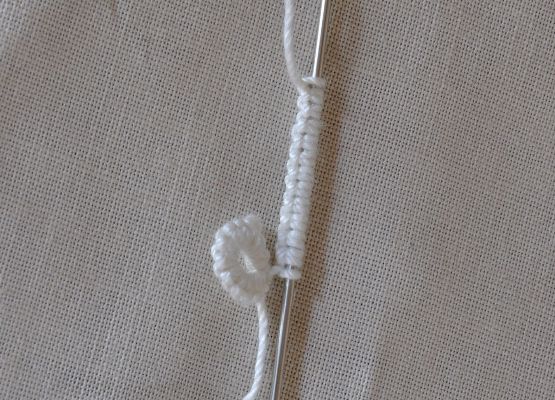
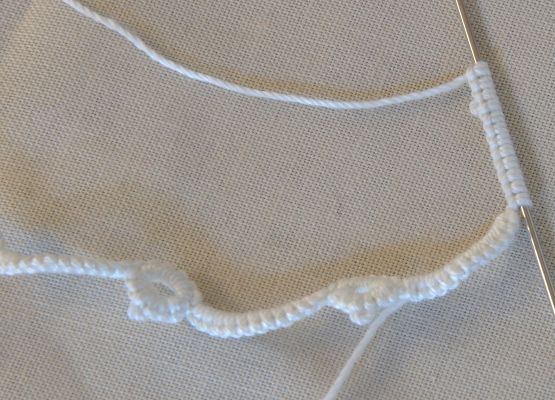
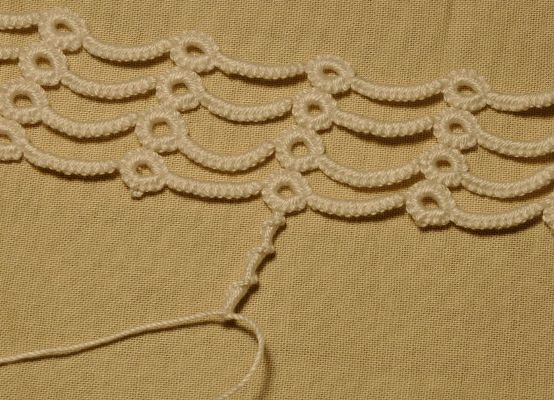
- Similarly, we knit the second and all subsequent rows of our necklace, until it reaches the desired width.
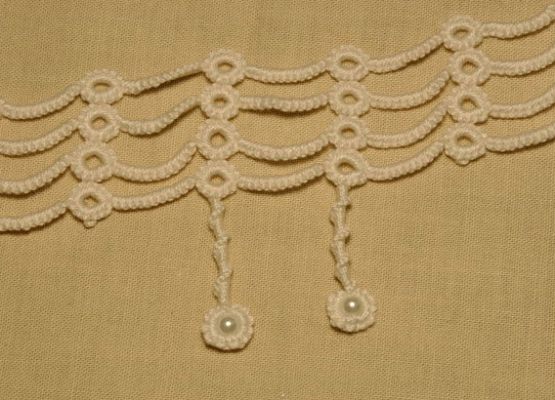
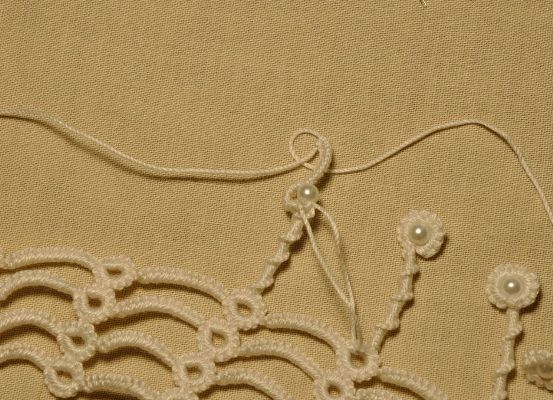
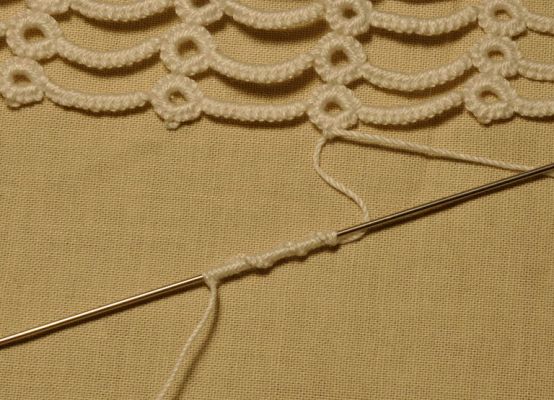
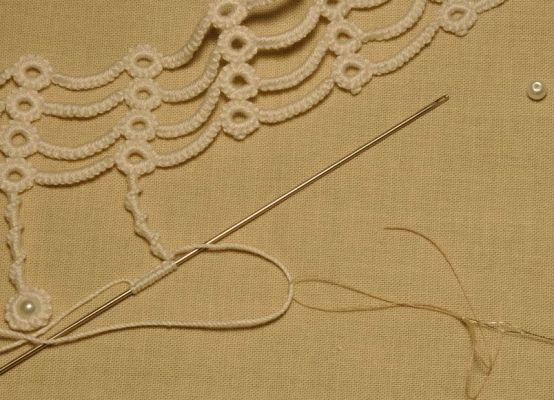
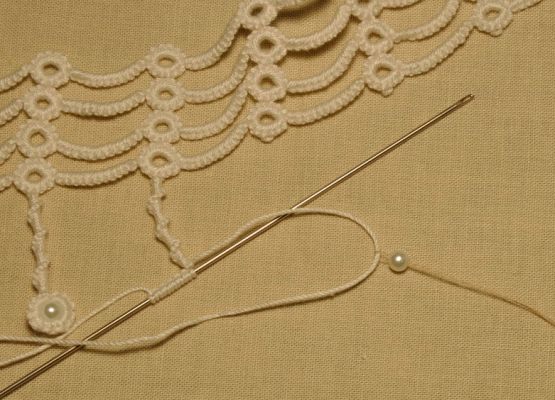
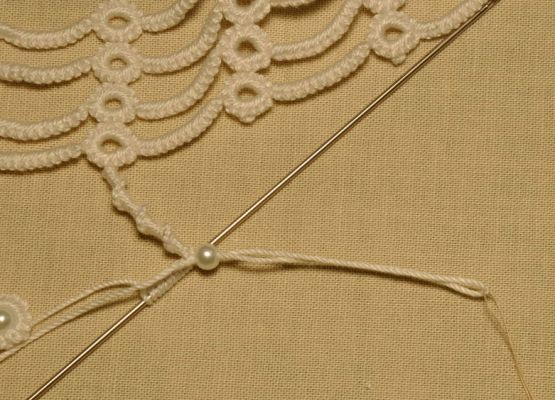
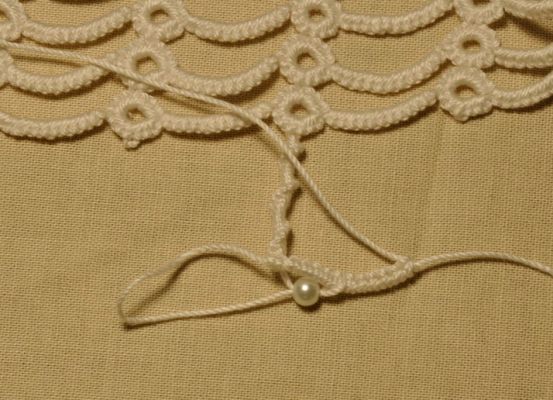
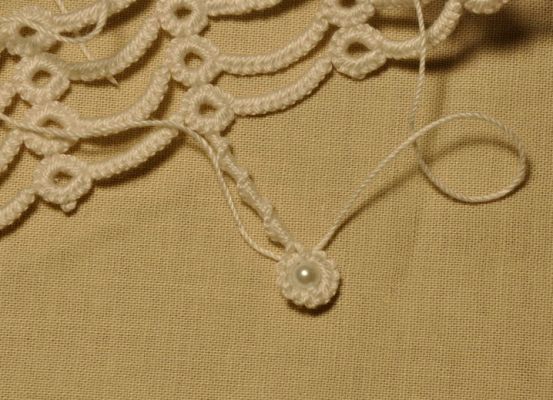
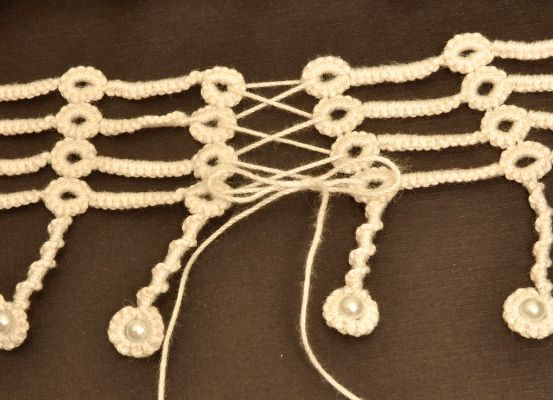
- It's time to decorate our necklace-choker. To do this, we take small beads and fix them on the bound fringe.
- Details the whole process of tying fringe and fixing beads on it is shown in the photo.
- In the process, the main thing is to act carefully, so that the finished product does not warp.
- Beads can be made of plain or with inserts. You can also experiment with beads of unusual shape or bugles.
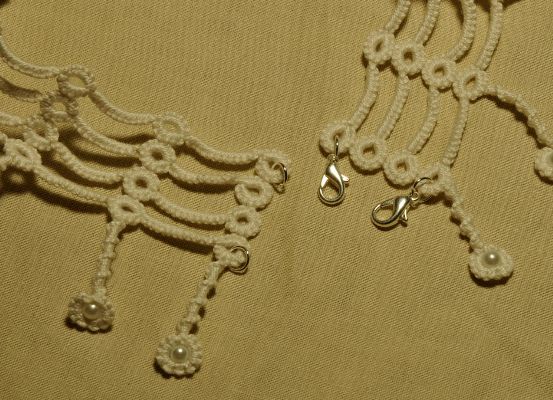
- As a lock for a choker, you can use both regular lacing and special attachments for costume jewelry.
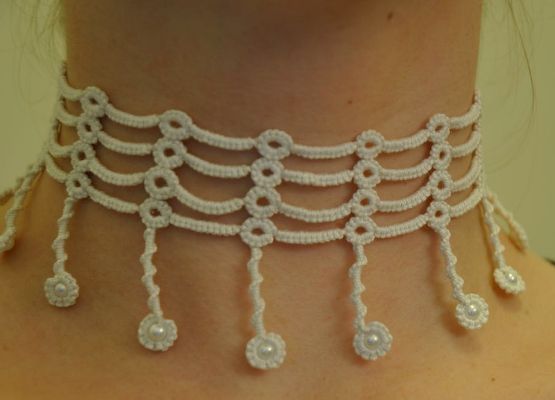
Our necklace-choker is ready!