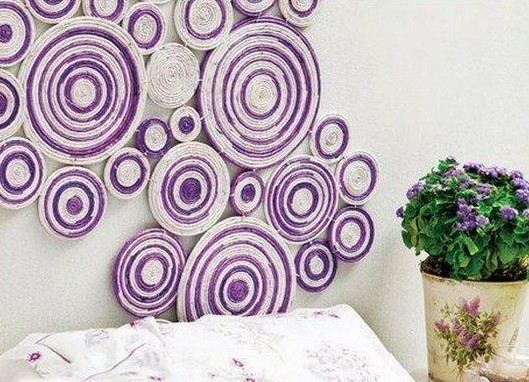
The empty walls of the room oppress and create a feeling of unfinished interior. For their decoration, you can use paintings or panels. They can be bought in shops or made by yourself. If you do not have the gift of an artist and can not draw a beautiful picture, then almost everyone can create a three-dimensional wall panel with his own hands.
From this article you will learn a few fairly simple ideas for performing a panel with your own hands. After all, almost any material can be used for this process: newspapers, textiles, cardboard, wood, plastic, etc.
Master-class №1: Wall panel
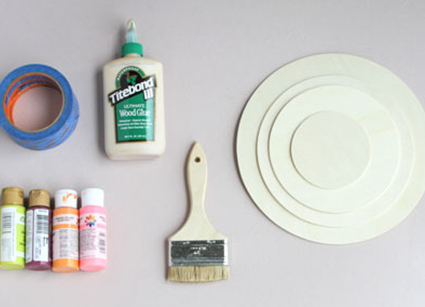
It will take:
- plywood;
- circles of wood of different diameters;
- brushes;
- Paint of bright colors: pink, light green, orange and magenta;
- painting tape;
- joiner glue.
Progress:
- From a single piece of plywood, we cut out a rectangular base. It should be taken into account that it should be small enough, as the parts will go beyond its edges.
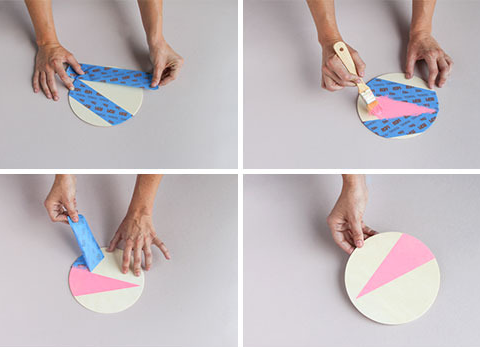
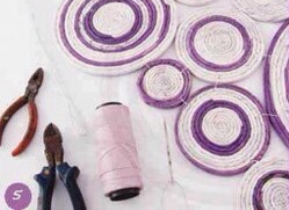
- According to our idea, each circle is painted with different colors. In order to do it neatly, that is, to make the edges smooth, first the place that we are going to cover with paint is pasted with a paint tape. After that, we put the color, wait until it dries well, and remove the protective tape.
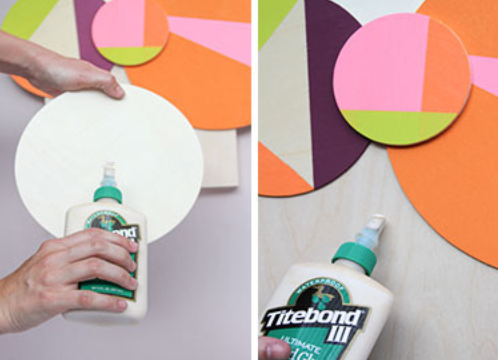
- The colored circles are glued to the base. First you need to place large ones, and on top of them medium and small. In order to glue the fragments well, it is necessary to apply the joinery adhesive to both the part and the substrate, and then press it firmly.
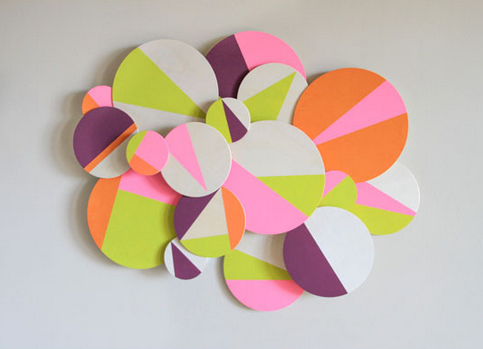
- After the panel is ready, attach to the back of the base of the loop and hang it on the wall.
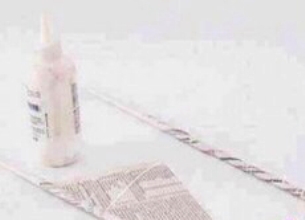
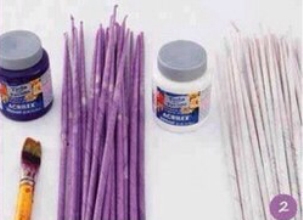
Master-class № 2: Wall panel in quilling technique
It will take:
- newspapers;
- PVA glue;
- elastic;
- purple paint;
- thick thread and needle.
Progress:
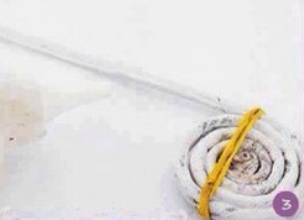
- We wind up the pipes from the newspapers (as for weaving).
- Half of the finished tubes are colored in purple.
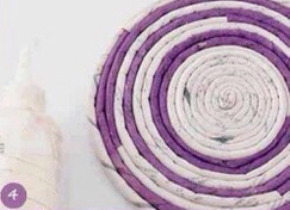
- We begin to twist each of the blanks in a ring. To ensure that it does not open, we grease the contacting sides with glue and stretch it with an elastic band, allowing the paper to stick to each other.
- Rings can be twisted from several colors, alternating them.
- The workpieces are stitched on the reverse side in the order we need, and we hang it on the nail.
| | |
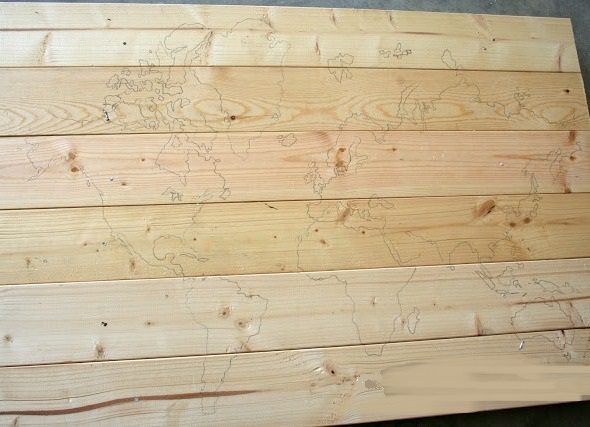
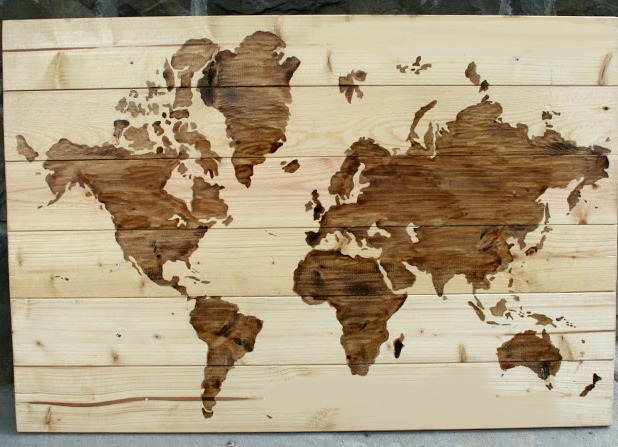
Master-class №3: Wooden panel - world map
It will take:
- wooden boards;
- sheets of paper with a drawn world map;
- pencil;
- brown paint and brushes of different sizes;
- varnish for wood.
Progress:
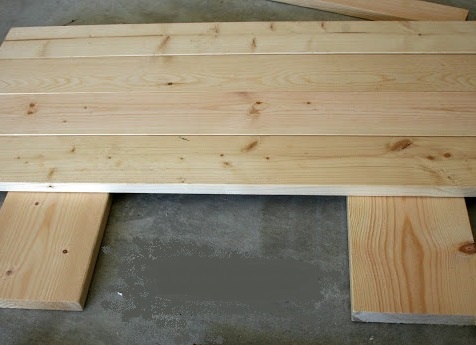
- We shoot a rectangle from the wooden boards. To do this, we take 6 boards with a length of about 1 m and on the back side we nail to them 2 boards across the entire width.
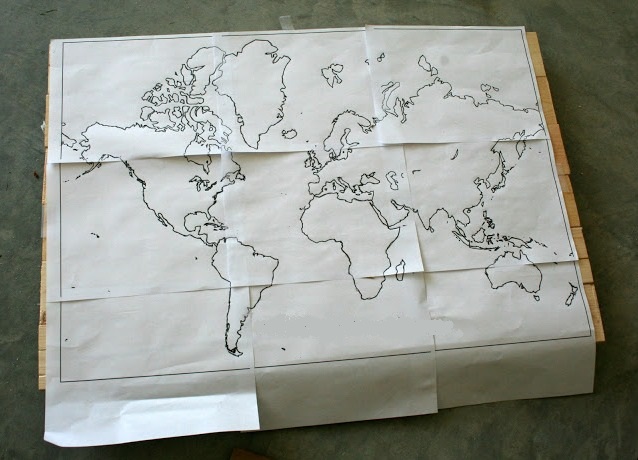
- Attach to the resulting paper with a picture of the map and translate it to a tree. You can do this by pushing the handle of the line, and then circling them with a pencil.
- We paint the dark red continent.
- If desired, you can open the panels of colorless varnish.
- The panel is ready!
Master class №4: Abstract panel
It will take:
- plywood;
- wooden bars;
- paper;
- black paint;
- sandpaper;
- accessories for drawing;
- adhesive PVA and a thick brush for it.
Progress:
- On the edges of the plywood on the back side nails, and in the corners - triangles of plywood. After that, be sure to sand the front side and paint it in black.
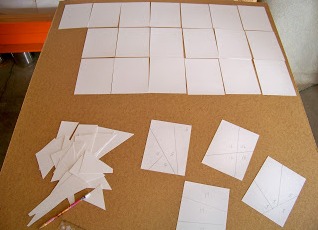
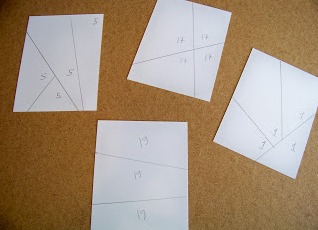
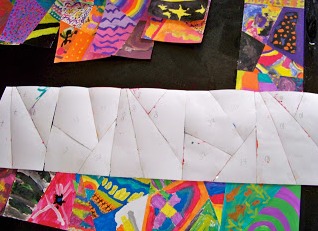
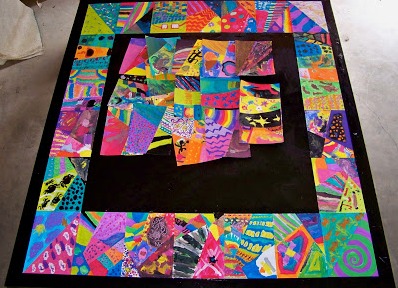
- Cut out of the paper so many rectangles of the same size, so you can close the entire plane of your plywood, except for the frame. We cut each of them into several parts. In order not to confuse them later, it's better to sign each on the reverse side.
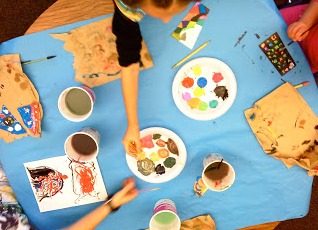
- On each of the pieces you need to draw a separate drawing.
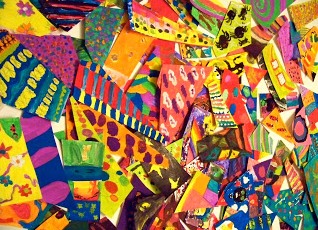
- We remove the dried pictures in a single picture. First we make a frame, and then an inner part.
| | |
| | |
| | |
| | |
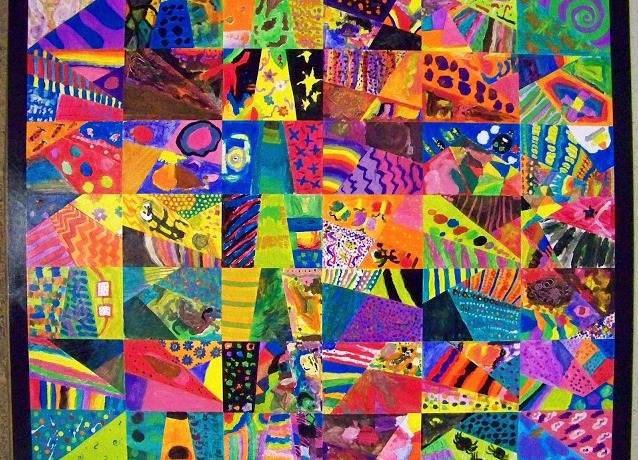
The panel itself with pictures of your hands is ready.
In addition to the presented, there are a huge number of options for the design of the panel on the wall. Their theme depends more on the interior and hobbies of the owners.