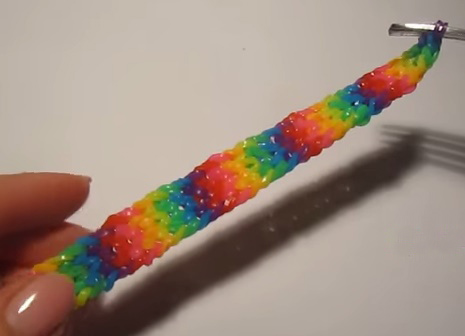
Of the rubber bands, you can weave not only solid or bicolour bracelets . The very name of this technique - Rainbow Loom - speaks for itself: these products can and should be made bright, choosing the most cheerful tone. Today we will try to weave a bracelet from the band with the name "Rainbow".
How to make a rainbow bracelet made of rubber bands on a fork?
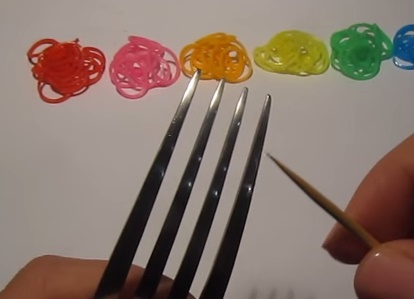
We begin the braiding of the bracelet with preparations:
- Stock up with a regular fork with four teeth and a wooden toothpick. And since we learn to weave a bracelet from the rubber bands "Rainbow", then the rubber should be of all colors of the rainbow - for this we have to remember the famous rule about the hunter and pheasant.
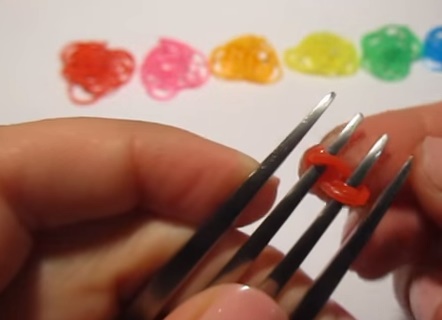
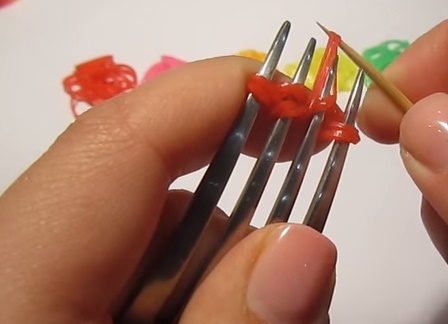
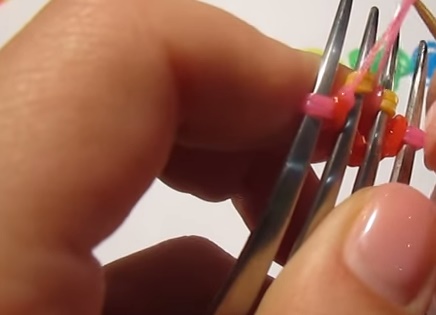
- Take the first rubber band of red color and put it on two middle prongs of the plug, pre-twisting the figure-eight.
- Do the same with the next red rubber band, just put it on the first two teeth. Do not forget to twist it.
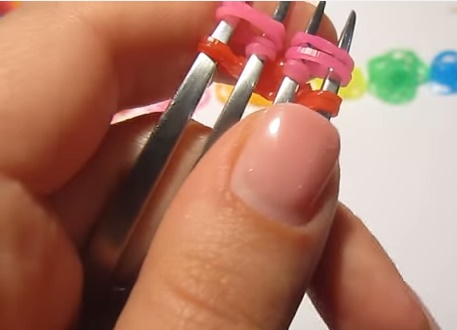
- And repeat the action with the last two prongs of the plug. We used three red rubber bands.
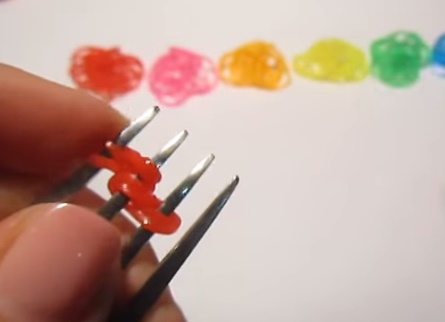
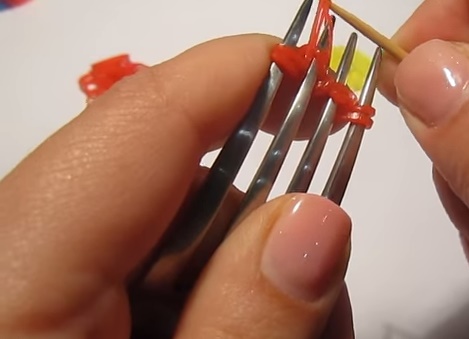
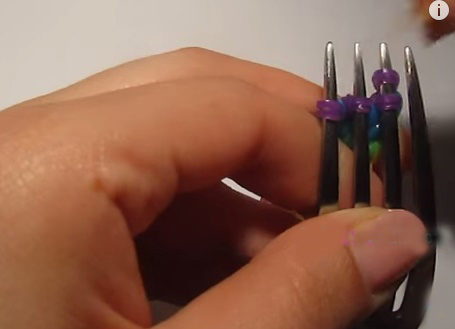
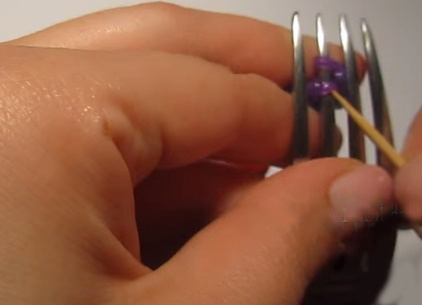
- Next - pay attention - you need to remove the elastic first from the third count of the tooth, moving it to the back of the plug, and then in the same way - from the fourth. Instead of a toothpick, you can use a hook.
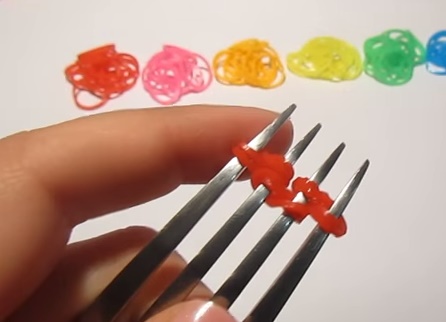
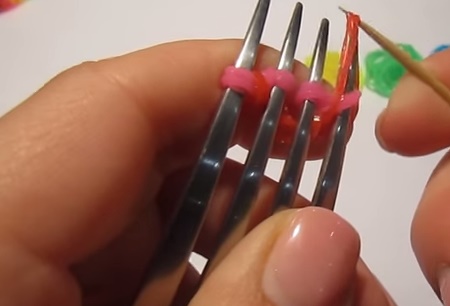
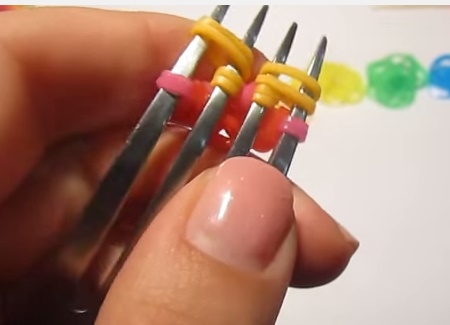
- Next, we take the gum of the next in turn color and put on two middle teeth. This time, we do not twist the rubber band with a figure eight, but simply put it on two turns.
- Again, we take the toothpick and remove the first level gum below, first with one tooth, then with the second one.
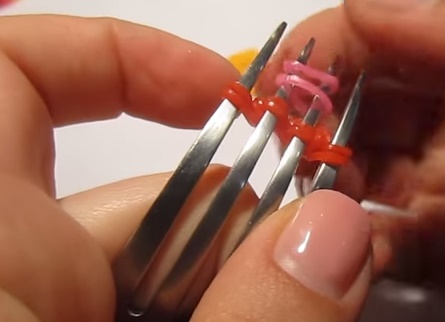
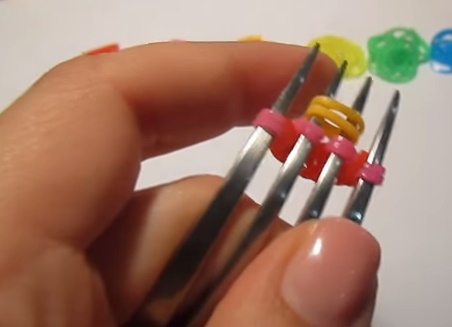
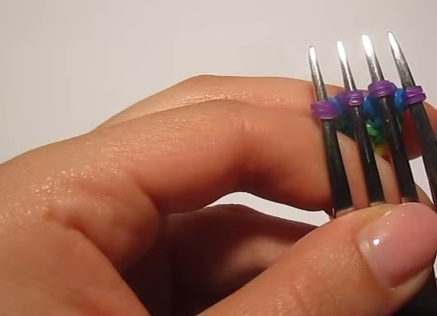
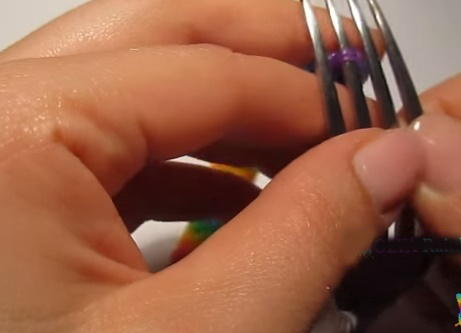
- We put two gums of the same color on the lateral teeth as shown in the picture.
- And we remove from each tooth those rubber bands that are in the bottom row.
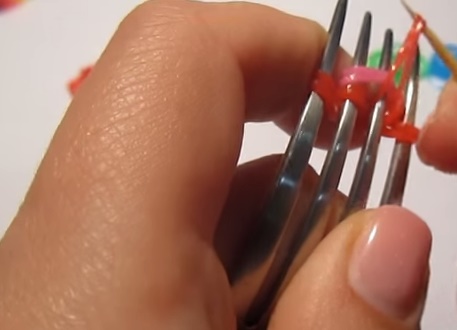
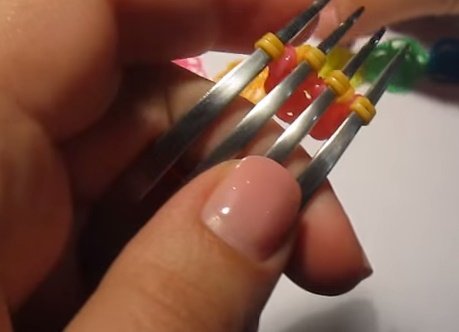
- Again we change color - we put on an orange for two middle teeth of a fork in two turns.
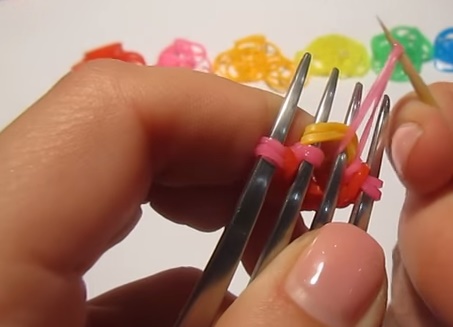
- Remove the bottom row of rubber bands under the orange ones.
- Then repeat the actions described in paragraphs 8 and 9.
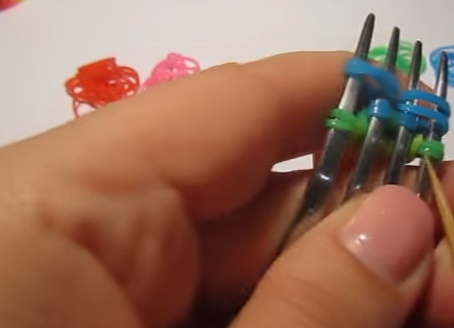
- Thus, we alternate the rows, where one rubber band is put on the middle teeth and those where the two rubber bands are put on the extreme ones. Repeat these actions with the rubber bands of all harvested rainbow colors in turn.
- Repeat the pattern of the seven colors of the rainbow repeat until the bracelet reaches the desired length.
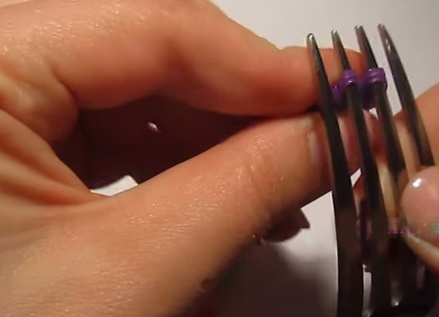
- After the end of the last row on the fork there should be one rubber band of the last, purple, color.
- Unscrew the plug with the back side, hook the elastic band from the outer tooth and put it on the one that is next to it. After that, draw the lower loop of violet upward.
- Repeat for the other two teeth, observing symmetry.
- Then move both the remaining loops to one tooth, one above the other.
- Pull the bottom through the top.
- For this last loop, hook the transparent plastic clasp in the shape of the English S, and thread the second part into one of the central stitches of the beginning of the bracelet.
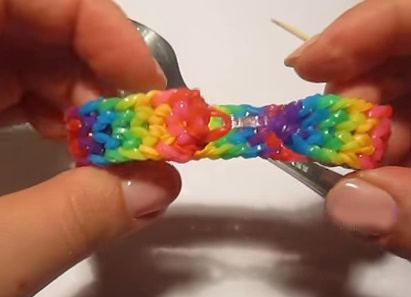
Give your work a rainbow style - these bracelets from rubber bands look very bright and even from afar attracts everyone's attention!