Venetian carnivals are known all over the world and are famous for their chic costume performances. Today we will make a Venetian mask - the most important element of the carnival costume. She will add solemnity and mystery to the festive evening, and on the remaining days will be a worthy decoration of your interior.
We will work in the papier-mache technique using a molded gypsum mold.
What do we need to make a mask of papier-mâché?
To make a mask, we need:
- two bags of gypsum (in the store you will find it under the name "Alabaster");
- plasticine;
- flour glue (a detailed recipe for its preparation is told in the master class);
- adhesive PVA (dispersion);
- old wallpaper or wrapping paper of two colors;
- brushes for glue;
- two pieces of velvet fabric of contrasting colors (each length of 20 centimeters);
- gold braid of two kinds (each one meter long);
- sewing needle, pins and threads;
- linen fabric in tone to one of the velvet pieces (length 20 centimeters).
How to make a mask of papier-mâché?
1. On a sheet of paper, draw a contour of the future mask, taking into account the width of the person's face, which will wear it.
2. By analogy with the illustration, we mold the plasticine shape of the future mask.
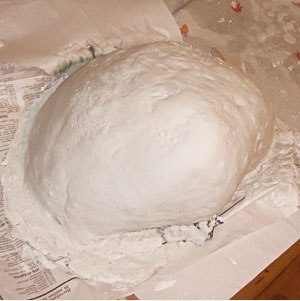
3. Now prepare the cast. It is important to fill up the gypsum gradually, controlling its density, because it is impossible to dissolve an excessively thick mass with water - the gypsum will not grasp. Starting with a thin layer, gradually cover the entire plasticine mold. The thickness of the layer should not be less than three centimeters.
| | |
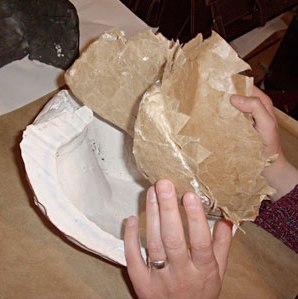
4. The gypsum starts to heat up and finally freezes when it becomes cold (about 30 minutes). After that, the gypsum form is removed. The plasticine blank and the entire mold are heated together with the gypsum and therefore easily obtained. If you miss the time, the clay inside the plaster mold will cool down and harden, making it very hard to get it. Before removing the shape, it is important to prune its brittle edges with a knife so that the shape does not crumble. After the plasticine has been removed from the gypsum mold, it should dry well for several days (to speed up the drying process place the mask near the battery or use a hairdryer).
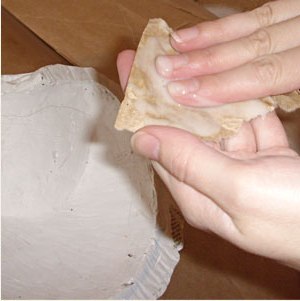
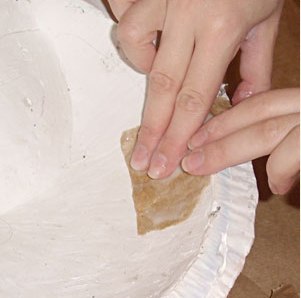
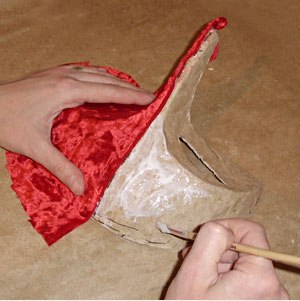
5. After the mold is dry enough, we begin to paste it in the papier-mache technique using flour glue. The recipe for the glue is very simple: to a third of a glass of cold water, add three tablespoons of wheat flour and mix thoroughly until a homogeneous mass is obtained. Now add the steep boiling water to the glass, resulting in a glass of wonderful glue for papier-mache. In order for the future mask to be easily removed from the gypsum form, the first layer of paper is spread with glue only on one side, applying a dry side to the mold. To glue hard-to-reach places it is convenient with the help of a flat brush.
| | | |
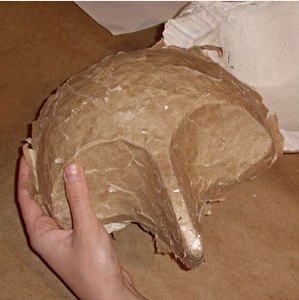
6. Paste seven layers of paper, not forgetting for the sake of convenience to alternate layers by color.
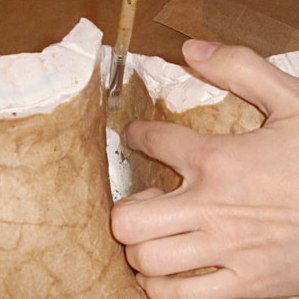
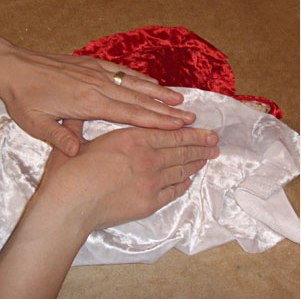
7. Leave the molded form to dry, then gently remove it and apply a thin layer of flour glue to smooth the surface.
| | |
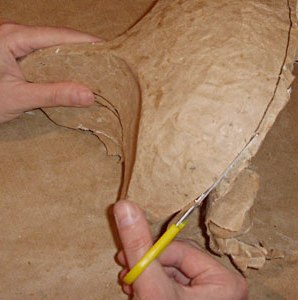
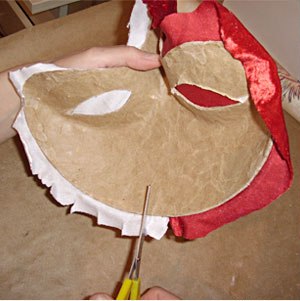
8. After the adhesive layer has dried, we mark the contour with a felt-tip pen, through which we will cut out the mask.
9. We use scissors and a writing knife. In order for the shape to be symmetrical, bend the right cut half to the left, press it against the shape and circle it around the contour.
| | |
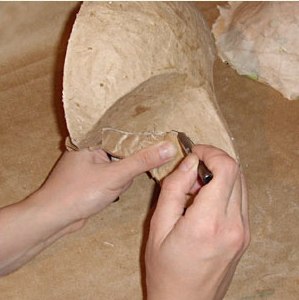
10. Drawing on the paper curves to the holes for the eyes, we cut them out.
11. Apply paper blanks to the mask and transfer the drawing (do not forget that the right hole is the mirror image of the left one).
12. Using a clerical knife, cut the holes along the contour.
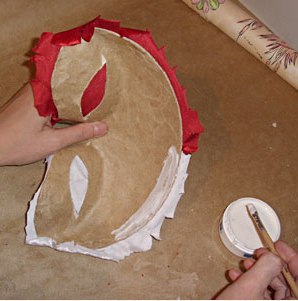
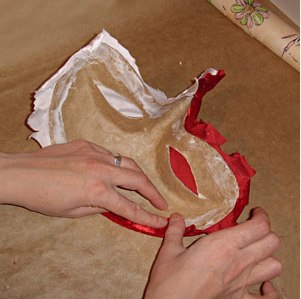
13. We will mark the middle line and pass through the left part of the mask with PVA glue. In order that the glue does not penetrate through the fabric, he needs to give a "grab" a couple of minutes.
14. After that, carefully apply velvet to the glued side and smooth it in the form. Then cut the excess material with scissors.
15. Now we need to carefully process the edge of the fabric, passing in the middle of the mask (if the thickness of the fabric allows, it can be bent inward) and glue the edges well.
16. Similarly, we prepare the right side of our mask.
| | |
17. We begin to process the inside of the mask. We cut the exposed edges of the fabric with scissors, glue the paper form with glue PVA and gently bend the fabric inside.
| | | |
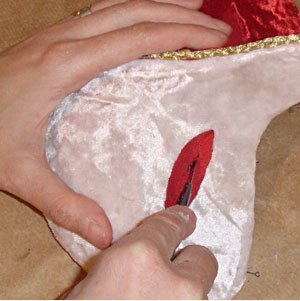
18. Process the slits for the eyes. Gently cut the fabric with a clerical knife and cut it with scissors around the perimeter.
19. Having smeared the paper form with glue PVA, we bend the fabric inside the mask.
20. The main facial part of our mask is ready.
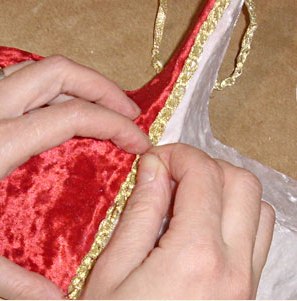
21. We proceed to the decoration of the central part of our mask. Using sewing pins, fix the decorative tape and gently sew it to the velvet, using threads in tone. The beginning and the end of the tape are fixed inside the mask using pieces of paper, coated with PVA glue.
| | |
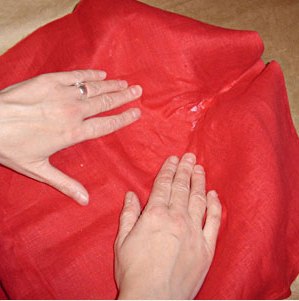
22. Now we need to process the inner surface of the mask. To do this, we use linen cloth. Lubricating the PVA glue with a paper surface, press the flax to it and gently smooth it in the shape. On the perimeter of the fabric is not left glued.
| | |
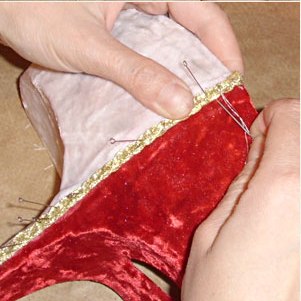
23. Now we spread the mask around the perimeter with PVA glue and gently bend the fabric inside. In order for the glued part to better "grasp", you can fix the fabric with sewing pins.
24. Now process the slits for the eyes from the inside. Cut the fabric with a knife and cut the scissors around the perimeter. Slightly pulling the fabric and, additionally smearing the paper form with glue, we turn it inside the mask.
| | |
25. The inside of the mask is ready.
26. We had to finish the decoration with a gold cord. To do this, sew it around the perimeter of the thread in a tone, grabbing the fabric.
27. In the same way we sew the slits for the eyes.
28. The Venetian mask is ready!