The pattern, which is considered in this master class, is very unusual. They are decorated with hats, coats and even bags , since from afar the elongated loops of this knitting resemble fur trim. Well, let's find out how to tie the pattern "Fur" with the spokes!
Master class on knitting with the needle patterns "Fur"
It is as follows:
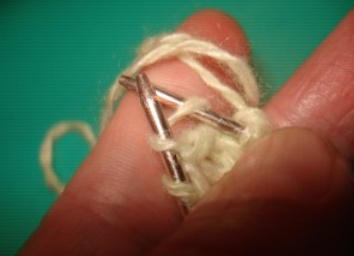
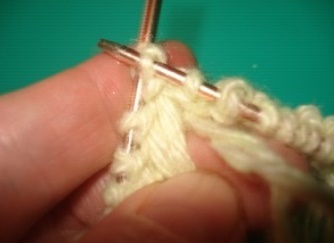
- Type 20 spokes on the spokes, using medium-thickness threads. Convert the first row with normal facial loops. We begin to untwist the pattern from the second row. Double-wind the index finger of your left hand with a working thread, and then insert the right knitting needle into the first loop.
- Grab the working thread in the area of the crossing of long loops covering the index finger. Convert the face loop in the usual way.
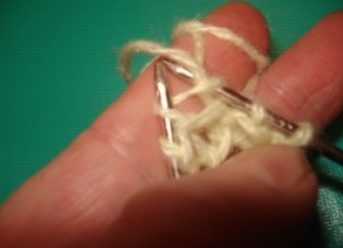
- On the right spoke you have a loop consisting of two threads. Carefully remove the thread that you wrapped around your finger in point 1, for convenience, pushing it with a knitting needle.
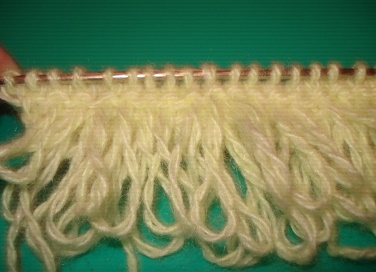
- From the wrong side you will have a loop that looks like this.
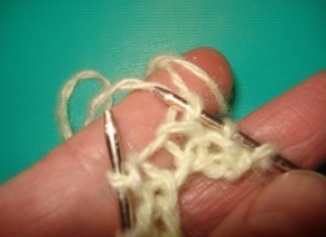
- The third row should be completely tied with facial loops. Please note that long loops should be held so that they do not dissolve. This is most conveniently done with the thumb of the left hand.
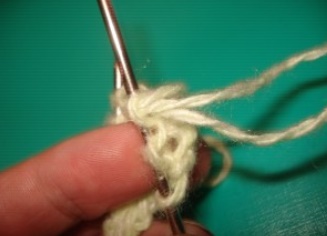
- The fourth row is similar to the second, here again it will be necessary to tie long loops. Next, knitting goes by a very simple scheme: odd rows knit by facial, and even - as described in points 1-4. In the photo you can see how five rows of knitted fur will look.
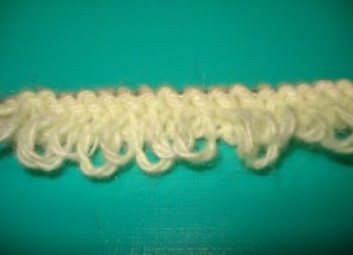
- As you can see, knitting the pattern "Fur" with knitting needles is quite simple. But there is one nuance - this knitting requires a very high expenditure of yarn. You can cut it a little, wrapping a finger with a thread, not in two turns, but in one. But keep in mind that then "fur" will be shorter, and knitting will be a little more difficult, since long loops often slip out of hand.