Good day! The New Year is coming , the mood is appropriate, so I want to create! Today I will tell you what to do to make a Christmas tree from organza. The most important thing is not to forget a good mood!
Christmas tree from organza - master class
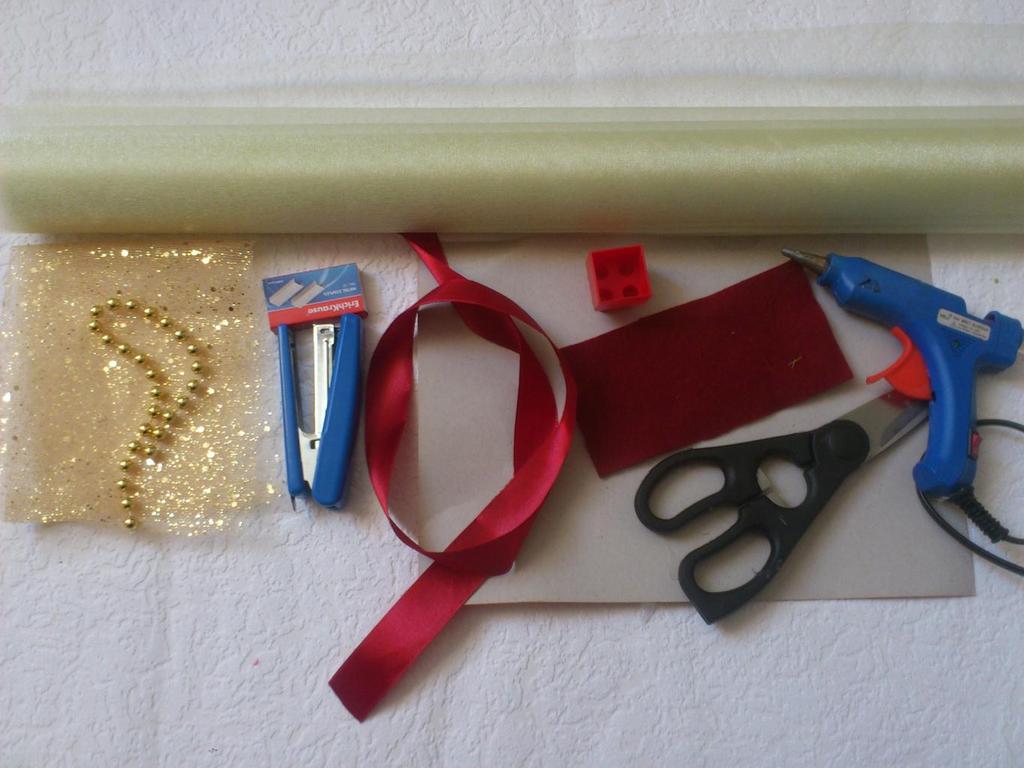
We need:
- organza;
- cardboard;
- floristic cloth;
- beads;
- a stapler;
- satin ribbon;
- felt;
- glue gun and rods to it;
- scissors;
- a detail of lego.
Performance:
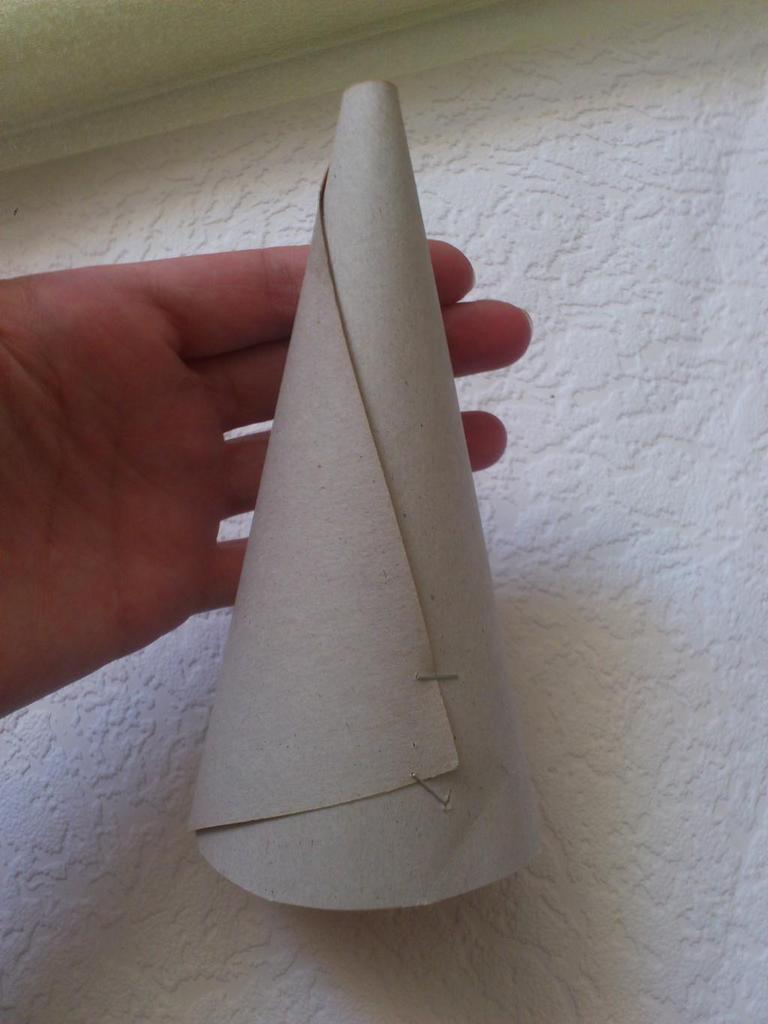
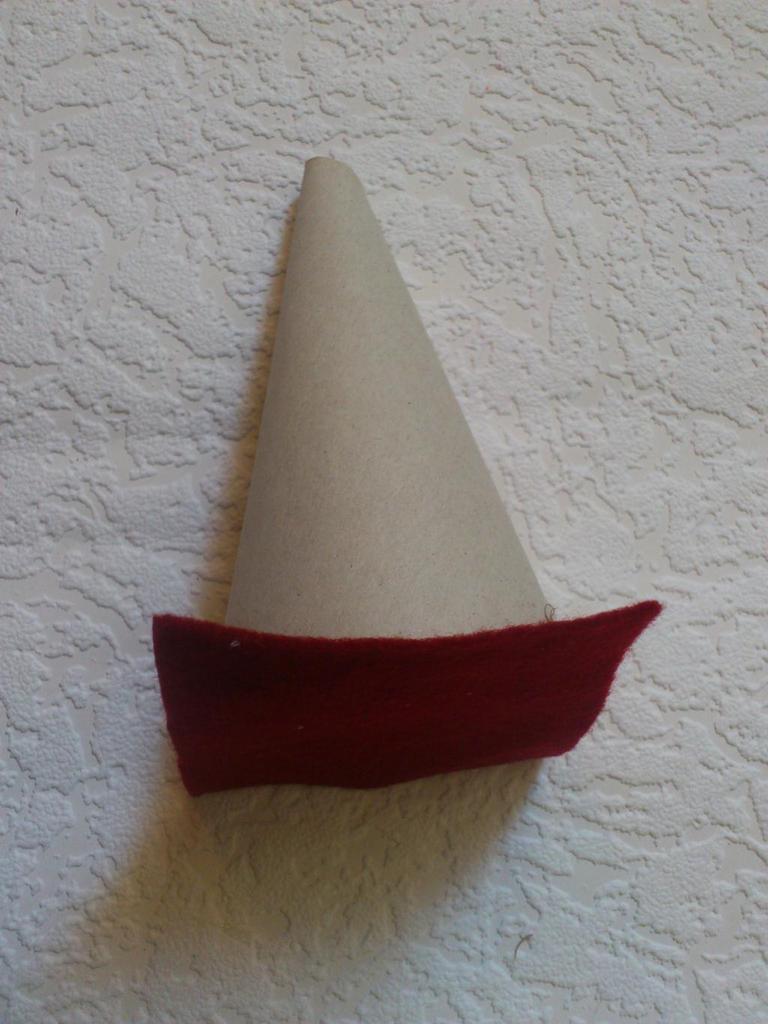
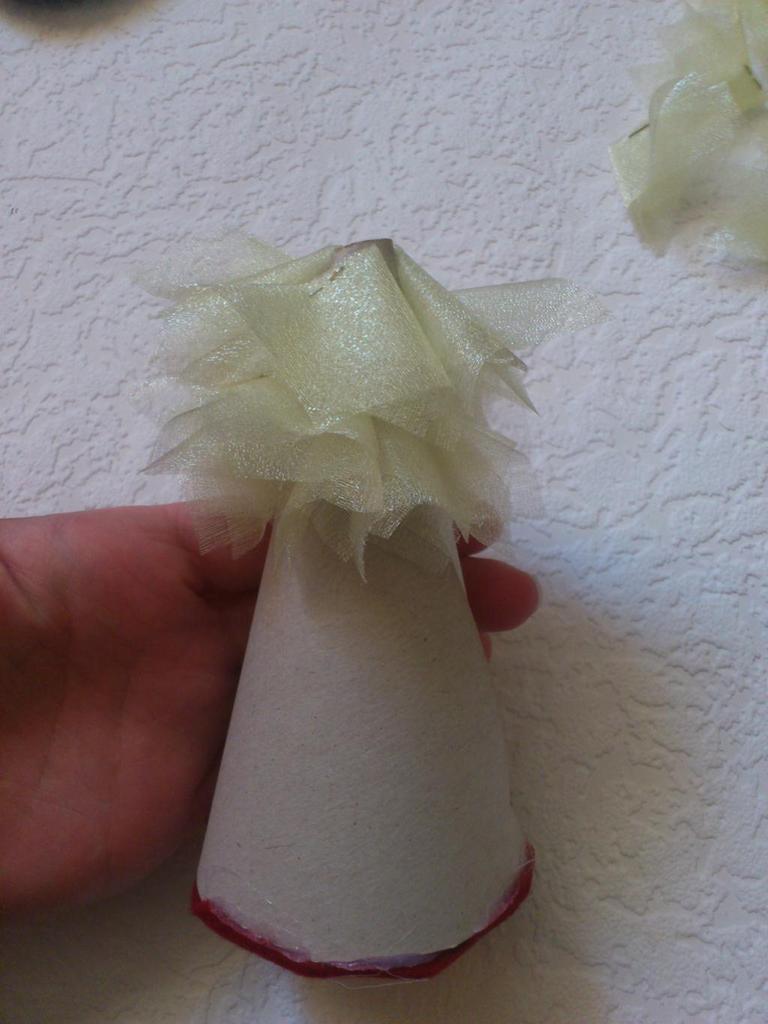
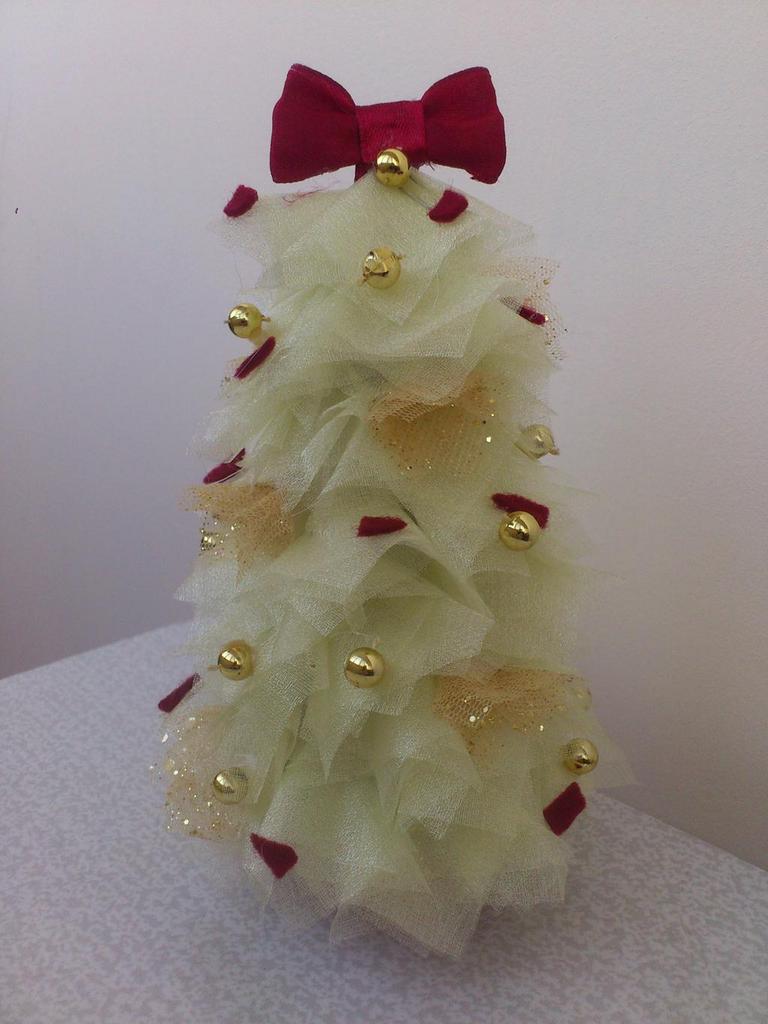
- The first step is to prepare the foundation - the cone for the tree. Of course, this part can also be bought in the store for creativity, but making the cone itself is not at all difficult. We twist the cone from the cardboard, fix it with a stapler and level the bottom with scissors.
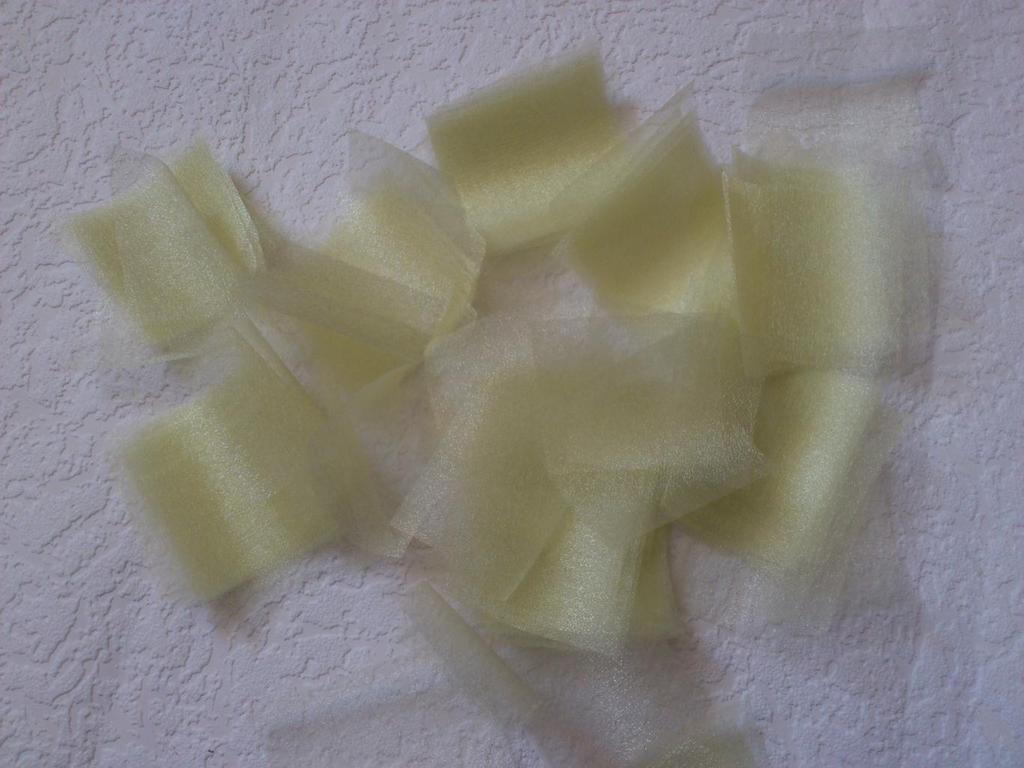
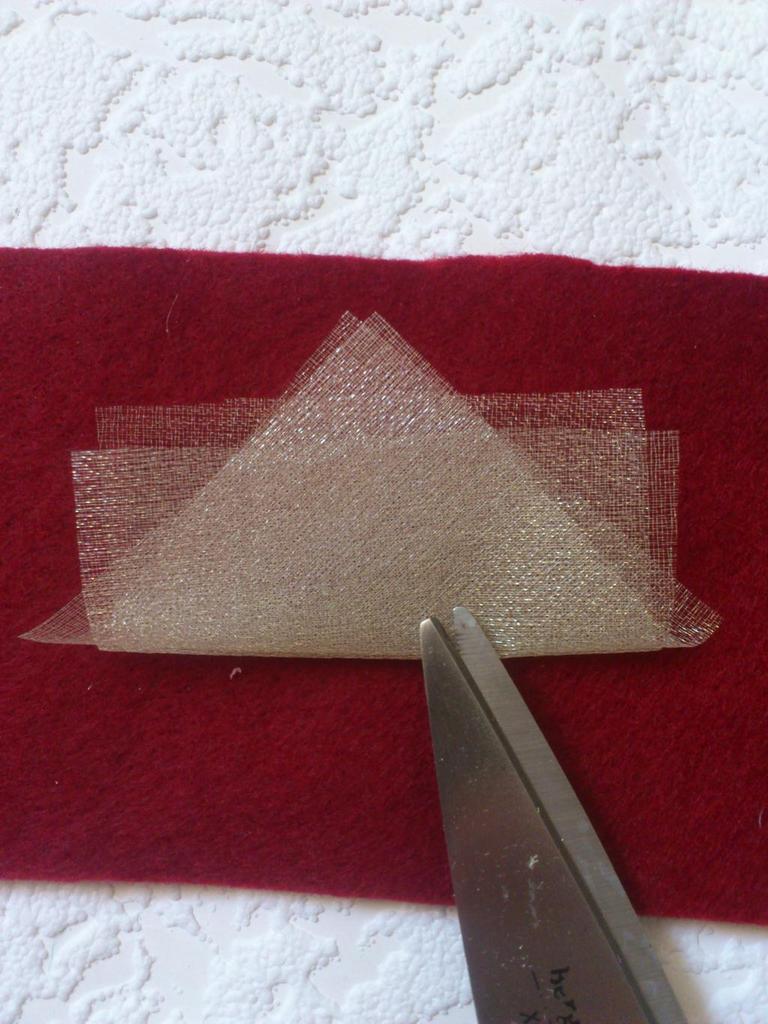
- From the organza we cut the stripes with a width of 5 cm. Then cut these stripes into squares 5 by 5 cm.
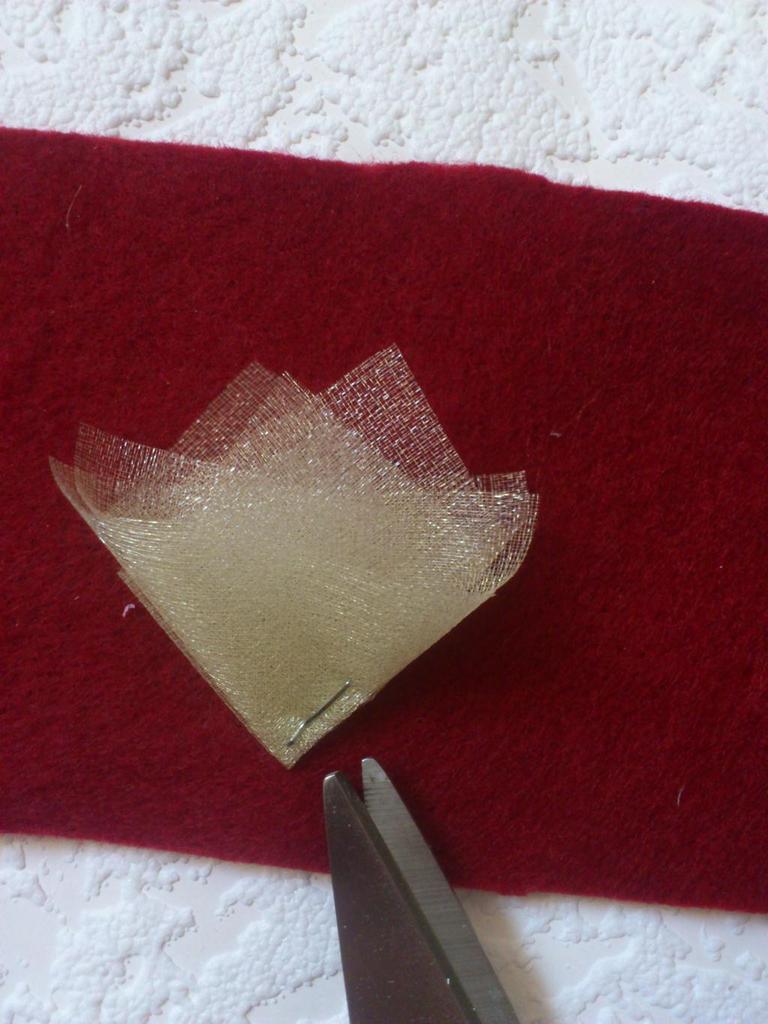
- Now we do trimmings. To do this, take 2 squares of organza and put them this way:
- We fold in half.
- And once again in half, fix the stapler.
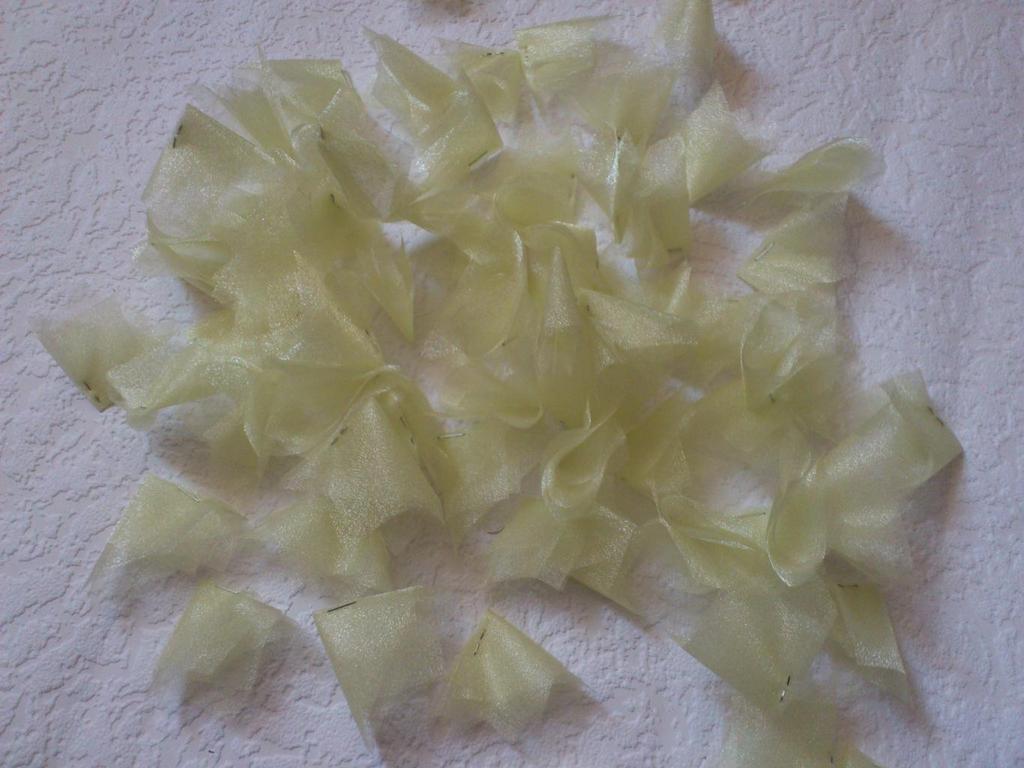
- We get the blanks.
- The bottom of the tree is closed with felt. We paste it on the edge of the cardboard, on the glue gun.
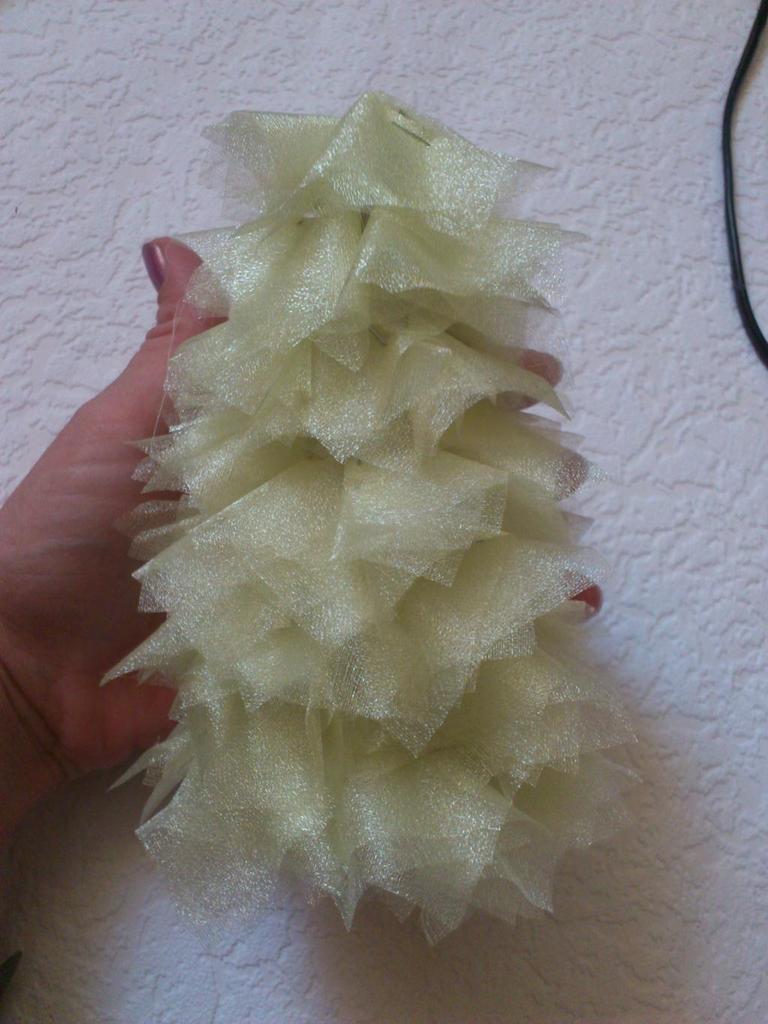
- Now we begin to glue the cone with the ends. We glue from above - downwards.
- Fill in the blanks so that everything was closely adhered, then the tree will be fluffy.
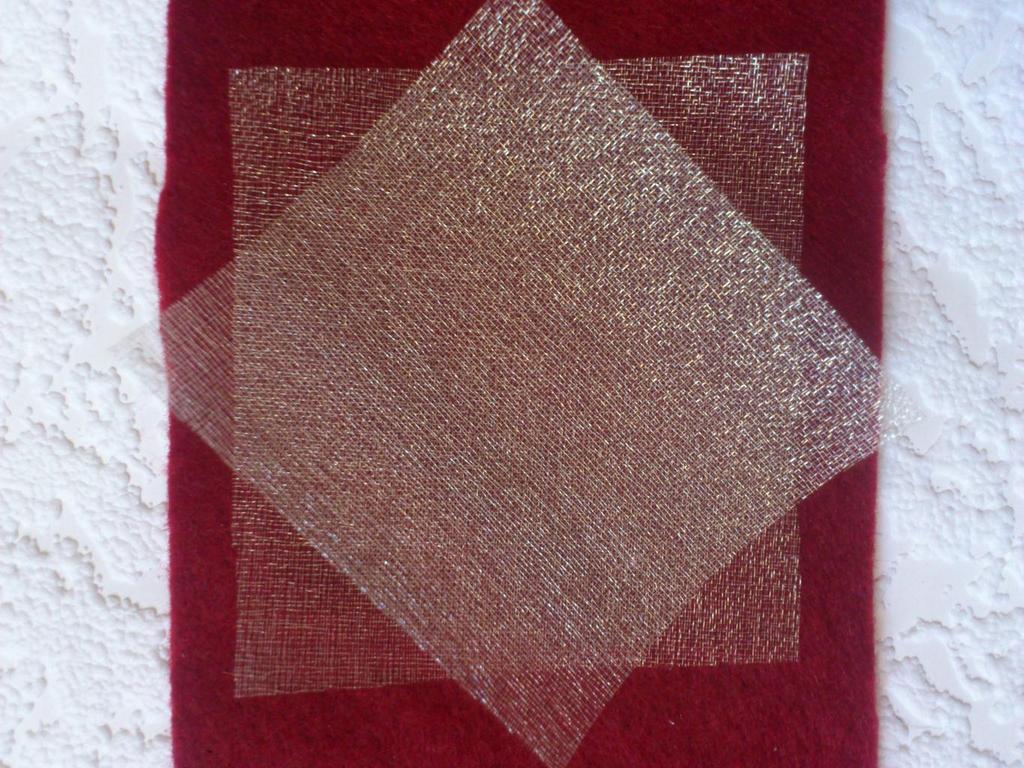
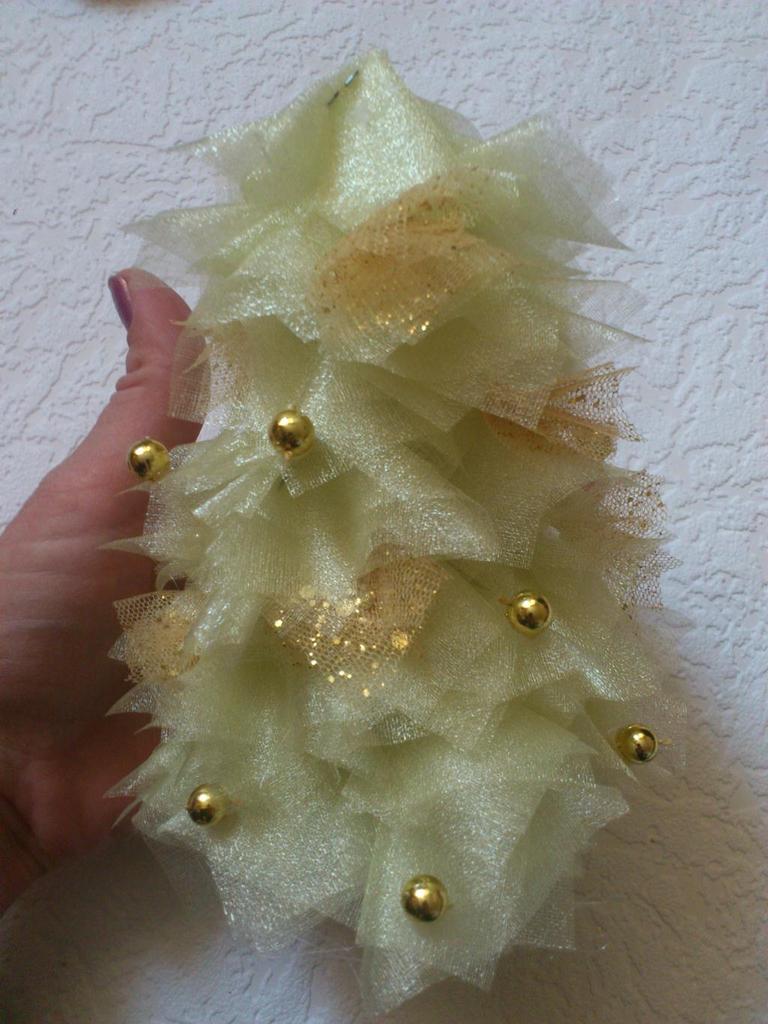
- The floral canvas is also cut, we make trimmings, but a little less than the size-4 by 4. This will be an ornament that we paste between the organza here and there. Prepare the beads and glue in chaotic order.
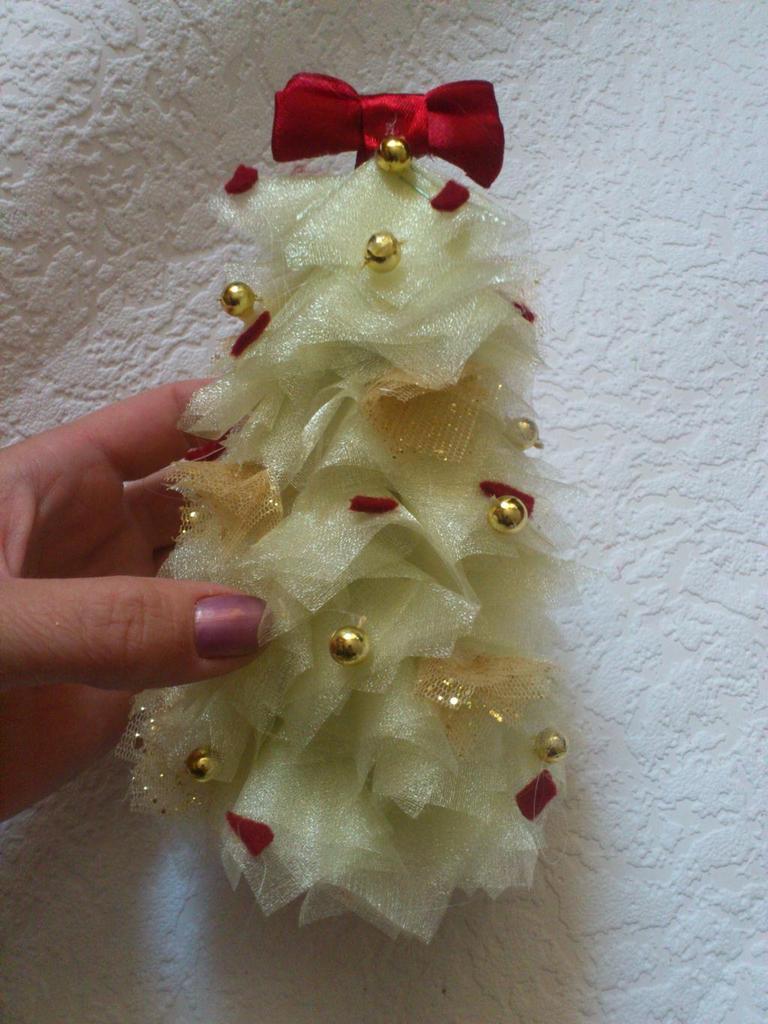
- From felt we will cut the pieces, which will also be a decoration. From the satin ribbon we form a bow.
- Lego serves as a podstavochkoy, glue it to the bottom. At us it turned out here such a Christmas tree from organza with own hands. Such a Christmas tree can be made any size and in any color, even in such as blue, red, white! It looks very beautiful!
I wish you all good mood and creative success!
The author is Domanina Xenia.