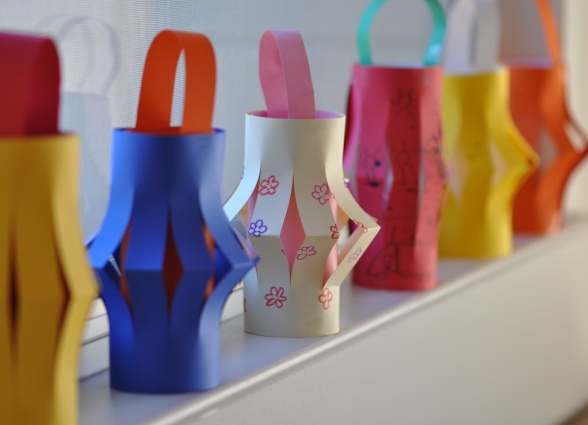
We unshakably decorate houses for the New Year with garlands, a Christmas tree and snowflakes. Another tradition came to us from China - this New Year paper lanterns, which decorate the Christmas tree, make them garlands or just hang out in the rooms. We suggest you follow the custom and make voluminous flashlights from paper. Do not forget to involve children in this interesting work.
Traditional Christmas tree lamp of paper
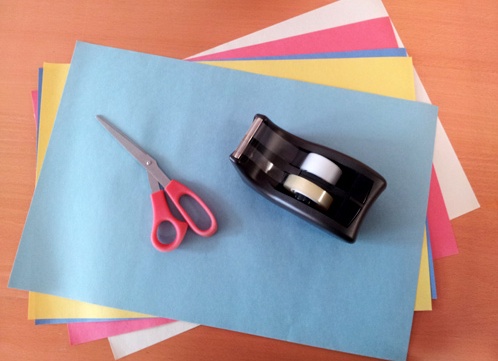
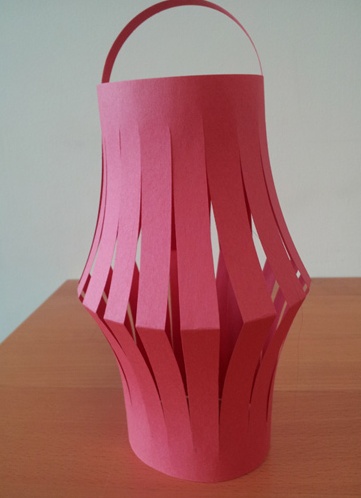
First of all, let's remember how we made flashlights in our childhood. Prepare colored paper, glue and scissors.
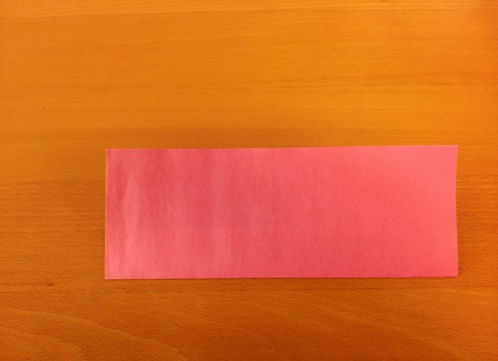
- Fold a piece of paper in half along the length.
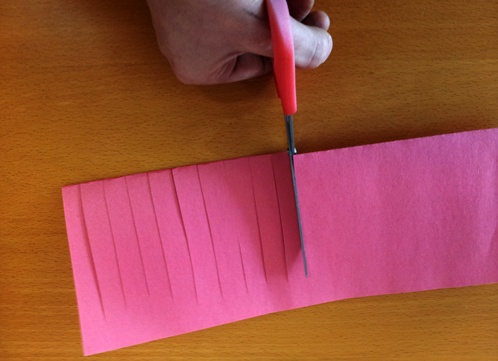
- Scissor incisions from the side of the sheet fold. Leave 1.5-2 cm of paper not cut.
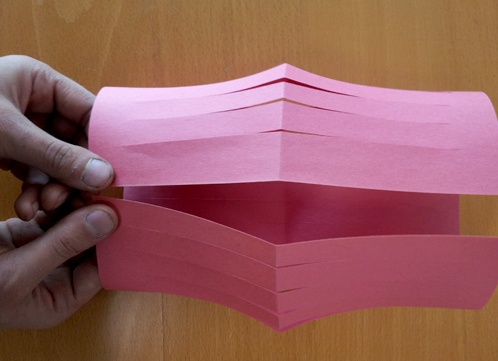
- Unfold the sheet, fold it into the tube along the width, pasting the edges.
- It remains only to cut and paste the handle for hanging.
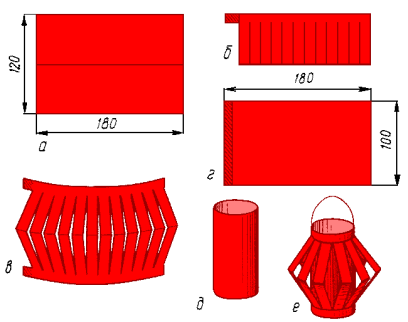
An interesting modification can be obtained if an incised sheet of paper is wrapped around inside a paper roll. How to do it, understand clearly the scheme of lanterns made of paper.
| | |
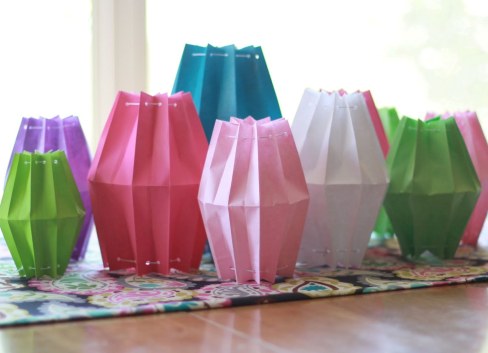
How to make an original paper torch?
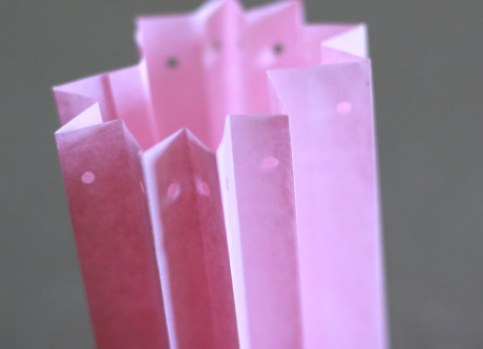
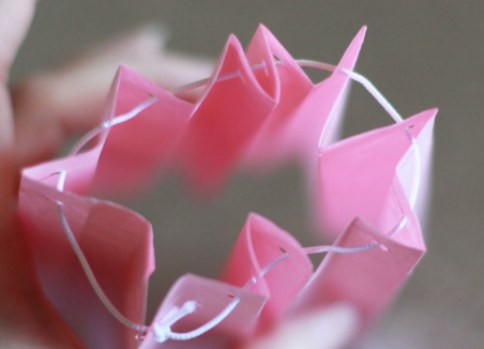
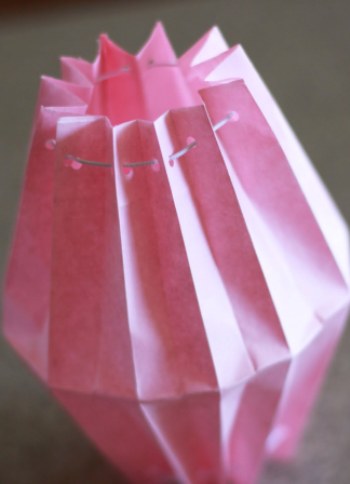
We suggest you make your own hands unusual paper lanterns. To make them you will need: colored paper, scissors, punch, rope or thread.
- Fold the sheet of paper into the accordion and straighten it.
- Connect the edges of the paper, forming a tube, and glue them together over the entire length.
- On each face of the resulting figure in the upper part at the same height, make a hole in the hole.
- Do the same thing from the bottom of your craft - a flashlight made of paper.
- Fold the workpiece in the middle in half. Then straighten and fold the other way, straighten it again.
- Drag through all holes a thread or rope and tie its ends into a knot. Do this from above and below.
- Adjust the flashlight in the middle along the fold line. The original flashlight is ready!
| | |
| | |
How to cut out an unusual flashlight from paper?
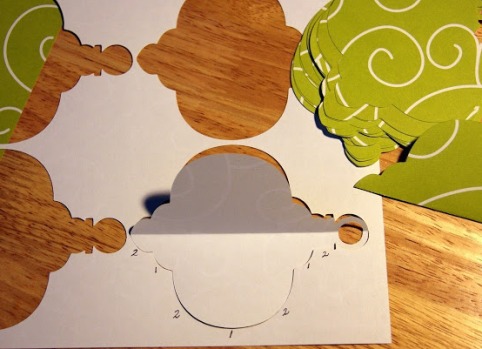
This flashlight is multilayered. To make a flashlight from paper you need the remains of wallpaper, wrapping or colored paper, glue, pencil and scissors.
- Cut out a lot of these pieces of paper from the paper.
- Their number should vary from ten and fifty at your discretion. The main thing is that they all be the same and neatly cut out.
- Each cut piece should be folded in half.
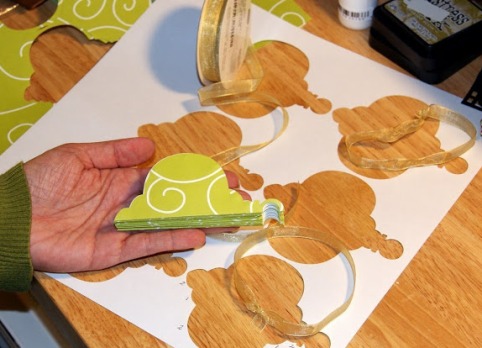
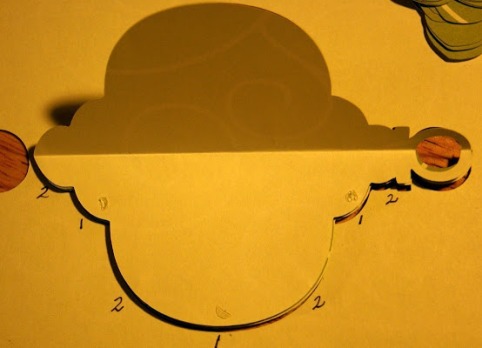
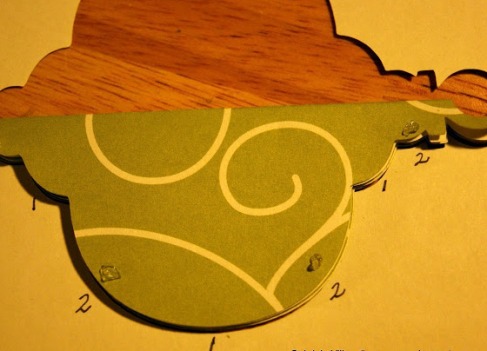
- We proceed to glue the flashlight. To do this, all the blanks are first gently stuck in points 1.
- Note that the same side is glued together in case the paper has only one side colored.
- Then the workpieces are glued on the other side at points 2.
- Then we connect the sides of the ovals together, sewing them with a needle or gluing with a double-sided adhesive tape.
- At the end of the work you need to glue the two extreme faces. The flashlight is ready!
A wonderful flashlight of paper with your own hands
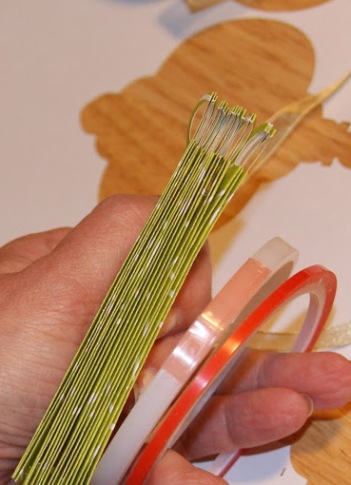
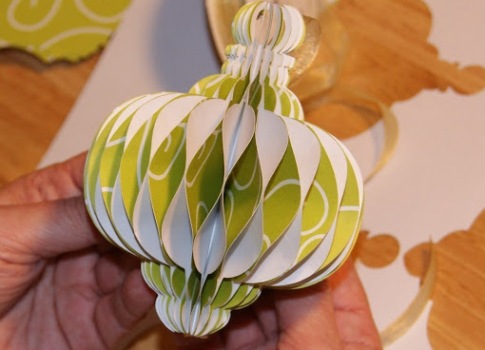
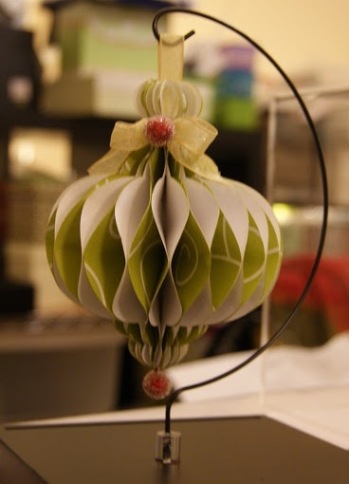
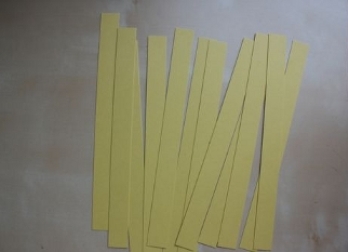
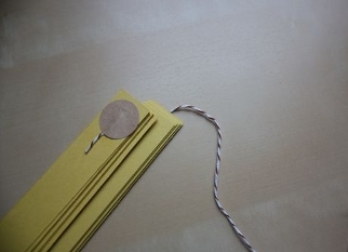
It is very simple to make a flashlight with your own hands, applying for this all the same colored paper. In addition, prepare scissors, glue or scotch, thread, awl.
- Cut out strips of paper. For each flashlight, there will be enough 15-16 lanes. Their size depends on what kind of flashlight you want to make.
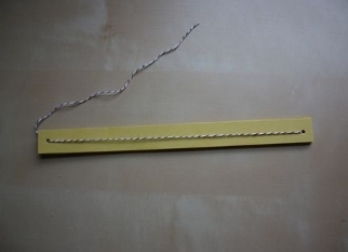
- All the cut strips need to be stacked. At each end of the stack, the holes should be made with an awl. Thread a thread into one of the holes and fix it with adhesive tape or glue.
- Then, thread the thread through the second hole.
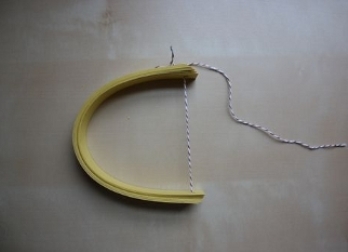
- The thread must be tightened so that the whole stack of paper strips bends. The string should be fixed with a knot.
- The stripes need to be straightened in such a way that in the end they form a sphere - a flashlight.
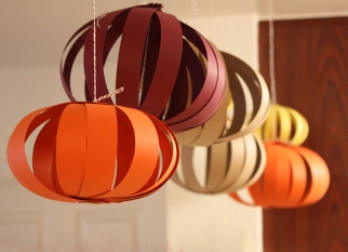
- Particularly advantageous are several such flashlights suspended from the ceiling.
We hope that the ideas of paper lanterns offered by you will be successfully implemented by you.
In addition to lanterns, you can make garlands and other elements of the New Year's decor .