But do not think that the crafts of beads - it's something unavailable, because for beginners there are many simple crafts with schemes, mastering which you can gradually improve your technique from time to time.
It is very useful for beginners to be engaged in making hand-made articles from beads with their own hands together with children. Children of the age of adolescence are unlikely to appreciate the occupation, but the children, starting with the first graders and older, will gladly take up a new and interesting form of creativity.
Before you start a lesson that serves the development of fine motor skills, coordination of movements and perseverance, you should properly equip your workplace. To do this, any table covered with fabric is better than rough, so that the beads do not slide to the floor and are not lost.
It is desirable to store beads of each color in special containers, since cellophane bags often break. Perfect for this purpose boxes from candies or matchboxes.
How to make crafts from beads with your own hands for beginners: a master class
Weaving can be made from beads not only on the line, but also on wire of various thicknesses. Let's try to make a beautiful multicolored butterfly, which will require pink, blue, brown and black beads.
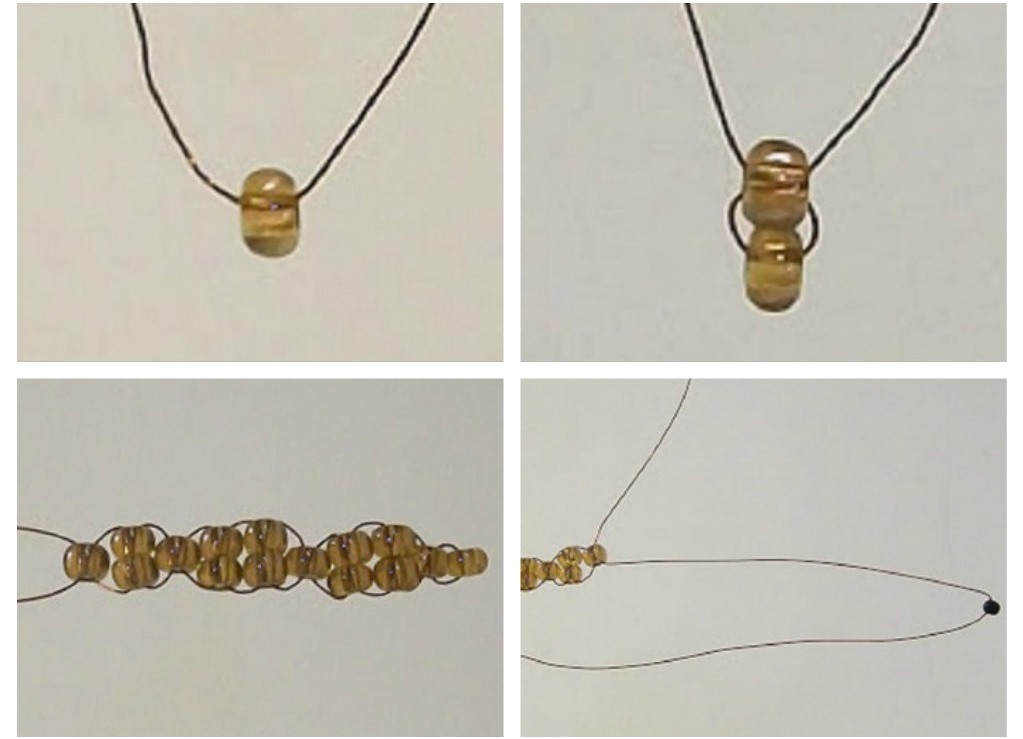
- We string the first brown bead for the butterfly's calf.
- Then we make the second row - we put on the next bead and extend through it the end of the wire in the opposite direction. Then we alternate the single and double rows. Single will get 4, and double 5. Then we make a mustache of black beads.
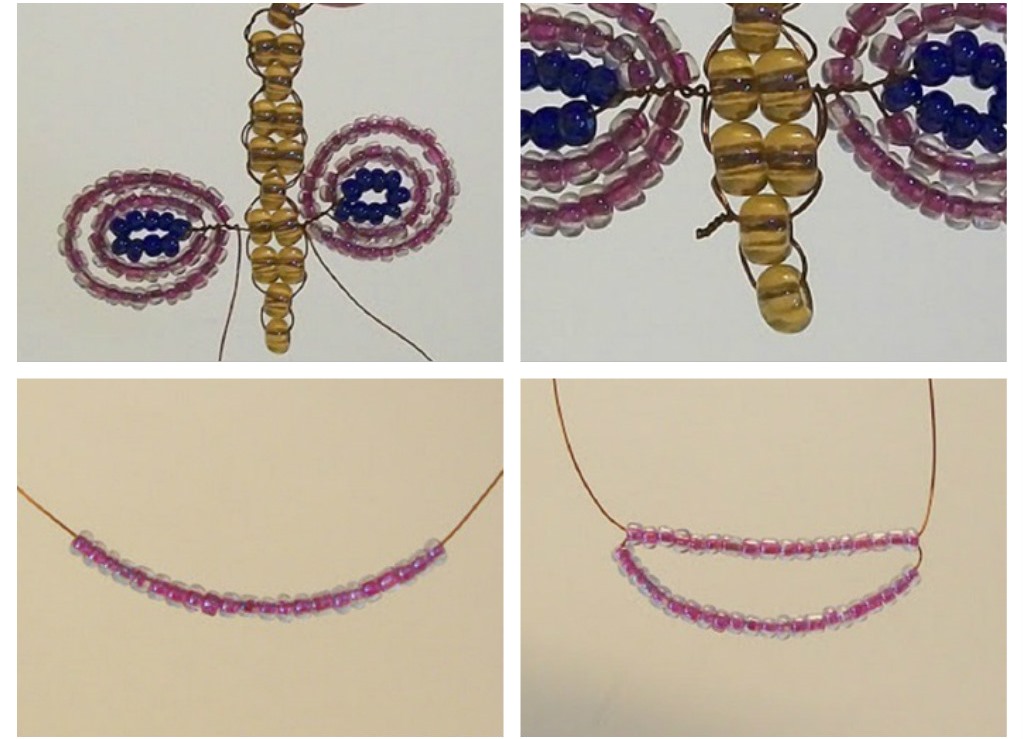
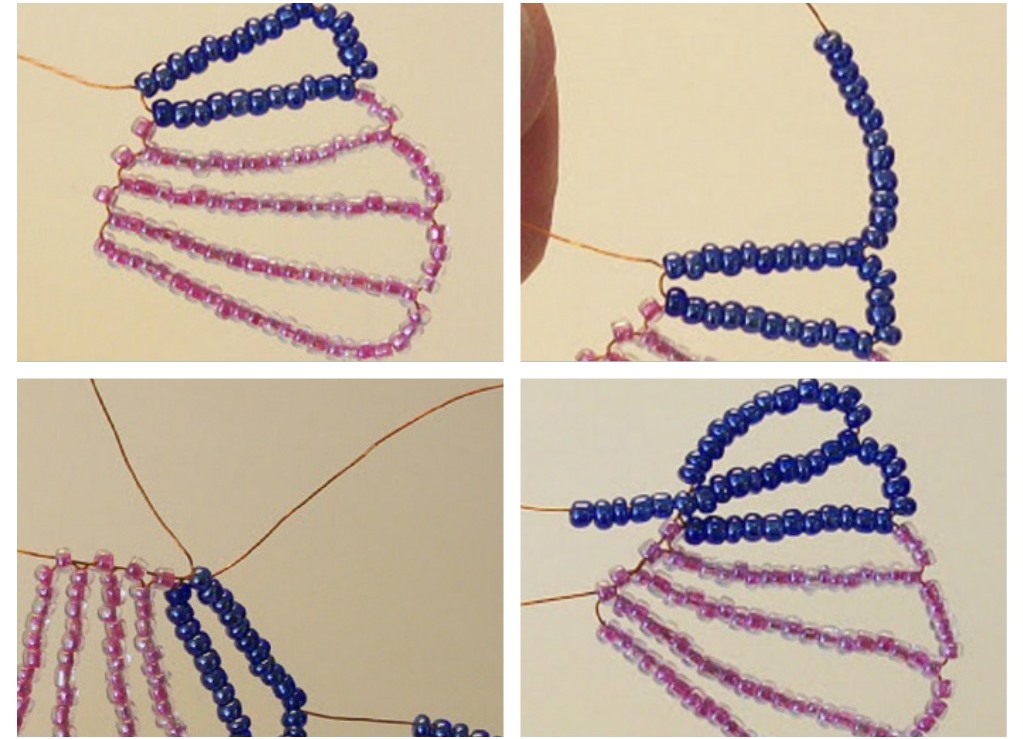
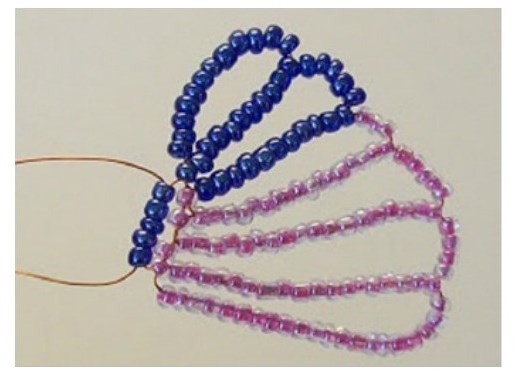
- To make the bead do not move, tighten the wire. The same is done with the second antenna, and the ends of the wire pass through the rows of the trunk (7 rows). Now it's time to weave the wings - they need 9 blue beads. We twist the wire with a loop, leaving an empty space between the wing and the body (about 1cm).
- On the same wire we string 16 pink beads. Turn around the pink row around the blue and securely fix the torsion. Again, dial pink beads, now 30 pieces and again make a circle, getting a ready-made wing.
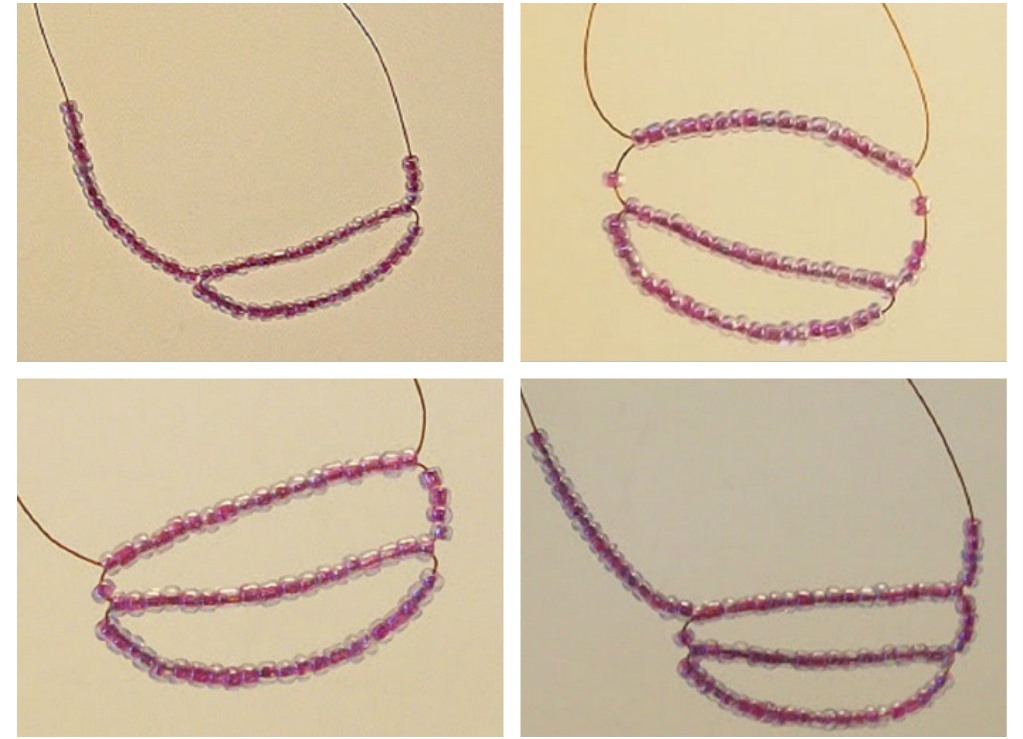
- Similarly we make the second winglet. Now, on a cutting wire of 60 cm string 22 pink beads, and in the second row should be 18 of the same.
- Left on the wire we put 19 beads, and on the right only 4. The right end of the wire should be passed through 18 beads on the left. We tighten our weave and again we dress 18 beads on the left side and 5 on the right.
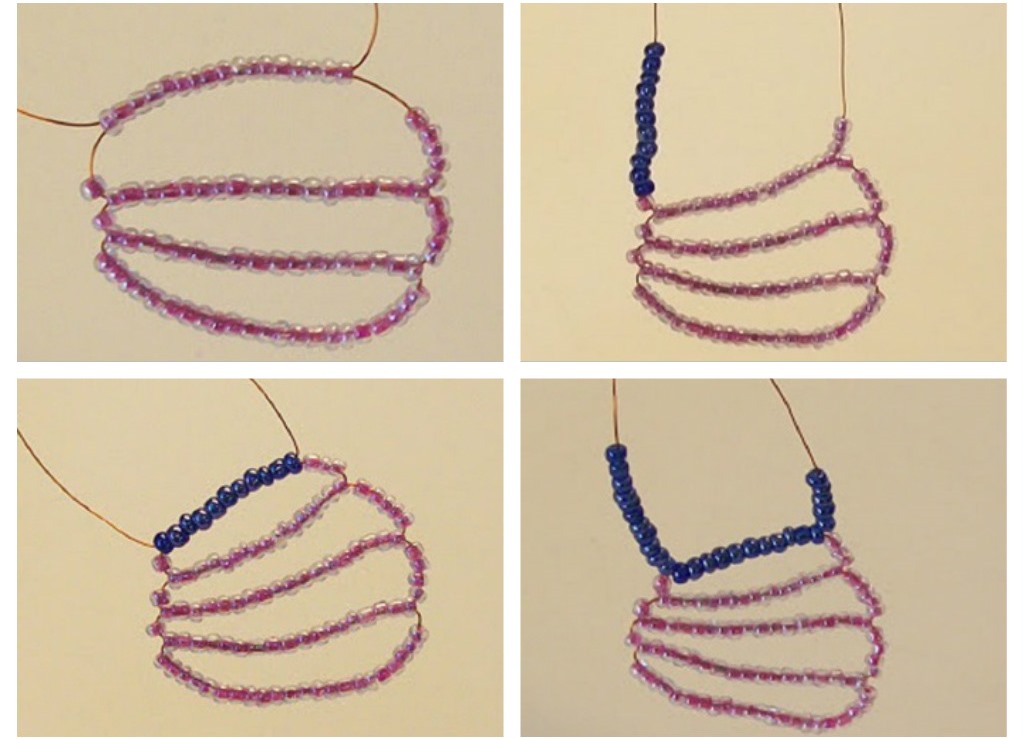
- The right end is passed through 17 pieces on the left side and slightly tightened. Now we put 15 blue and 1 pink bead on the left, and only 3 pink ones on the right. The right side should be passed through the entire blue left row, after which the left should be dressed 14, and on the right 5 blue beads.
- The right end of the wire is passed through the entire left row and again on the left we dial on the wire 15 blue. We tighten and put on the top wire 5 blue beads and pass through the bottom row.
- On the top wire we type 5 blue beads and pull them through the bottom.
- We put on 3 blue beads and through 6-7 rows of the trunk we pass the wire to fix the wing. Another winglet is done similarly.
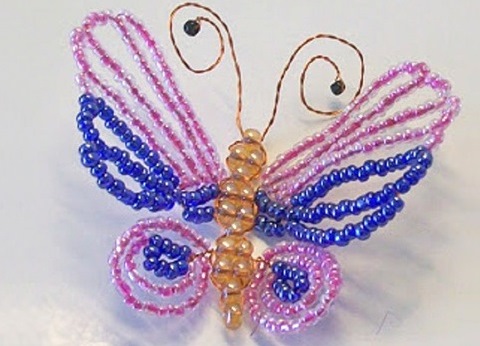
- Here's a pretty butterfly should be.
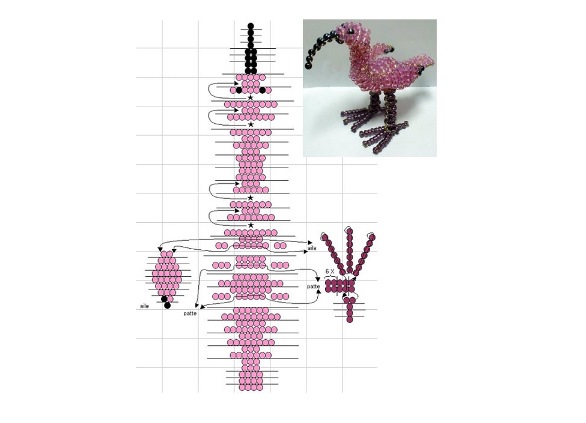
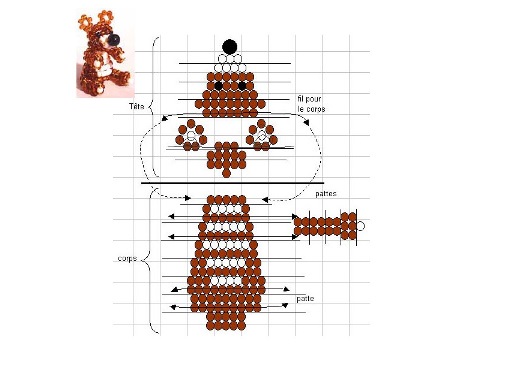
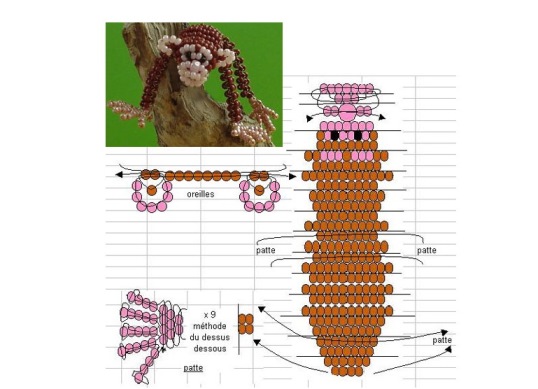
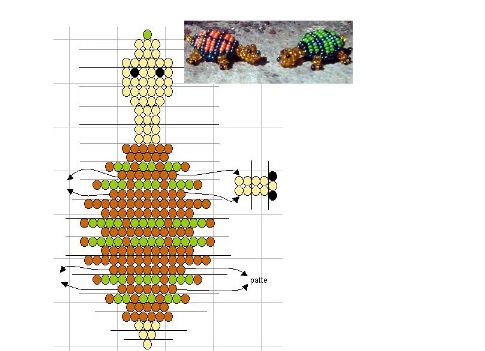
Similarly, for beginners, you can make from bead crafts for Easter, New Year, March 8 and other solemn dates, creating thematic hand-made articles, or simply weave cute animal souvenirs for our loved ones and friends.
| | | |
| | | |