Ornaments made by themselves are quite popular among young people. Many girls and girls learn to weave bracelets from beads , laces, ribbons and leather. Bracers of ribbons weave in many different ways. There are very simple variants of two ribbons and more complex of three or four.
Baubles made of ribbons: how did they appear?
One of the first who started to weave this ornament is considered to be American Indians. Later, this bracelet began to be used in its hippy culture. And today a modest handmade bracelet from ribbons or threads is considered to be a sentimental and very personal gift. If before the bracelet on the hand symbolized a certain society, today this decoration is often given to each other by close friends.
Banners from tapes in different ways
The easiest way to make a bracelet on hand is to weave ribbons in the form of a pigtail. At what pigtail can be simple of three tails or more difficult from five and more. This is just one of many options. Girls often use weaving of baubles from tapes to decorate not only the wrist. Such an ornament is hung in the form of a keychain for keys or bags, and girlfriends do not rarely wear the same bracelets on their hands.
It is interesting to look round a bouquet of ribbons. It is made of two long ribbons. As a rule, for weaving use a width of not more than 7 mm. Due to special technology, something like a dense cord, round in cross section, turns out. Square baubles of ribbons
We suggest you try to weave an interesting and very unusual option. This is one of the ways of weaving braces of 4 ribbons. To work it is necessary to prepare belts about 5-7 mm wide, about 2.4 meters in length. Instead of four, you can take two and start the weaving from the middle with four ends. This scheme of weaving is very convenient because, if necessary, you can easily dissolve the work and the tape will not suffer from this.
Now let's look at the step-by-step instructions for weaving the baubles from tapes.
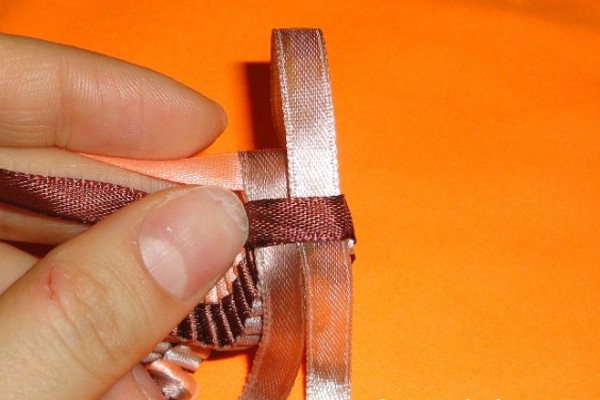
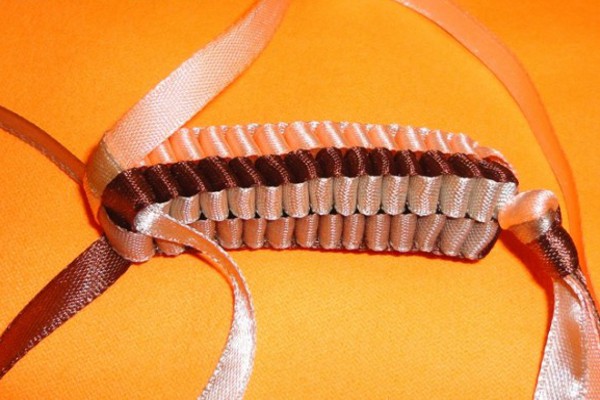
- Leave 15 cm of ribbons and tie them with one tight knot. It is very convenient in this scheme that the opposite side does not matter at all, since they will be seen equally. Straighten the bundle up, down and to the sides. Now we begin weaving bracelets from satin ribbons.
- We bend one tape from top to bottom (in this case pink) and leave a small loop.
- We shift the second (brown) tape in the direction from the right to the left.
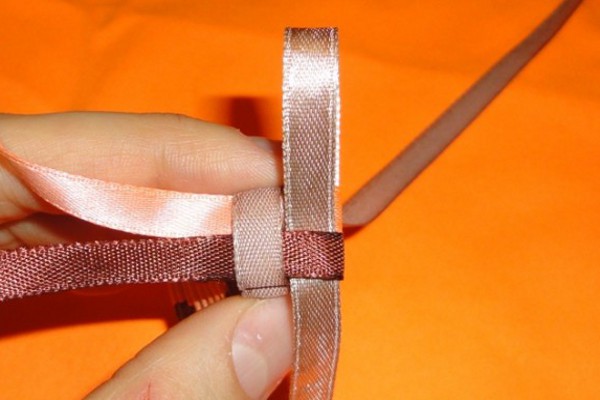
- The third ribbon (beige) is bent from the bottom up, while overlapping the previous one.
- The fourth tape is bent in the direction from left to right, push it into the loop from the first tape.
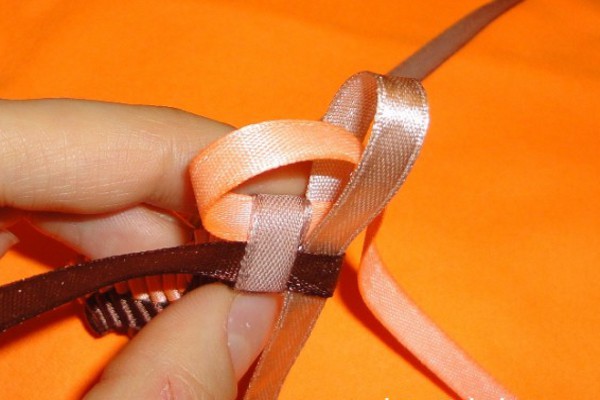
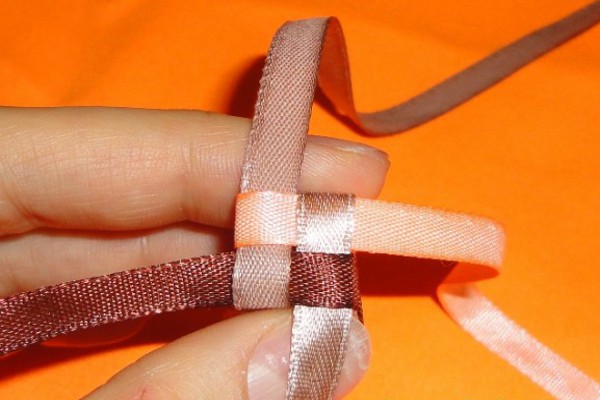
- Now carefully tighten everything, should get a square. Try to straighten the ribbons strong enough that they lay flat and do not crumple, but do not allow the wristband to deform.
- In this way, we shave the baubles from the belts of the necessary length. In the process of periodically trying on the arm bracelet.
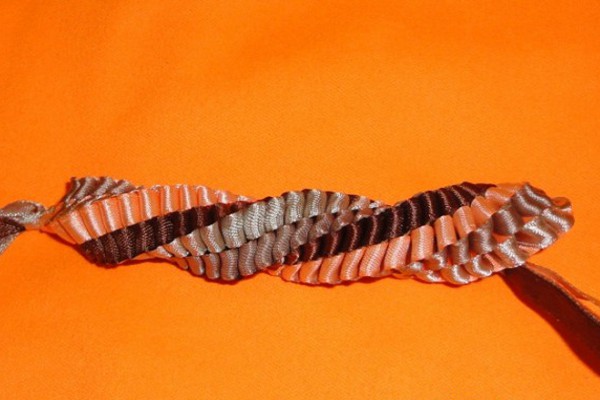
- It turns out quite a voluminous bracelet. It looks more impressive when it is slightly twisted. Around its axis just slightly shift the bracelet, but not stretching in length.
- Do this very carefully, otherwise the bracelet is deformed. Such an unsightly look will be in a deformed bracelet. Unfortunately, it will not be possible to return the original form and it will be necessary to start all over again.
- A little trick: that in the process of work you can constantly control the tension of the bands and do not worry that the weaving turns out too loose, you can insert a stiff thread into the center. This will prevent stretching of the bracelet in the process of work, and in the future will prolong the life and the original appearance of the product itself.
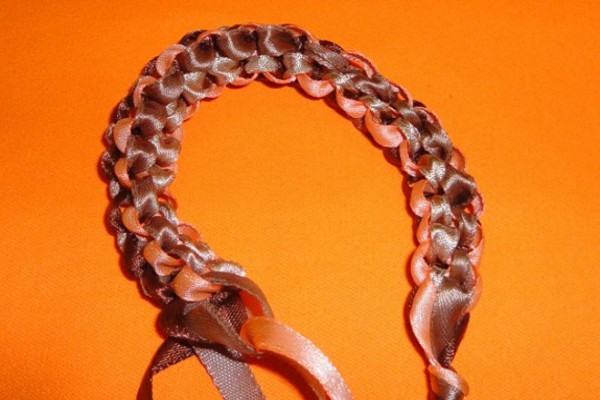
- Here such remarkable fechechka it has turned out.