With the advent of the Internet and the ability to send short messages using a mobile phone, the value of greeting cards has lost a bit. All the more rarely in their mailboxes we find paper cards with pleasant words and wishes. But emails and SMS are lost in the depths of devices. Another thing is a postcard. It can be stored for years, from time to time re-reading the message written by a loved one. If for you an ordinary postcard has not become a relic of the past, this article will prove useful.
What could be better than a traditional postcard? Of course, a beautiful three-dimensional postcard made with paper hands! If you are ready to give time to this lesson, we suggest that you familiarize yourself with the simple master class for making large-scale postcards, during which you will learn how to do them.
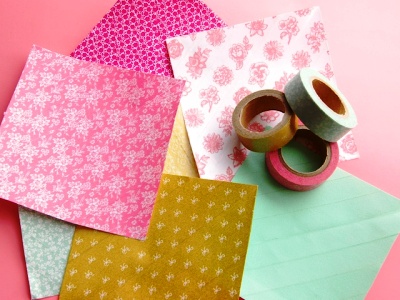
We will need:
- a sheet of parchment or wax paper;
- Perforated cardboard;
- colored narrow paper tape (blue, pink, yellow);
- paper for scrapbooking (you can replace any with a small print);
- glue;
- scissors.
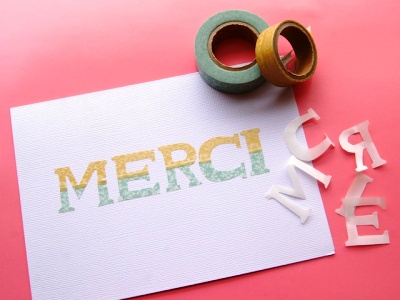
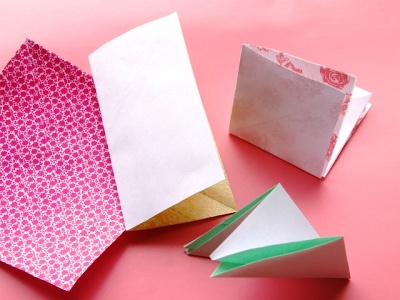
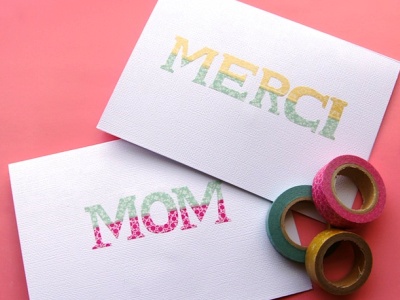
- Create a self-made volumetric greeting card with the preparation of the basics. For this, bend a sheet of perforated cardboard of standard A4 size in half. Then write a short message on the parchment. In our examples, these words are "merci" ("thank you") and "mom" ("mom"). Carefully cut out all the letters, and on them, stick a colored paper tape. Each letter should be covered with a ribbon of two colors. It remains to carefully cut out the letters. This work is laborious, but the result is worth it. Lubricate each letter with glue, gently lay out the word on the front side of the postcard.
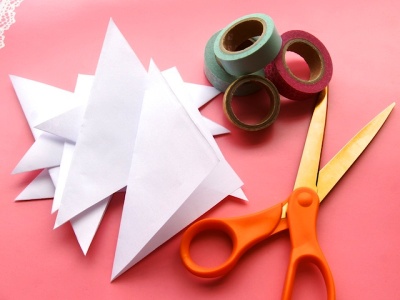
- Now proceed to decorating the bulk cards inside. To do this, cut out seven scrap-like squares (10x10 cm) from scrapbooking paper.
- If you can not find such paper, use plain white. Glue strips of colored tape onto it, then cut out.
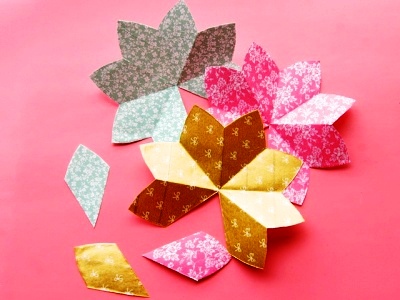
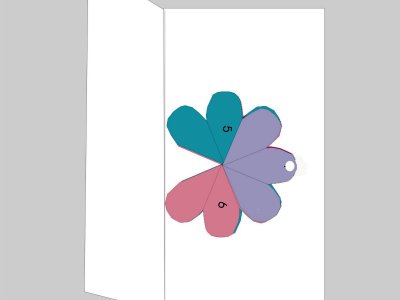
- Fold the square in half, then again half-and-half, and then diagonally. Do the same for each square.
- Cut off the tops of the resulting squares in the form of a petal. It can be both pointed and round. If you open the part, you get a flower with eight petals. Cut one petal from each flower. You can use the first cut-off petal as a template to cut out the other six.
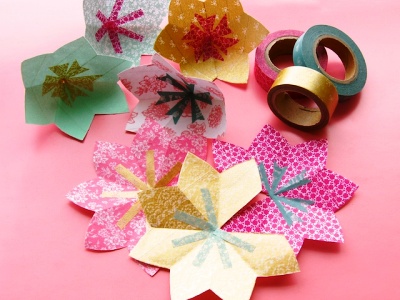
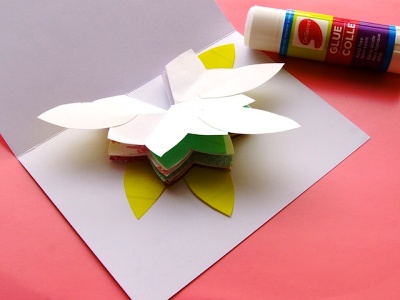
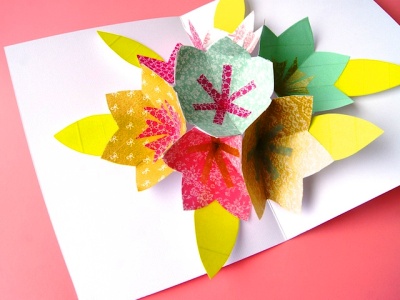
- Now, using the same colored paper tape, decorate the core of each flower with "pistils". When all the flowers are ready, proceed to assemble them. To do this, glue them together so that one petal is double (one overlapping the other). From a flower with eight petals you should have a flower with six petals. Similarly, glue the remaining flowers.
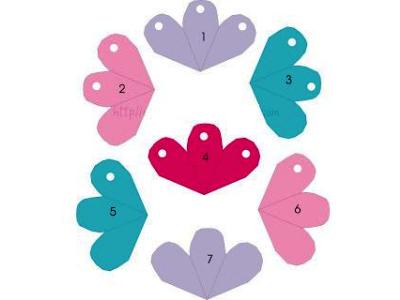
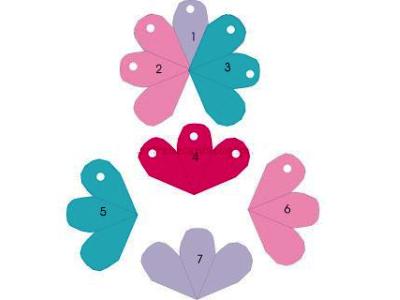
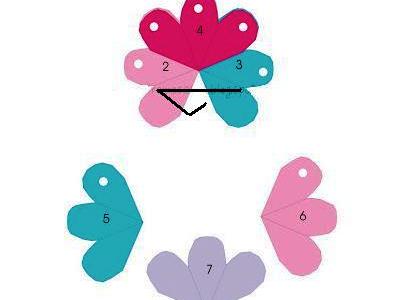
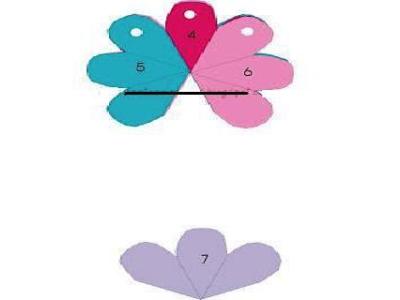
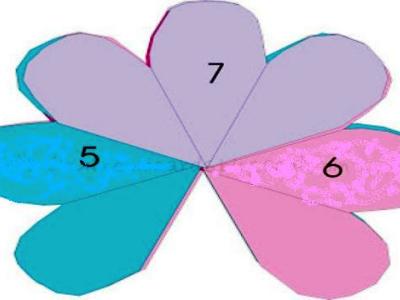
- And now you have to work a little to collect a bouquet that will open, as soon as you unfold the card. Below is the assembly diagram, where each flower is indicated by its color.
- If you want, before you paste the bouquet into the card, you can decorate it with additional elongated petals.
| | | |
| | | |
The postcard is ready!
| | |
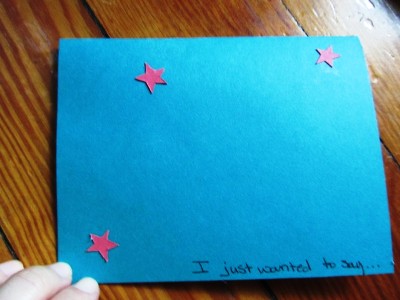
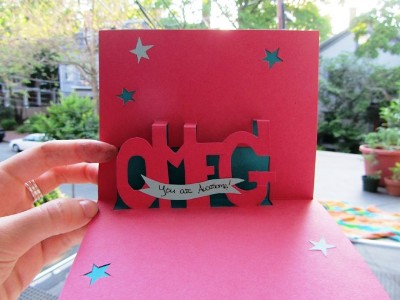
Postcard with voluminous text
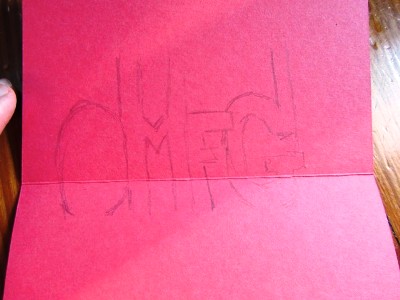
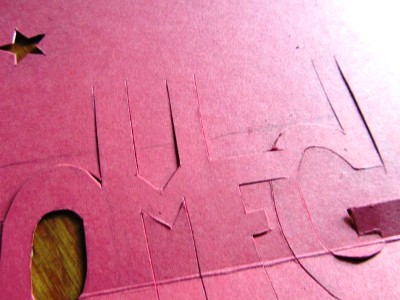
Want to surprise a loved one? Make for him an original gift in the form of a postcard with "pop-up" text. To do this, write a wish on a sheet of cardboard, bent in half, with a pencil. In this case, the upper elements of each second letter are lengthened. Then cut them neatly, without cutting through the bottom and top.
| | |
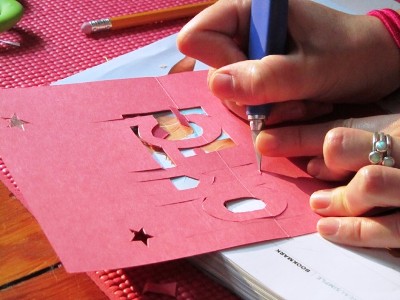
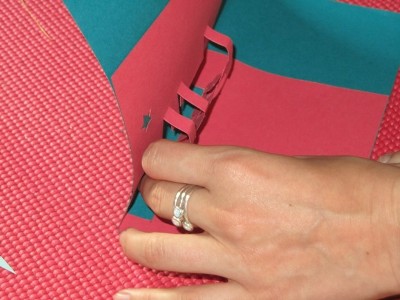
Bend the part, if necessary, cut the letters. Fold the fold lines with your finger. Glue the part in the card.
| | |
It remains to decorate the postcard on the front side, and the gift is ready!
| | |
With your own hands, you can make other unusual cards in the technique of quilling or scrapbooking .