Plasticine - an ideal material for the manufacture of a variety of crafts. Even adults with enthusiasm are engaged in molding plasticine animals , sea creatures, plants, fairy-tale characters and cartoon characters, which is incredibly pleasing to the kids, who do not yet get it all smoothly. In addition to the pleasure of the process itself, molding has a positive effect on the development of fine motor skills, and figurines of animals from plasticine can then be used for interesting role-playing games. It is also worth mentioning that molding does not require large material costs, as the cost of plasticine is low.
If you are interested in this topic, in our master class you will learn how to mold animals and other figures that your child can play from plasticine. So, let's get started!
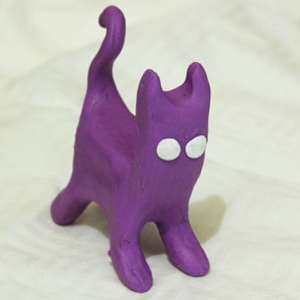
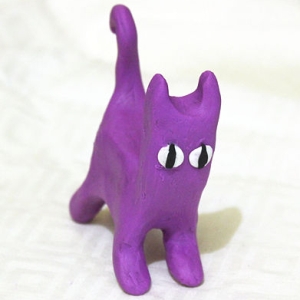
Funny cat
We will need:
- plasticine;
- board (optional).
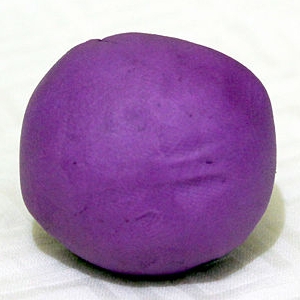
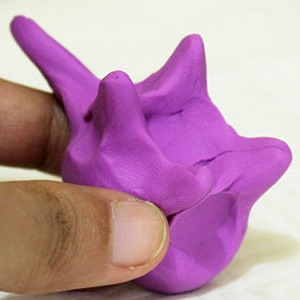
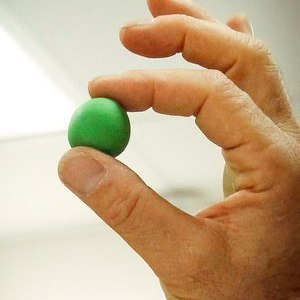
- Before you begin to sculpt, thoroughly grasp the clay hands, so that it warms up and becomes elastic. Then roll a ball out of a small piece of plasticine. After that, press it with your thumb, and those parts that protrude on the sides, slightly extend, giving them the shape of the feet. Form a head and a long tail. Now the figure is already remotely like a cat.
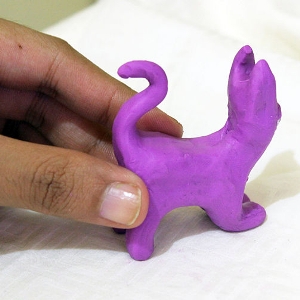
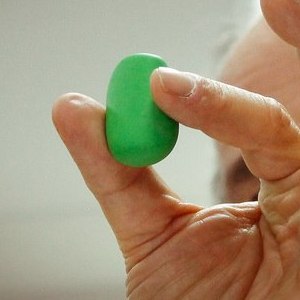
- Continue to shape the figure until its appearance will not satisfy you. The front legs of the cat can be slightly bent, so that the pose is like a willingness to jump. Tuck the bend, playfully tucked up.
- It's time to make our kitten eyes. To do this, from white plasticine, form the sausage and divide it into two pieces, cutting it across. From these pieces roll small balls of the same size.
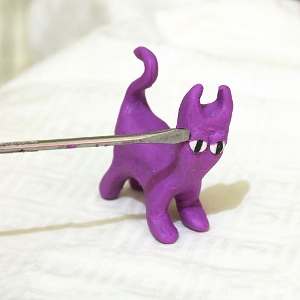
- Flatten each ball between the fingers to make circles. Gently place them on the face. Make sure that they are at the same distance from the spout. If you attach them closer to the ears, then the kitten will have a surprised look, if closer to each other, then the animal will have a more severe and even severe appearance. From black plasticine, form two thin strips and place them vertically in white circles. We recommend using a knife or tweezers, since it is not very convenient to work with such small details with your fingers. Now the cat has eyes.
- The eyes can also be adorned with eyelids (like the Garfield cat from the cartoon of the same name). You can attach only the lower or only the upper eyelids.
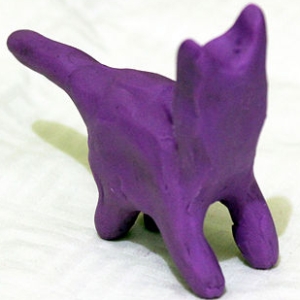
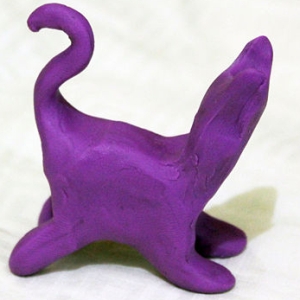
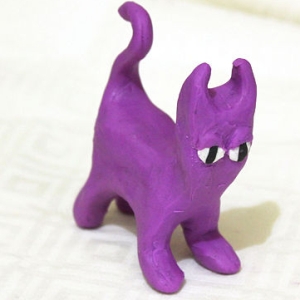
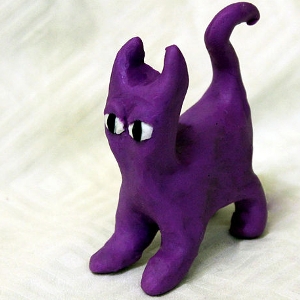
- The handicraft is ready. It remains only to straighten the ears, making their tips sharper, denoting the neck, narrowing it with a finger, and adjust the "fur" to get rid of the roughness that could appear in the process of work.
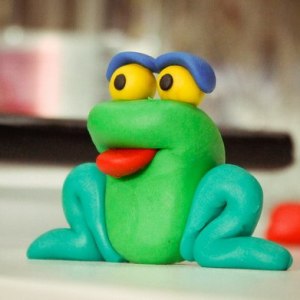
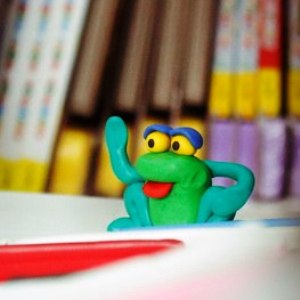
Froggy
To create this craft, you should stock up on plasticine green, red, blue, blue, yellow and black.
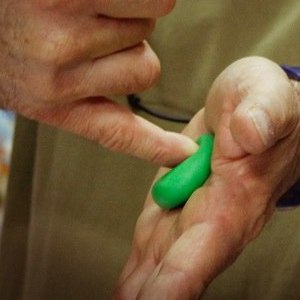
- As in the previous master class, you first need to prepare clay for work, heating it in your hands. Then we make a ball from plasticine (when we sculpt animals, the ball is the basic element from which everything starts). The resultant ball is slightly pressed with fingers, so that it turns into a rectangle with rounded corners.
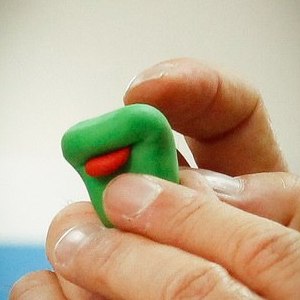
- We make a dent in it, we put in it a tongue molded from red plasticine.
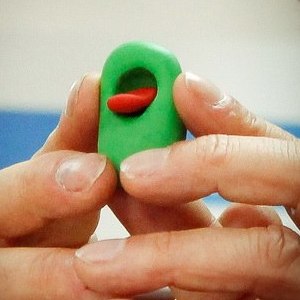
- Then the upper part of the part is pressed downwards, closing the frog's mouth. We place two yellow balls with black pupils on top of which we attach blue arches.
- It remains to mold two blue paws from blue plasticine. To do this, you need to form two sausages, bend them and attach them to the sides. Handicraft " Frog " is ready!