Even the most pragmatic person is little, but superstitious. From time immemorial, we want to believe that our actions and actions will save us from evil and evil. Many acquire a talisman or amulet , which, it seems to them, is able to protect against all bad things and bring good luck. A woman, as the keeper of the home, in general, is characterized by the desire to protect their loved ones. Well, since each representative of the beautiful half of humanity in the shower probably a little fortune-teller, we propose to create a personal amulet for your own person.
Since ancient times, the Slavs have been making so-called motanki dolls, which are now recognized as the oldest symbol of their unique culture. Our ancestors believed that such simple dolls, made by themselves, can protect the house from evil spirit, and the person to whom such a thing was intended - from evil people and their thoughts.
Today, motorcycle dolls are sold in shops as a souvenir. But we are sure that if you decide to make a doll with your own hands, then your craft will become a talisman for your daughter, mother or girlfriend. Therefore, we suggest to learn how to make a doll-motanku with their own hands.
How to make a soft doll-motanku own hands?
To create such a bright amulet you will need:
- pieces of white coarse calico or flax to make the head, trunk and hands;
- pieces of white and colored cotton with embroidery for the dress;
- thread of different colors;
- decorative elements (braid, beads, beads).
So, now we will learn how to make a doll-motanka with our own hands:
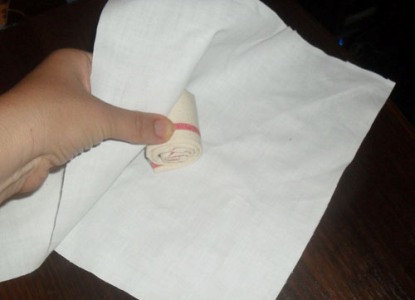
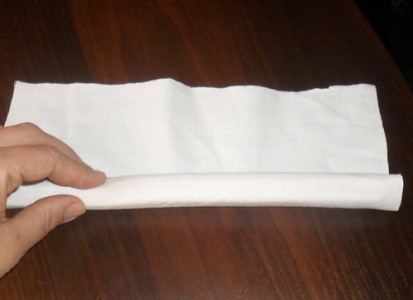
- Let's start with the head. A long strip of fabric is wound up in a barrel.
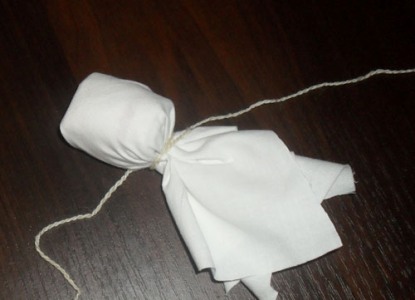
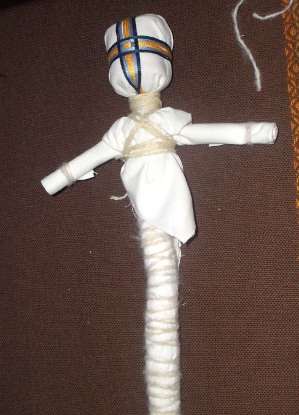
- Then we cover it with a white cloth of square shape and fix it in the bottom of the keg, threading the head and neck of the doll.
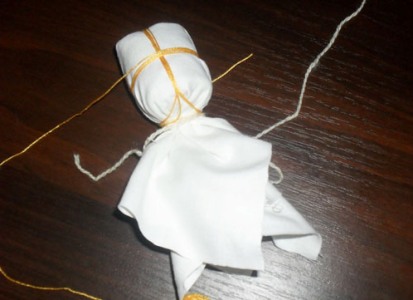
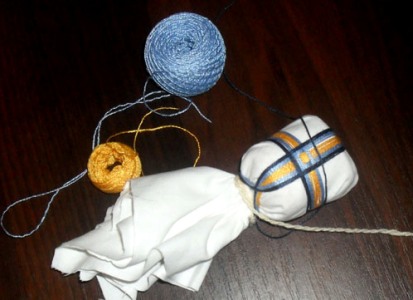
- Then, with bright threads of 2-3 colors, we decorate the head with a cross. It is such a sacred cross that gives the doll a property of an amulet. And the number of windings should be odd.
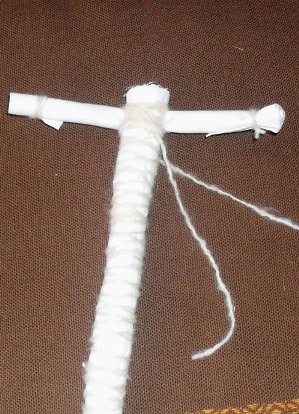
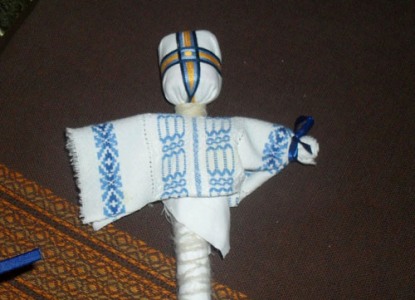
- We proceed to fabricate the trunk and hands. From the rectangular sections of the white fabric, two tubes must be twisted.
- The long one will become the torso of the future doll, and the short one will be her hands. A short tube, whose edges need to be drawn by a thread, is attached to the upper part of the "trunk" in the manner of the cross. The part is fixed with a thread. The filament descends along the whole length of the trunk in cross-section.
- Then the head is tied up to the trunk. For better fastening and strengthening of protective properties, the thread is wound crosswise.
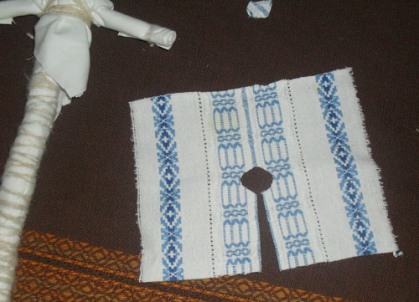
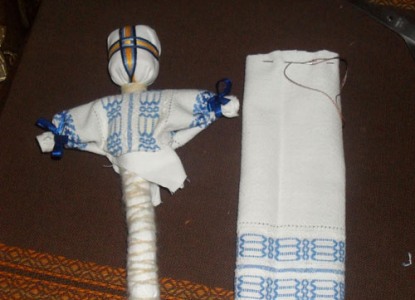
- Now we have to "dress" the doll. If you have an embroidered canvas left from your mother or grandmother, make a beautiful shirt out of her. Cut out the rectangle by opening the neck opening and the cut to the edge.
- Put the shirt on the doll with the cut back and fix the thread on the place where the waist is supposed. Drag the sleeves with a bright ribbon.
- The lower part of the dress of our Motanka doll consists of two skirts of various lengths and an apron. The lower skirt, length to toe, is cut out of the same cloth as the shirt. Rectangle stitched into a cylinder, the upper part of it is processed with a "forward needle" seam.
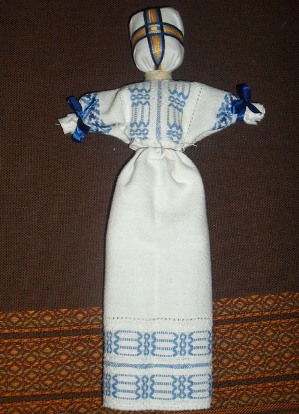
- We put on the skirt on the doll, hide the edges of the shirt in it. Then at the waist we pull the ends of the thread and bind them into a knot. Now our doll-amulet in the lower skirt.
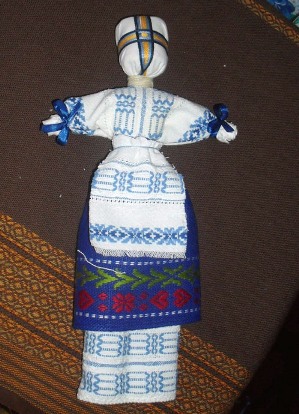
- The second skirt, the top one, is made from another cloth, which must be combined with the rest of the doll's clothes. We create and fix it in the same way as the first skirt, but only it should be a little shorter. To make the doll more similar to the traditional Slavic outfit, decorate it with an apron in front, which must be attached to the waist with a thread.
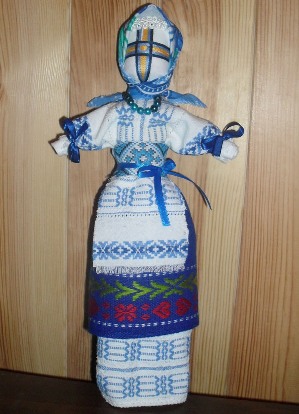
- At the end of the work, the matter remained for decorations. Cover the head of the doll with a handkerchief (you can use a small handkerchief). On the neck put on a necklace of beads, and on the waist tie a girdle.
| | |
| | |
As you can see, the master class on creation of dolls-amulets is not so complicated. But what a beautiful souvenir it will be in the end!