The final stage of creating an image of a young fashionista is a hairdo, including the hair ornament with a hairpin. However, very often we come across the fact that nothing offered in the store is combined with the unique and unique way in which I would like to appear today. The way out of this situation is simple - you can make a hairpin with your own hands. Of course, it will take some time, but the result is worth it!
How to make a hairpin of ribbons?
There are many options for making barrettes with your own hands - you can make jewelry from beads, from precious stones, from fabric, from scraps of leather, and how much you can make! The fantasy of young women of fashion has no boundaries. We will offer you a simple and economical way - we will make a hairpin from tapes.
To make a hairpin of tapes with your own hands, we will need the following materials:
- ribbon satin 5 cm wide brown;
- a satin ribbon with a width of 2.5 cm in brown color in polka dots;
- thread with a needle of light colors;
- a bead, preferably of a small white color;
- automatic pin;
- glue the moment;
- scissors.
Hairpins made of ribbons: master-class
So, having prepared everything you need, let's get down to work:
1. Take a brown tape in polka dots and cut it into strips of 7 centimeters long.
2. Then add a piece of tape at an angle of 90 degrees so that the distance from the edge of the tape to the corner is equal.
| | |
3. This is how the ribbon looks in the folded form from behind.
4. Now thread the resulting petal into a needle and thread.
5. In the same way, string four more petals, carefully and evenly pull them together. The result is the first flower.
6. Let's make the exact same flower from a brown ribbon of a larger width.
7. Attach the flowers to the pre-made base. The base is made elementary by wrapping a circle of cardboard with a piece of cloth of the same color from which the flower is made.
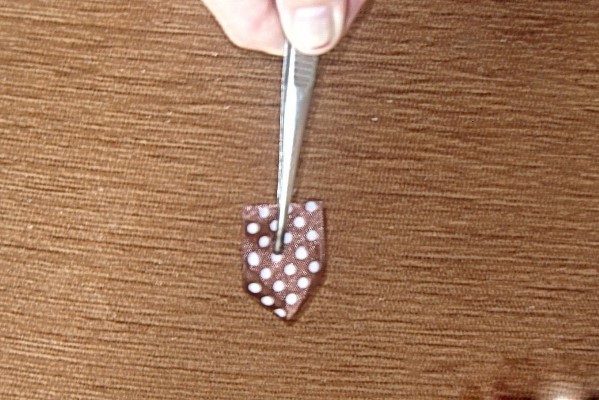
8. Now make the second type of petals. For a good example, we used a white tape, for the master class, the petals are made from brown tape in polka dots. Cut the ribbon into pieces with a length of 5 centimeters. From one piece one petal is obtained.
9. Using a soldering iron and a ruler, we seal the corner, if it is not possible to work with a soldering iron, you can sew a corner with a fine seam, then cut off excess fabric, but it should be done very carefully, without tightening the fabric. The tape is folded along the wrong side inwards. The cut off corner turned out very sharp. Let's take a note that the sharper the corner, the more smooth the petal is. In the master class we got a corner of almost 30 degrees.
10. Straighten the petal, bend the corners to the center. We will fill the edge with a lighter or a soldering iron.
11. We make six petals of such a plan.
12. Then we sew the obtained petals into three pieces, stringing them on a needle and thread.
13. Now, when all the elements of the hairclips from the fabric are ready, proceed to assemble the jewelry. First of all, we paste flowers - first a big brown one in the middle of the barrette, then glue the flower into a pea of smaller size. Glue so that the tips of the petals of the smaller flower are located between the petals of the larger, in its center we glue the bead. Then on the sides of the glue small sharp petals.
14. The hairpin is ready!