During the summer holidays, when many people go on a journey, the question of how to keep the freshness of food on the way is very acute. Wherever you go: to the nearest country beach or on a long journey, to save your supplies from the heat will help the cooler bag. What is this adaptation? A refrigerator bag (or a thermo bag) is essentially a normal bag, equipped with a layer of heat-insulating material inside, and the cold is stored in it thanks to the cold accumulators, which are previously frozen in a conventional household refrigerator. To acquire this useful device, it is not necessary to spend a large amount for its purchase. Make a bag-refrigerator with their own hands is not at all difficult, but it will cost much less than what was bought in the store. Functionally, the homemade refrigerator bag will not be inferior to its purchased analogues and will allow to keep the products even in the strongest heat for at least 12 hours.
How to make a refrigerator bag?
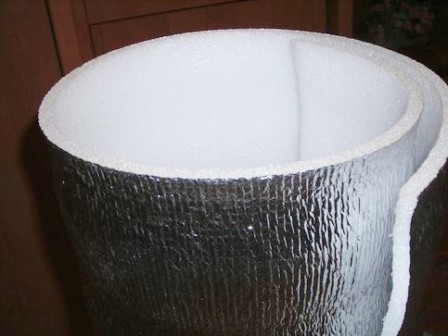
- Before you sew a refrigerator bag, you need to determine the heat-insulating material (insulation). It should be light, strong and well-kept cold. In our case, it is foam foil polyethylene, which you can buy in any store of building materials.
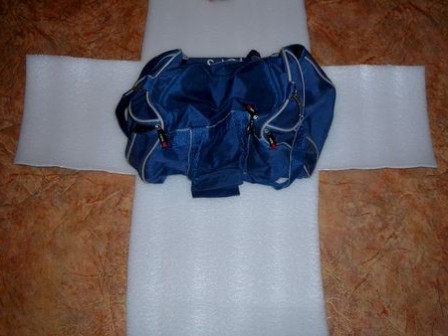
- We choose a bag suitable for our needs. It should be roomy and not very cumbersome, and most importantly - comfortable. The size of the bag should be chosen based on how you plan to move it - manually or by car.
- We produce an inner box of insulating material. To do this, we mark out on the heater the details of the bag: the bottom, side, front and rear walls. As a result, we get a "cross", in the center of which there is a bottom. It should be remembered that in order for the liner from the heater to fit normally into the bag, it should be slightly less than it. Therefore, the pattern should be made 3-5 cm smaller than the actual size of the bag.
- We fold our "cross" on the principle of the box, connecting the sidewalls with adhesive tape (scotch tape). All the seams should be glued inside and out, trying not to allow gaps and sparing scotch, because it directly depends on how well the bag will cope with its task and keep the products cold.
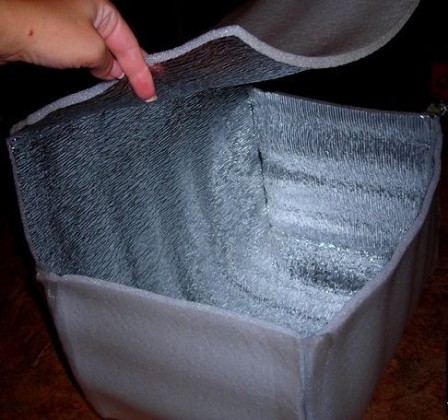
- We glue to the resulting box the lid from the heater. The lid for the box is better to be cut out as a separate part, and not to be made integral - then it will be better to recline and denser to the rest of the structure.
- We insert the resulting design in the bag. If there is space between the insulation box and the bag, it must be filled with insulation cuttings, foam rubber. Alternatively, the box can be attached to the bag from the inside with a double-sided tape.
- Our refrigerator bag is ready. It remains only to produce cold storage batteries. To do this, fill the plastic bottles or old hot water bottles with salt solution and freeze them in a regular household refrigerator. To make a salt solution, it is necessary to dissolve the salt in water in the proportion of 6 tablespoons of salt per liter of water. As cold accumulators it is possible to use special polyethylene bags, also filling them with saline solution.
- We put cold accumulators on the bottom of the bag and fill it with food, shifting each layer with several more batteries. In order to keep the bag longer the cold, the products should be packed as tightly as possible.