Once chests were in every house, today they are rather exclusive things. You can use the chest in various ways, for example, make it a place for storing toys , an attribute of a pirate party, or a decorative element of an apartment interior. If you have already figured out what to find for him, it remains to learn how to make a chest yourself. We offer a detailed master-class "Chest with our own hands".
Chest by hand from the box
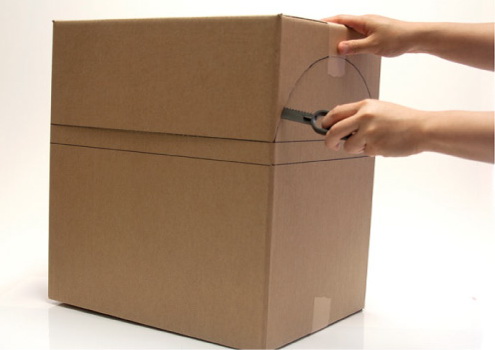
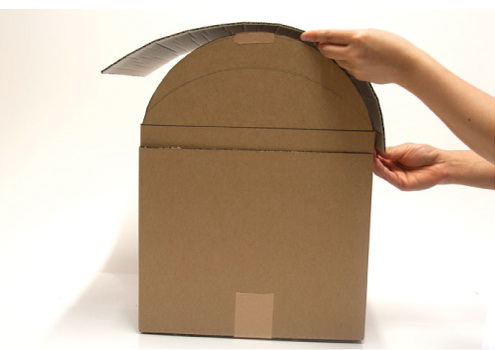
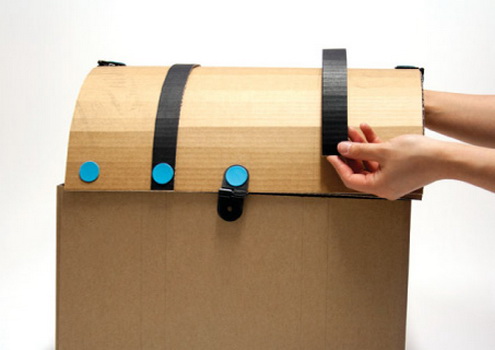
- It's easy to make a chest with your own hands out of the box, which everyone can find on the farm. To begin with, the future chest should be drawn, sketching on the smaller sides of the semicircle, and the two lines that encircle the box. Now, with the help of a knife, we cut off excess on the upper line (from the ends along the bend) and cut from the three sides along the bottom line.
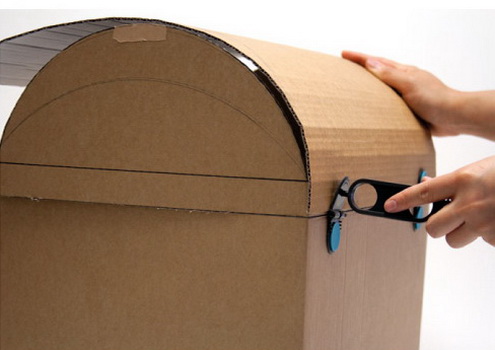
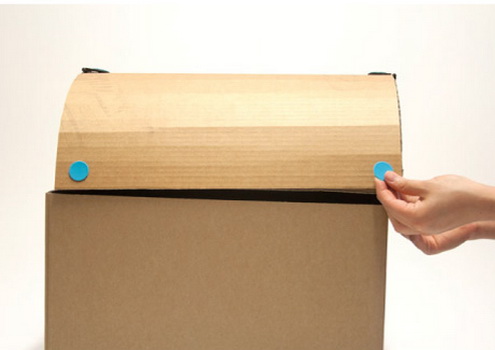
- The lid is made from a sheet of cardboard, the corresponding width. We fasten it to the loops by clamps or even plastic screws and nuts, which can be found in the children's designer.
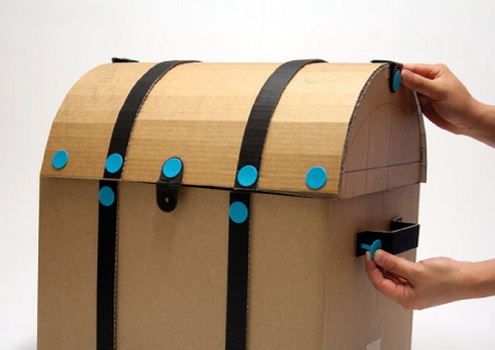
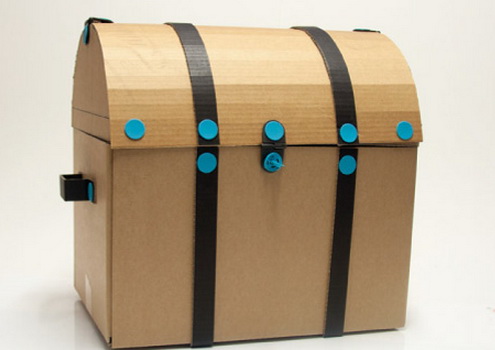
- In front, we also connect the lid sheet with a cardboard strip. You can use glue for this. And we will carry out the decoration of the trunk by our own hands, creating an imitation of iron chains. To do this, glue the body and cover with dark cardboard strips.
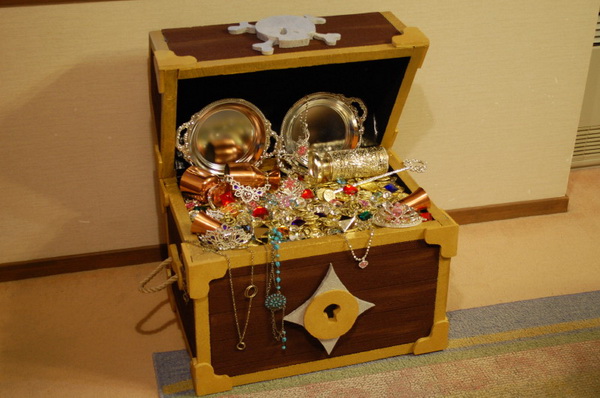
- At the very end, our chest will need pens and a lock. Now you can put things here, toys, towels and any other non-heavy items.
Chest of expanded polystyrene
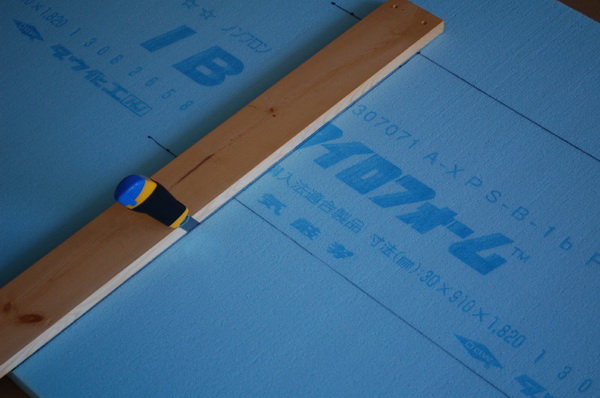
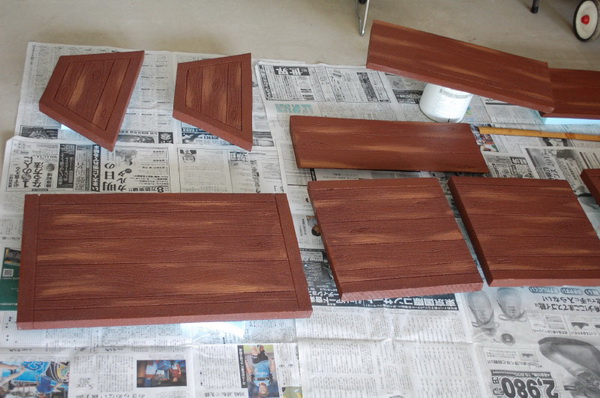
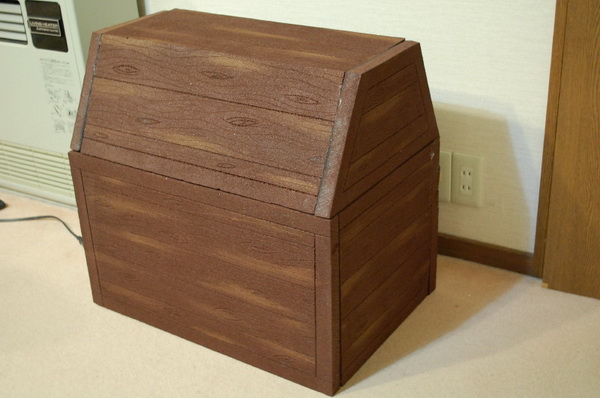
- A spectacular chest with your own hands can be made from a sheet of expanded polystyrene. First, we draw on a sheet of paper a diagram with the dimensions of the parts and proportions. The cover will not be round, but inclined, consisting of five parts - two side sections in width, two sides along the length and top. We cut the component parts, the edges of the upper part of the lid and long sidewalls are cut at an angle - this is necessary for the connection.
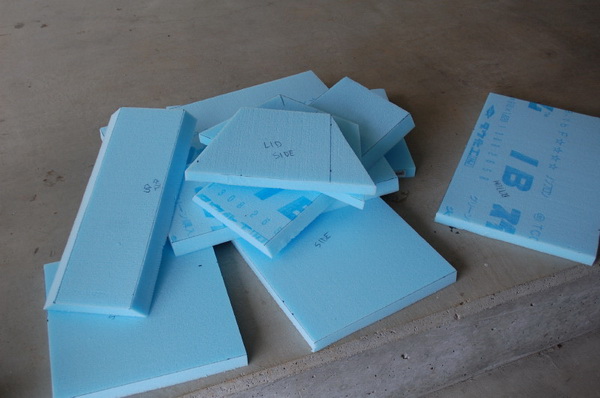
- Making a chest with your own hands will not cause trouble if you initially make accurate calculations. In any case, after cutting the fragments, connect them to make sure that everything is the same and the chest is straight.
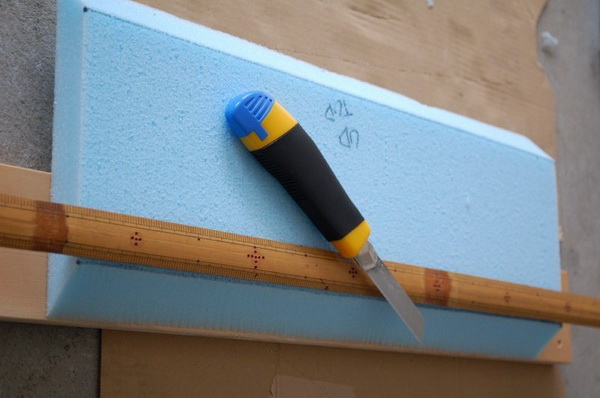
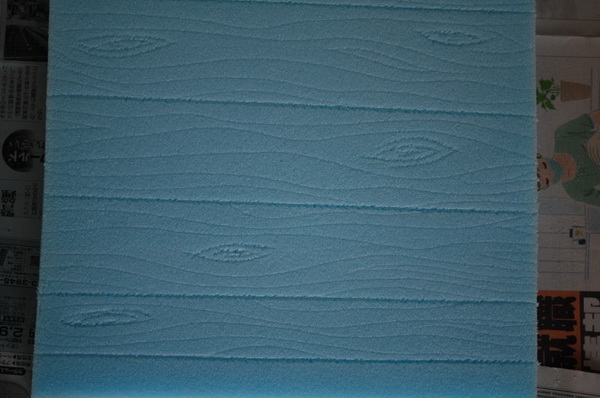
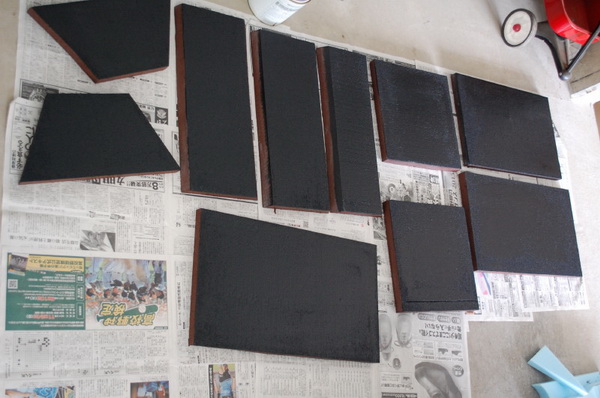
- Styrofoam is good because you can work with its texture. A screwdriver draws on the surface of straight lines that create an imitation board, curved lines apply a picture of wood. Then we paint the inner surface with black paint, and the outer brown. The paint from cans is undesirable, it can deform the material.
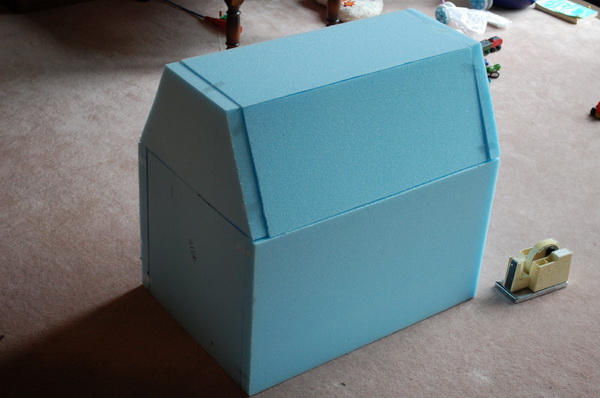
- When the parts have dried, they can be glued together with silicone adhesive. After the glue dries, paint the metal upholstery on the edges with gold paint.
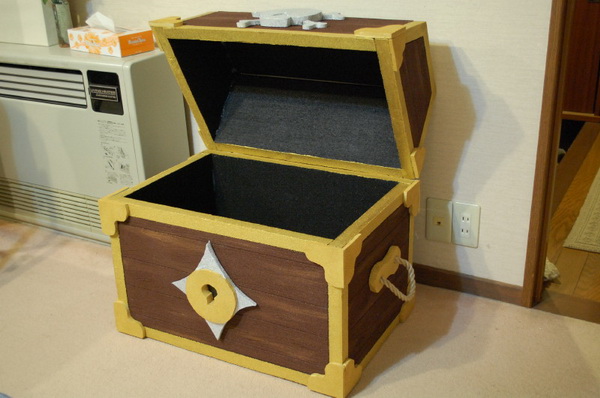
- Now it's time to think how to decorate a trunk with your own hands. It can be decorative elements from the same expanded polystyrene, you can cover the surface with pebbles, glass or shells. In our case, a pirate skull and a lock are made of expanded polystyrene.
Chest of cardboard
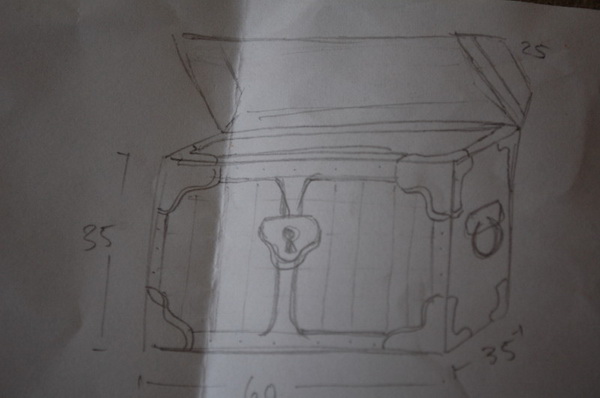
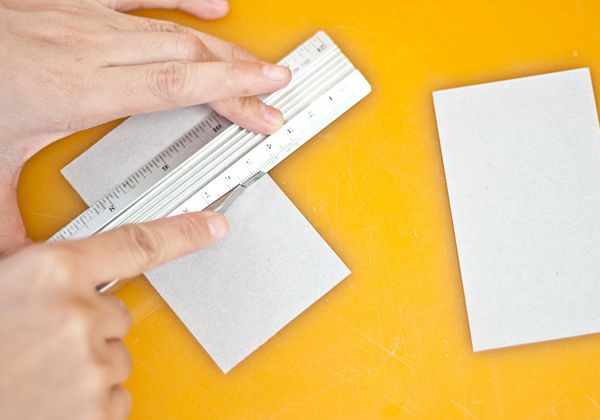
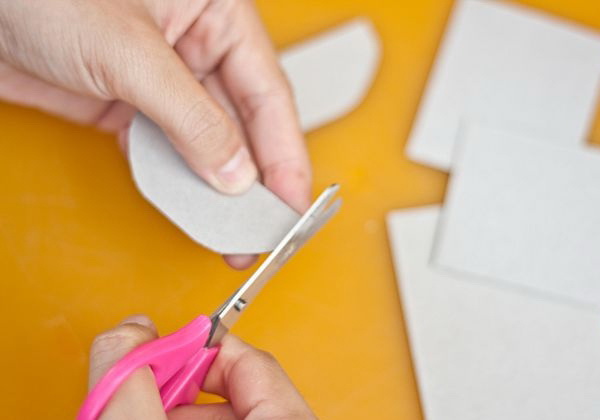
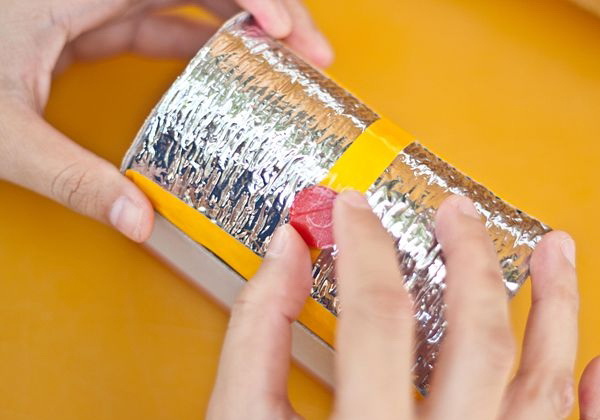
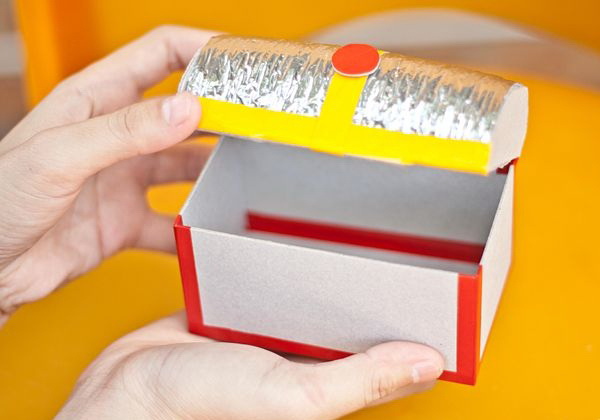
- Make a small chest with your own hands can be made of cardboard. Cardboard is used ordinary white or interesting with drawings and embossing for scrapbooking. First, we cut out three identical rectangles, then two squares with sides equal to the width of the rectangle. Then cut out two semicircles, the straight side corresponds to the side of the square.
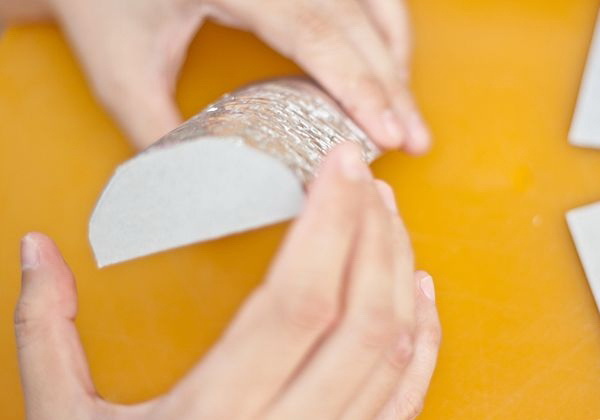
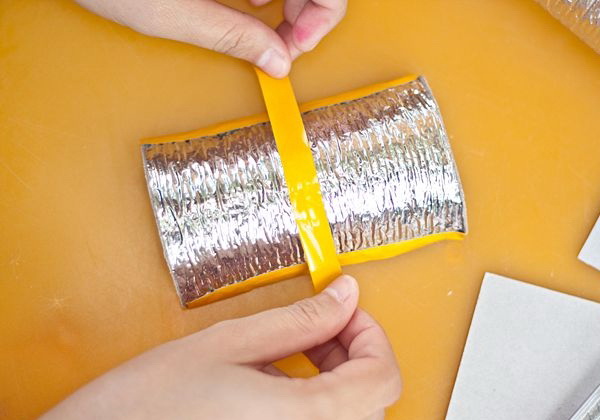
- For the lid of the sidewall, we connect it to a corresponding piece of cardboard, wrap it with foil, and cover the joints with an insulating tape or a colored tape.
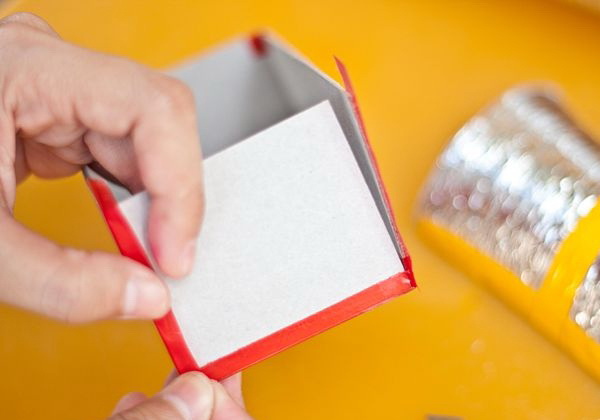
- We also connect the base with tape or tape, attach the cover to it. Again, you can fantasize over the decor. In such a trunk can be stored jewelry, watches, beads, materials for needlework.