On the unlimited opportunities that handicraftsmen give and just people with fantasy throw-out material, written a lot. One of the most accessible, but therefore popular materials is plastic. It is malleable, easily colored, takes any desired form, and most importantly - there are many around it. Speech, of course, about the plastic bottles that are in every house. The easiest way is to use them as vases and various supports. To do this, the upper part is cut off, and the edges are optionally processed. But today we will offer you an unusual solution - a handmade water lily made from plastic bottles, which will especially look spectacularly on small water bodies or on the surface of dacha ponds, pools, lakes.
You do not have to stockpile the necessary materials, because for the production of a water lily you only need what you have at home.
We will need:
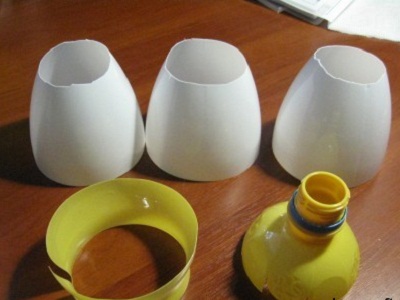
- plastic bottles of white color - 3 pcs;
- a plastic bottle of yellow color;
- plastic five-liter bottle;
- scissors;
- candle;
- glue;
- paint is green.
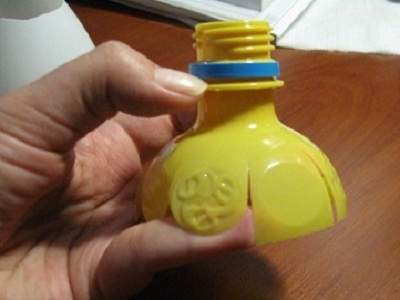
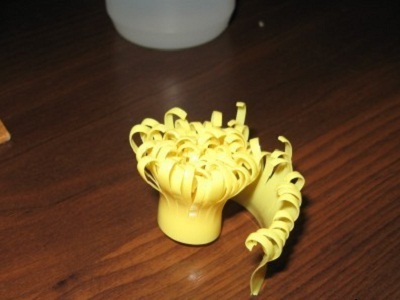
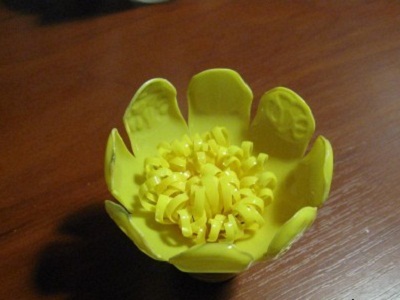
- The first stage of manufacturing our water lily is that from the plastic bottle of yellow color (for example, from the non-carbonated drink "Zhivchik") we must cut the neck. The rest of the plastic is used to make stamens, which will be in the center of the flower.
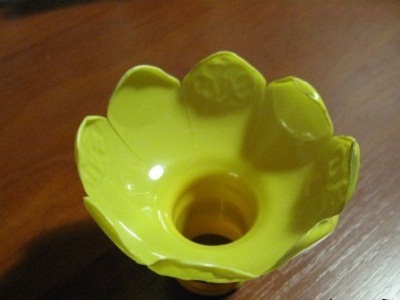
- Now you can begin to design the core of the water lily. Turn off our workpiece and gently fuse it over the candle flame. Do not bring the workpiece too close to the fire: even if the ignition and melting you can avoid, the black soot on the yellow heart of the handicraft does not add. If you did everything right, the stamens will turn inwards. Similarly, we process the flower itself, controlling that the petals are bent in the right direction.
- With the help of plastic glue we connect the flower with stamens. Our mid-water lily is already ready!
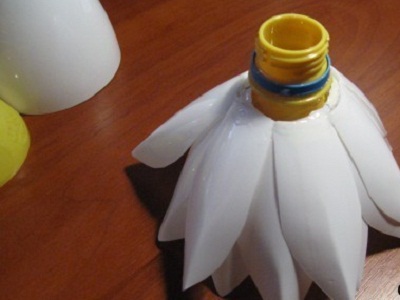
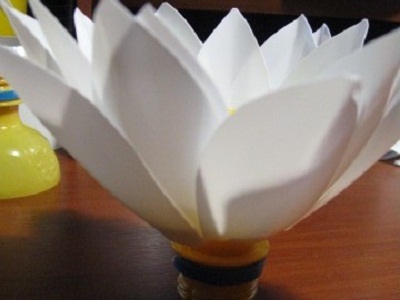
- Now let's start cutting out the rosette of our water lily. To do this, we take white plastic bottles (it is best to use bottles from milk products TM "Prostokvashino", if there are none, we will have to paint transparent), bend the corners and attach them to the neck of our flower. Secure the structure around the neck with glue for strength.
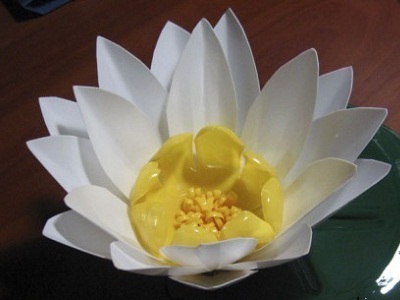
- A leaf on which our water lily will be displayed, we cut out from the bottom a large five-liter bottle. It does not matter its color, because you still have to paint in a saturated green. It is better to apply the paint in two layers so that the stains are not noticeable. Glue the flower to the sheet. Our original artwork is ready, and now you know how to make a charming water lily in a short time!
| | | |
| | |
| | |
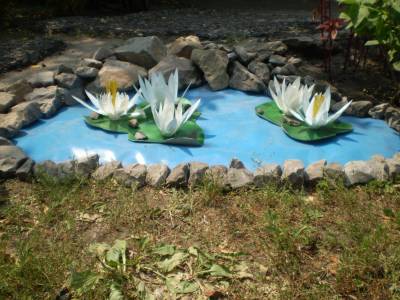
To make your pond even more picturesque, do not limit yourself to one lily. Snow-white flowers on a bright green leaf will certainly please the look. A small recommendation: tie a piece of rope, the other end of which fix on the shore. So your flowers will not migrate over the pond, carried away by the current or wind.
As a sheet-stand, you can also use a piece of linoleum cut out from the corresponding template. To fasten the water lily to it in this case it is necessary on the reverse side. First, the fabric base is more easily colored in green, and, secondly, not so quickly water will destroy its front side, covered with a waterproof film.
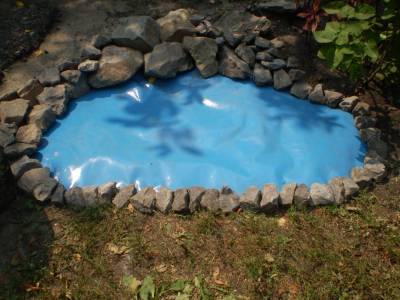
By the way, the presence of a reservoir for making such an article is an optional condition. Painting the linoleum in blue, and carving it in the shape of a lake, you can easily make a decorative pond on your lawn. That it is not destroyed by pets or your baby, fix the edges of the "lake" with stones (they can even be cemented). Decorating the garden in this way, you can make beautiful hand-made tulips or bells from plastic bottles .
| | |