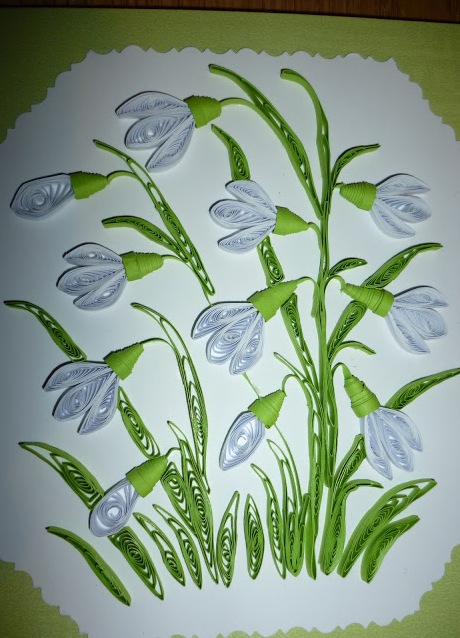
Paper flowers, created by craftsmen, amaze with their beauty and resemblance to the originals, as well as the diversity of their performance. The most amazing floral compositions, both flat and volumetric, allow the implementation of quilling. In the presented master class you will learn how to make quilling snowdrops from paper in the technique.
Master class on making flowers snowdrops from paper
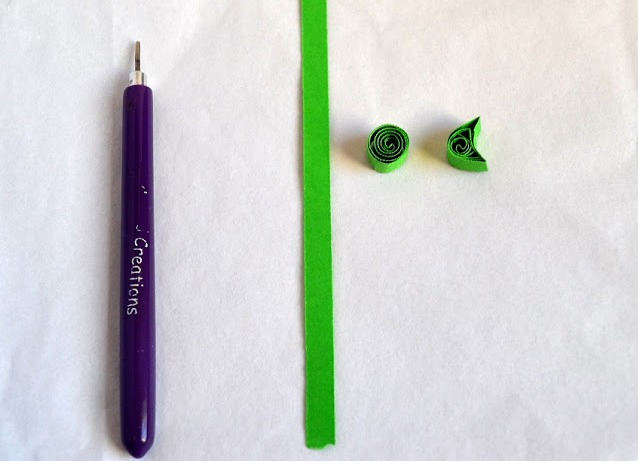
It will take:
- White paper;
- green two-sided paper;
- PVA glue;
- toothpicks;
- templates for quilling;
- scissors or clerical knife;
- colorless nail polish;
- ruler, pencil.
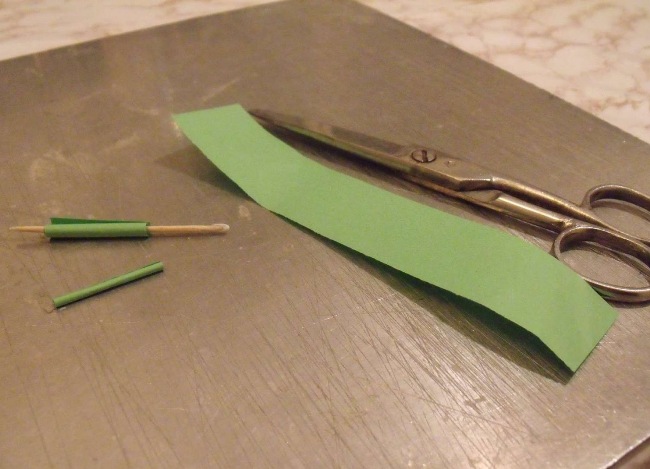
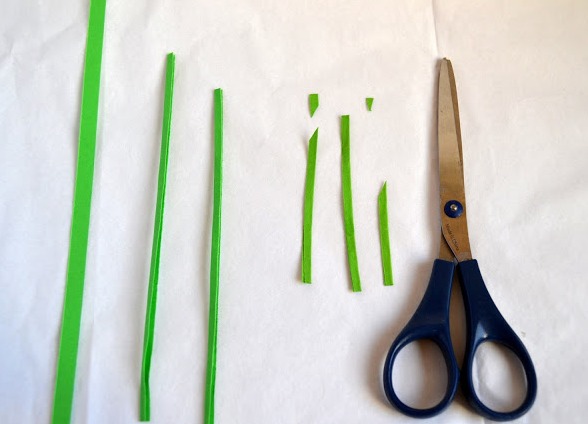
- We cut white and green paper with strips 3 mm wide.
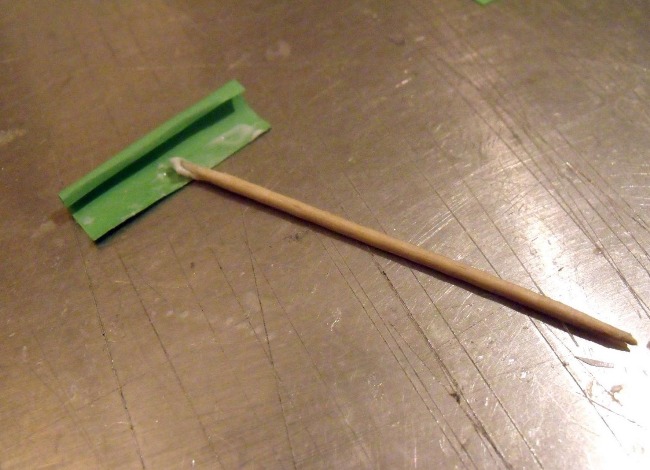
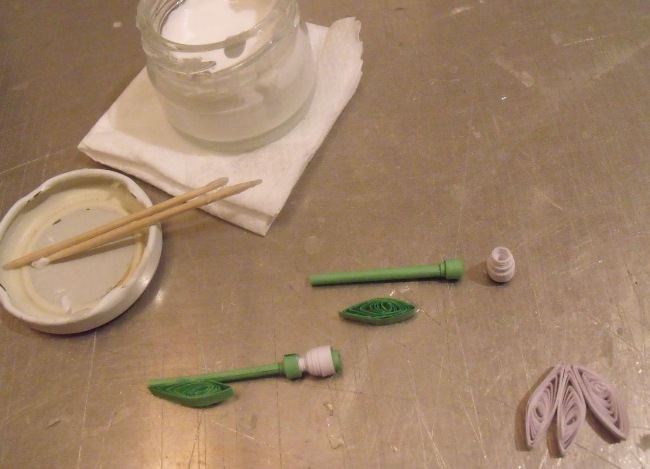
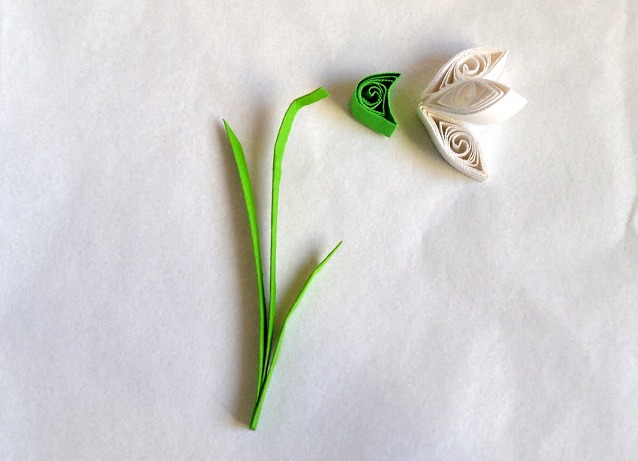
- We make the stalk. Take a strip of green paper with a width of 5 to 10 cm, depending on the desired length of the stem. We wind several layers on the toothpick, cut off excess, glue the edges, and pull out the toothpick.
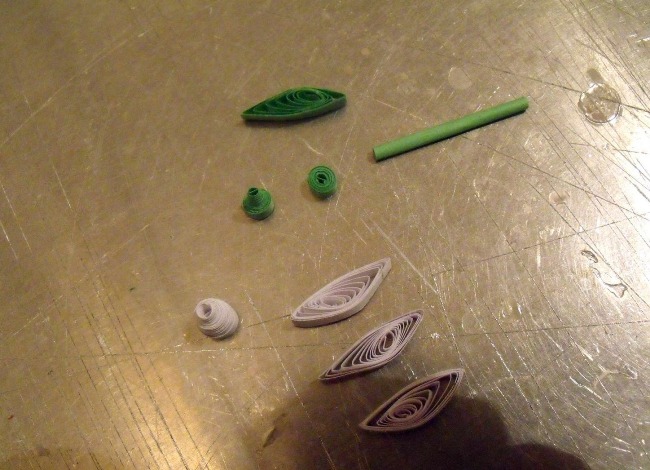
- To make the middle and sepals of the flower, take a strip of green paper, wind on the toothpick, glue the edge, and then, pressing down the center with a pencil, attach the roll to the shape of the cone. We need 2 green and one white such a cone. Cones inside are smeared with PVA glue for fixing. You can make a combined center. To do this, attach 2 cm of green paper to the strip of white paper, and start winding it on the toothpick from the white end.
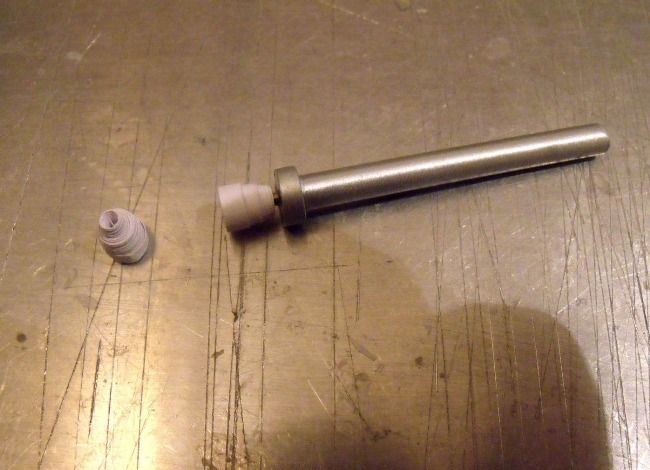
- We make 1 green and 3 white rolls. To do this, reel the strip on the toothpick and bloom on a template with a diameter of 15 mm. We give the roll the shape of the eye.
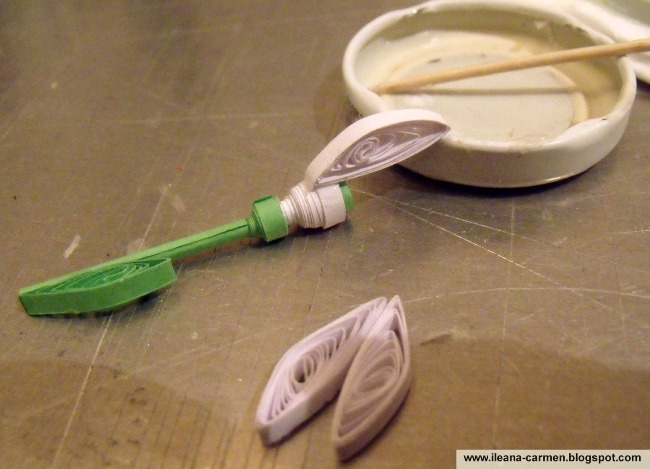
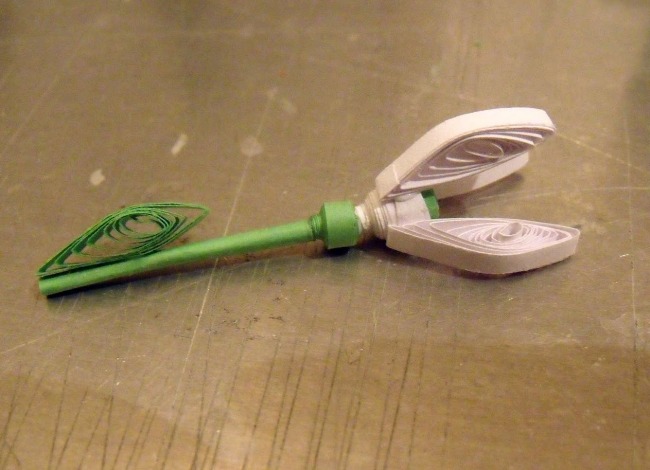
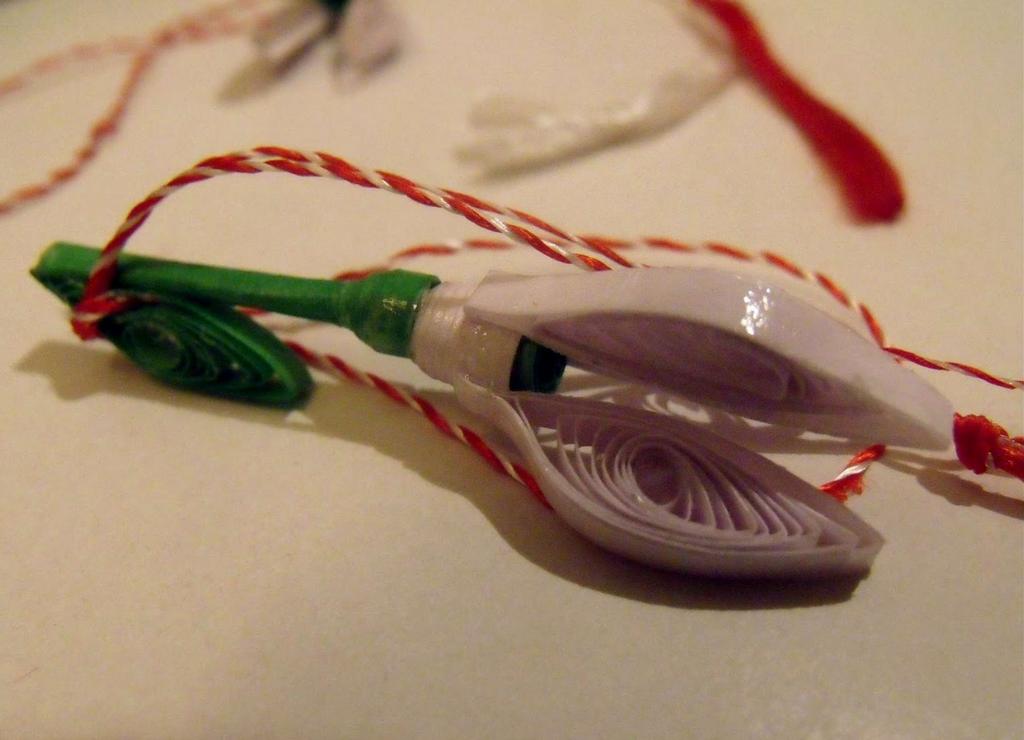
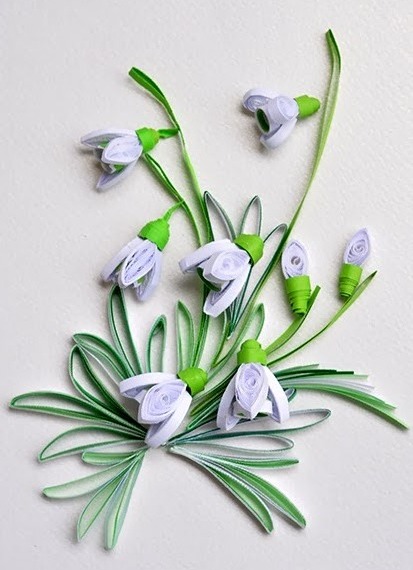
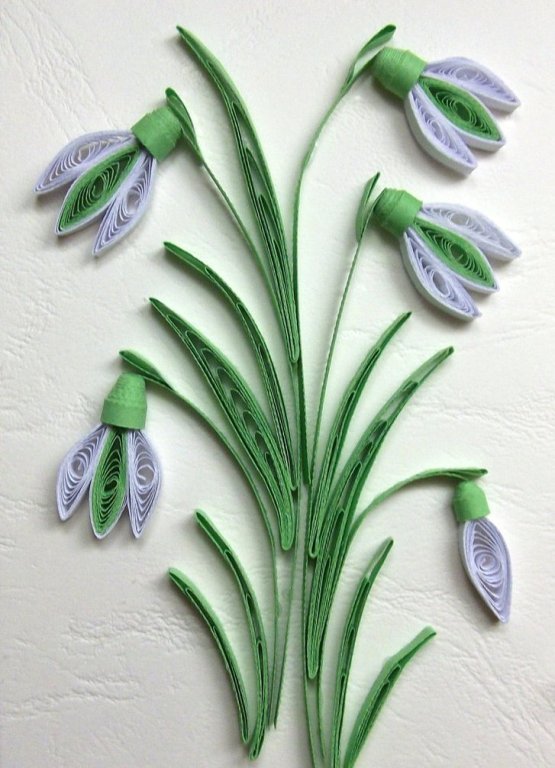
- We begin to collect the snowdrop. On the stalk, we glue a green cone of sepals, glue a white detail of the middle, with a wide part inserted into it by another green cone.
- To the bottom of the stem, we glue a green leaf. Uniformly positioning in a circle, we glue three white petals to the stem with a side edge to the middle.
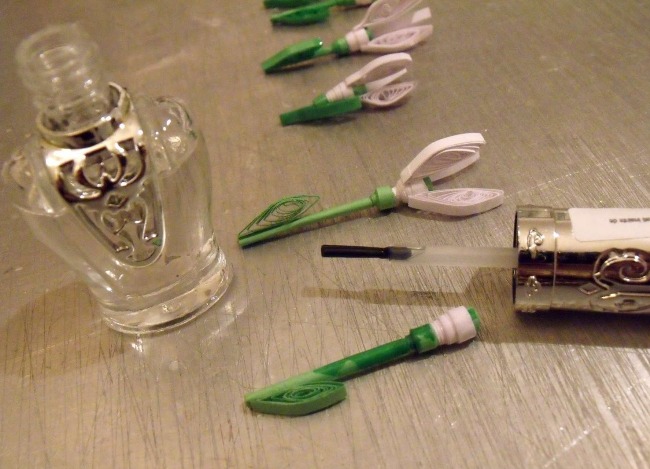
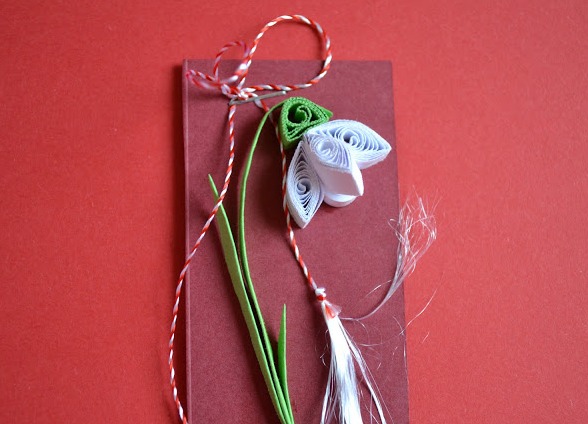
- Cover our snowdrops with a clear varnish in two layers and let them dry.
- You can put a beautiful strong thread at the end of the stem, and use a snowdrop, like a decoration or a pendant.
| | |
| | |
Such flowers can also be put in a basket.
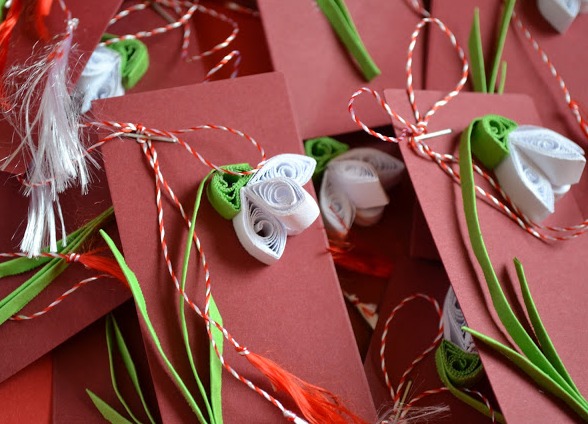
Master class on making postcards with snowdrops
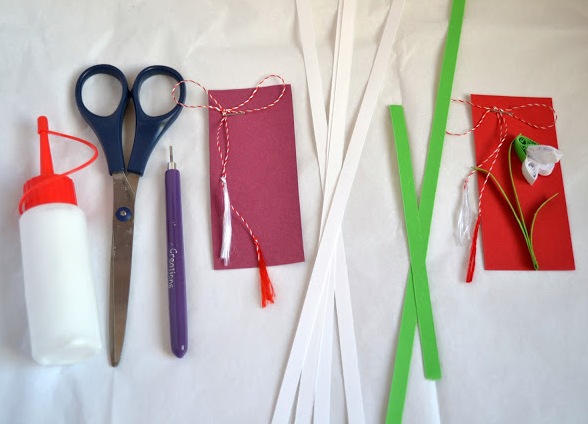
You will need:
- White and green paper strips 3-5 mm wide;
- scissors or clerical knife;
- colored or white cardboard;
- PVA glue;
- a tool for quilling or toothpicks;
- templates for quilling;
- braid for decoration.
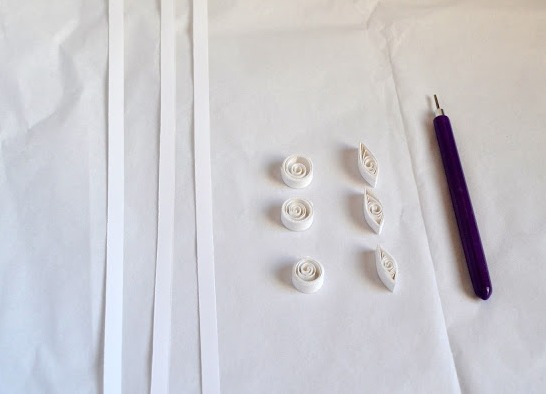
- We wind a strip of white paper on a tool with a needle (toothpick), place it in a template with a diameter of 15 and seal the end. We give the round roll to the shape of the eye.
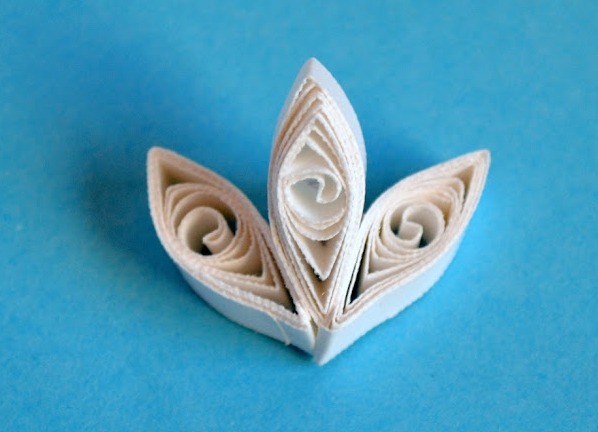
- We need three white lobes for one flower, which we glue together for the side edges so that the middle petal is raised upwards, as shown in the photo.
- We make sepals from half a green strip. We twist it onto a needle, place it in a pattern with a diameter of 10mm and glue the edge. We give it the shape of a young month.
- We make a stalk and leaves of their bent in half along the length of green strips. For the leaves we take short pieces and cut the ends at an acute angle. Stalk and leaves smoothly bend.
- The resulting details of the flower are glued together.
- We take a small rectangle of cardboard and glue our snowdrop on it, adding a white roll of small diameter under the petals of the flower.
- We tie a thin tape with a bow and attach it to the left corner.
Our postcard with snowdrops is ready!
Using these simple techniques and your imagination, you can make very beautiful pictures and greeting cards, combining snowdrops with any other colors made by yourself in the quilling technique.
| | | |