Our ancestors considered the egg a symbol of the birth of the world. Today, the attitude to Easter eggs is not so serious, but the tradition to give each other original gifts for Easter, fortunately, remained.
How to make an Easter egg origami?
An Easter egg made of paper can be collected from both the rounded end and the sharp one. It is better to start with a sharp one - then the hole is formed at the opposite blunt end, which will be closed by the stand.
Twenty-first modules need to be tightened with scotch - after all, they have the strongest load.
A band of narrow adhesive tape is glued to the module from the back, the underside, protecting it from damage.
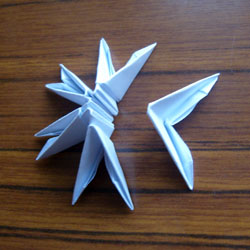
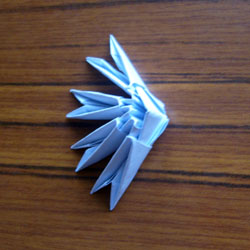
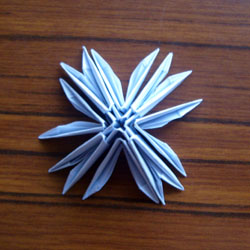
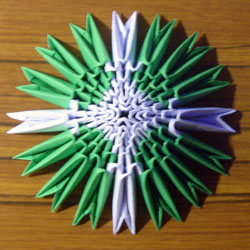
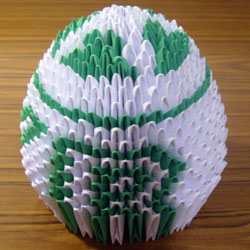
1. We begin assembling the egg from the creation of the base, an octagonal snowflake, so we add the modules from the cut paper, following the picture.
2. Further we take four modules, we add them in a row, having arranged them so that it was convenient to carry out connection.
| | |
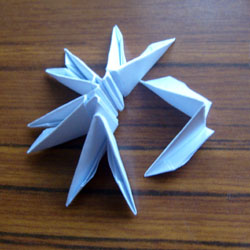
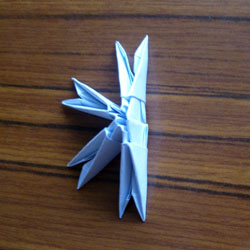
3. Then we take the three following modules and connect the previous four modules by squeezing their corners into the extreme corners of the two adjacent modules.
| | |
| | |
| | |
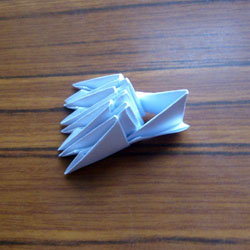
5. Add four more tape-enforced modules. We place them between the corners of the snowflake base.
| | |
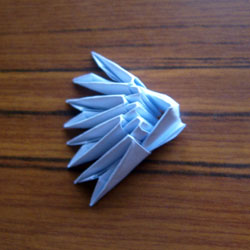
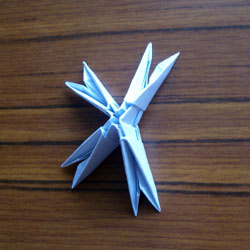
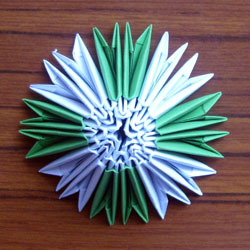
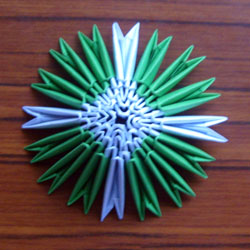
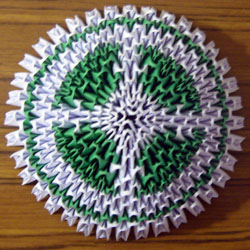
6. Then we fix the snowflake with the remaining reinforced modules. With each row our snowflake becomes more and more magnificent.
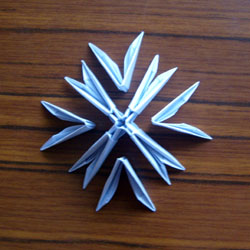
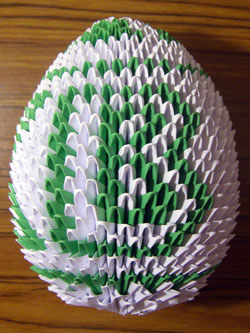
7. In the next series include color modules, gradually, with each row adding their number in accordance with the figure, in our case it is a cross on the rounded part of the egg.
| | |
| | |
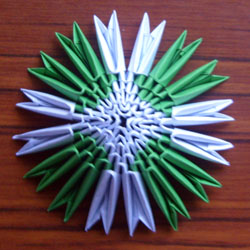
8. When you count in a row of 36 modules, it's time to stop adding and start building a figure in the usual way, like any other one. The main thing is to pay attention to the construction of the letters "ХВ". If you have modular origami skills, the figure is very easy to get confused, so it will be more convenient if you draw a diagram on a sheet of paper, this will help to execute the drawing without errors.
| | |
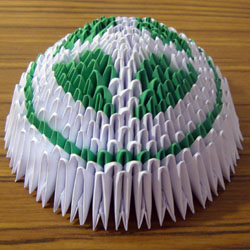
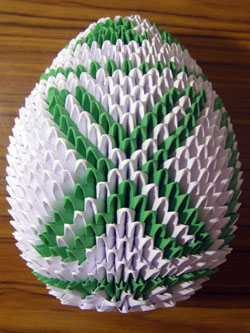
9. We finish the egg by reducing the number of modules. Now each module alternately (one at a time) grasps not one by one, but two modules of the previous series.
| | |
| | |
10. At the end of the work, this is a small hole.
11. But the result is the tip of the egg.
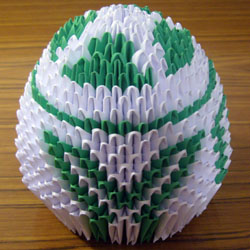
12. Pay attention to how much the first modules are stretched. If we did not use scotch to strengthen them, they would undoubtedly have broken for a long time.
13. Hands, lightly squeezing, give the product the shape of the egg - with blunt and sharp ends.
14. At this stage, the egg is already ready, but we can not allow this wonderful product to lie randomly in the sideboard! It is necessary to make a stand for the egg.
15. It is not difficult to do this for anyone who has already collected several figures. For clarity, let's imagine a snapshot of the stand from below. Here you can see how to assemble such a stand.
16. Now our festive souvenir is completely ready! We will remove it on the shelf and we will wait for the bright Easter holiday!