It is very important to know the history of your family. But it is important to know the personal data of relatives, but also family ties. For this purpose, it is necessary to compile the family tree of the family . In this article, you will learn how to make and arrange a family tree with your own hands.
How to make a genealogical tree?
For people who are going to compile such a family tree, it is first necessary to carry out preparatory work, which is as follows:
- Write a list of the next of kin.
- Collect the following information about all relatives: surname, name, patronymic, date and place of birth, degree of kinship, spouses and children, brothers and sisters, places of study, work and services in the army.
- Ask relatives about information about your ancestors and make detailed entries.
- Make a "geographical map" of the areas where relatives and ancestors live.
- Review the documents of home archives, sign old photos: date and place of shooting, who is photographed.
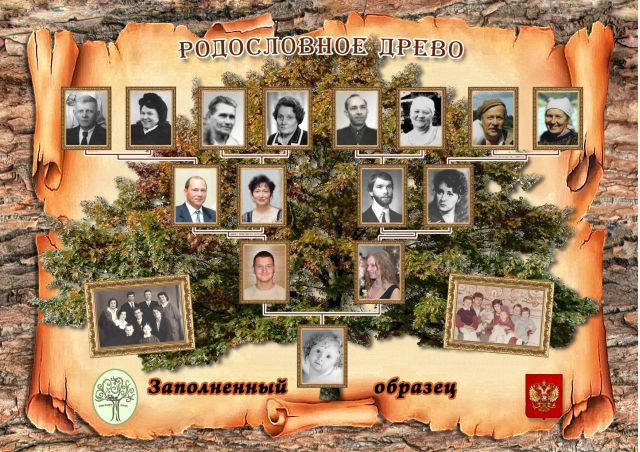
A genealogical tree is a scheme of family ties between members of one family, made in the form of a "tree", where the ancestor is located at the roots, and the trunk and branches are related to the main line of the genus, and the "leaves" are their descendants. Such a scheme is called descending.
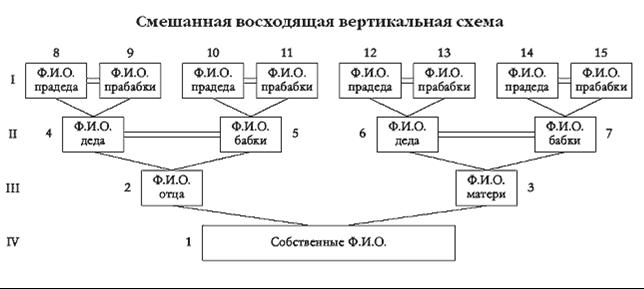
Most often, an ascending scheme is used, in which the ancestors are located in the crown, and descendants on the trunk and roots.
A family tree can be made up or downwards.
If you decide to use an ascending scheme, then fill in the information on relatives according to the diagram in the figure.
How to make a genealogical tree?
It will take:
- 4 wooden boards of the same width;
- plywood;
- frame with glass;
- hook and loops;
- white and brown colors;
- brush;
- linen cloth (burlap);
- green paper;
- adhesive or thermal gun;
- photos and cardboard;
- putty.
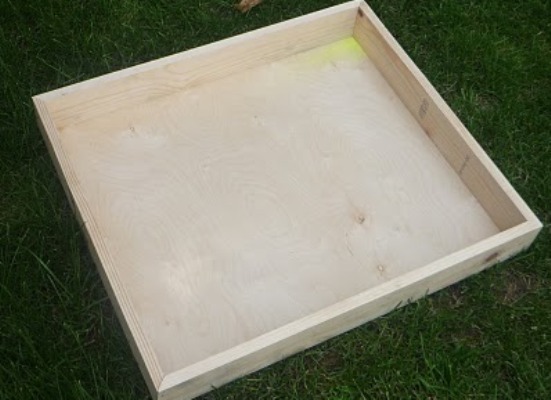
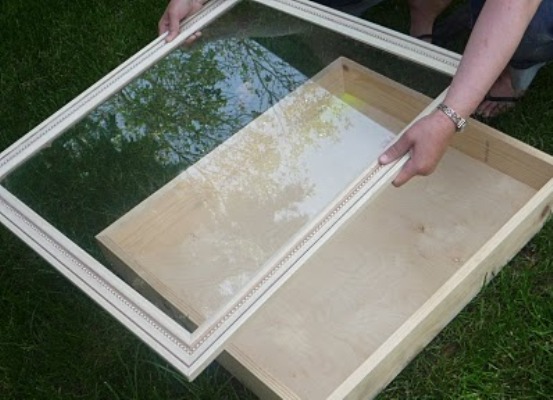
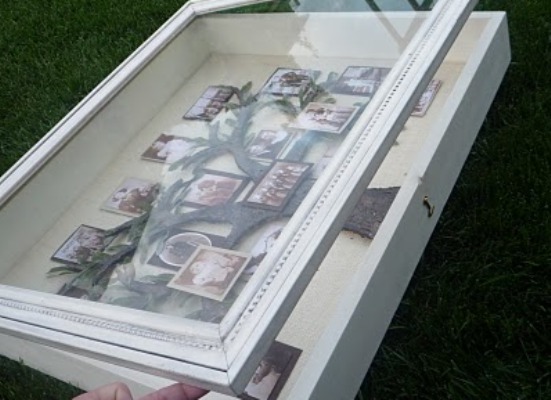
- We measure the frame with the glass.
- We make a box of wooden boards according to the dimensions obtained.
- Cut the size of the box of plywood and attach it to it.
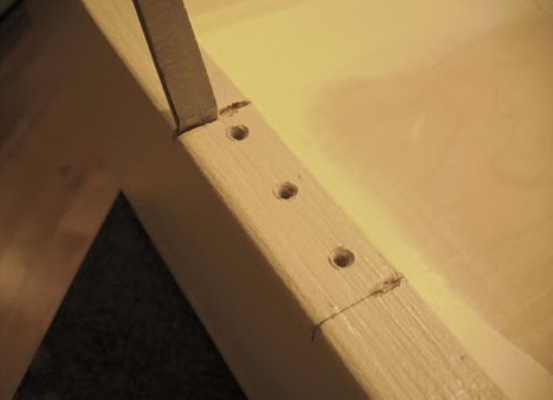
- We make on the frame a groove and a marking for fastening the loop.
- We ground and paint the box and frame.
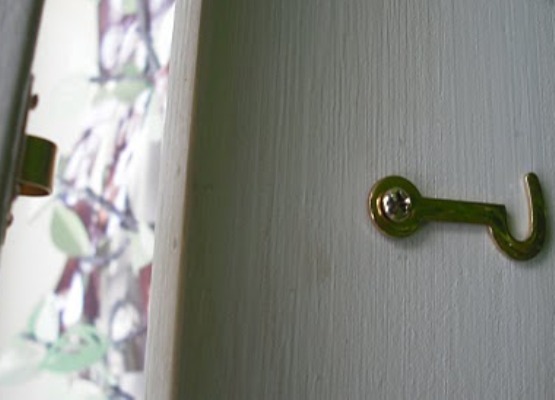
- We attach loops and a hook so that it can be closed.
- On the inner bottom of the box neatly, starting from the middle, we glue the linen cloth or any other that looks natural.
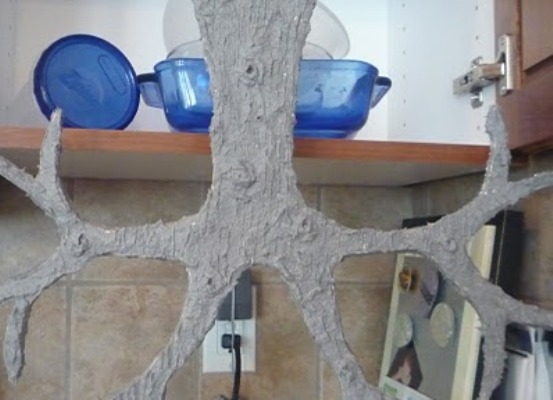
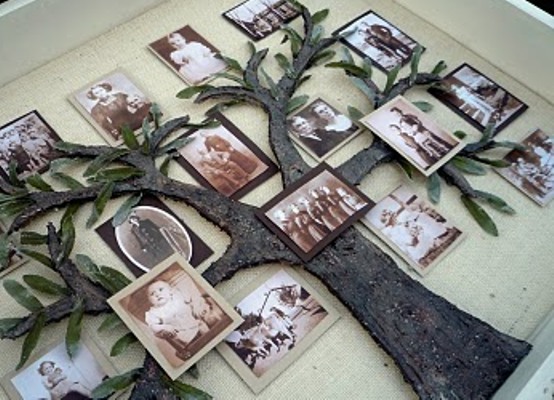
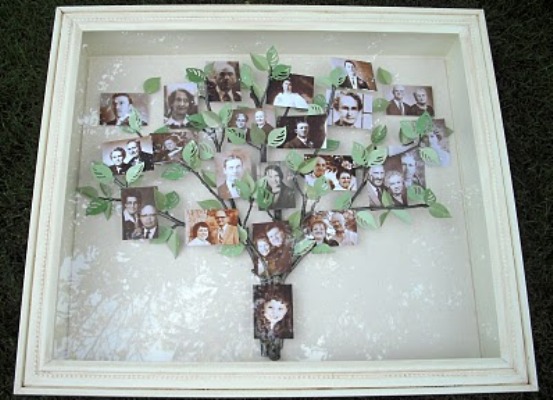
- From plywood or thick cardboard we cut out the trunk of a tree, we put on the entire surface of the putty, we make roughness and knots, like a real crust. Let's dry (about 12 hours), if you need to grind, and then paint with brown paint.
- We cut out the leaves from paper, add them in half for volume, and unfold them, glue them to the trunk in random order.
- Photos are cut out and glued on cardboard, slightly larger than the photos.
- On the double-sided adhesive tape we attach the cardboard with the photograph in the required order. Our family tree is ready!
| | |
| | |
| | |
| | |
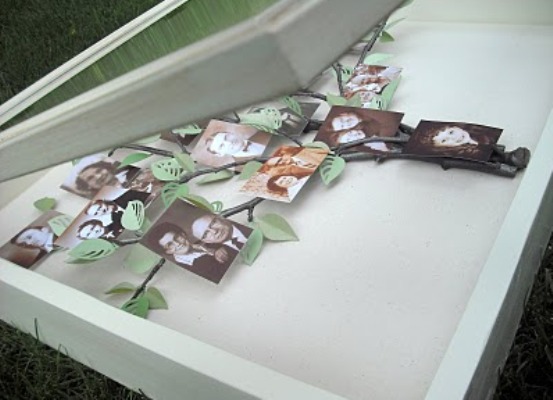
Also for the production of a family tree, it is possible to use fastened branches with small leaves pasted on them.
| | |
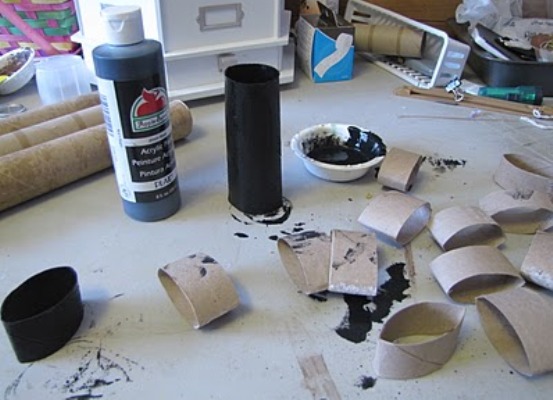
How to make a genealogical tree from paper?
Required:
- cardboard rolls from toilet paper and paper towels;
- black paint and brush;
- photos in black thin frames;
- double sided tape;
- black cardboard and scissors.
- Cut the rolls into strips of the same thickness.
- Straighten them a little so that they take the form of leaves.
- We color the resulting blanks inside and out with black paint, let them dry well. We get "leaves" for our tree.
- From black cardboard we cut out several branches for a tree.
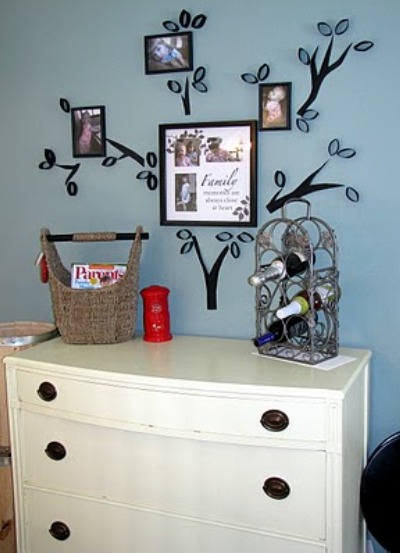
- In the prepared place on the wall, we place the photographs within the framework, and between them fill the space with twigs from the cardboard and "leaves", gluing it onto a double-sided adhesive tape.
That's what a family tree on the wall we got!
Family genealogy tree will introduce your children to relatives who live far away or have already died, and also will help to preserve and transfer the history of your family to future generations.