Now there is no shortage of gift wrapping in stores. When buying a presentation, sellers instantly offer all kinds of boxes, packages and beautiful wrapping paper. Probably everyone agrees that it is more interesting to make an original package for your gift.
To improve the appearance of the box with the present, you just need to wrap it in paper, even if it is not very festive. To wrap the gift you can use even a cloth or a handkerchief. The ends of such a wrapper can be easily connected with a pin or simply a beautiful knot. And for decor decorate applications, buttons, flowers, butterflies, bows for gift packaging, threads and much more that is at hand. You just have to show a little imagination, a little bit of time, and your packaging will play very different colors.
There are many ways how to give originality to the prepared surprise, but today we will try to teach you how to make unusual packages for gifts without glue.
Master-class on making a gift box
For the manufacture of this type of packaging we need about an hour.
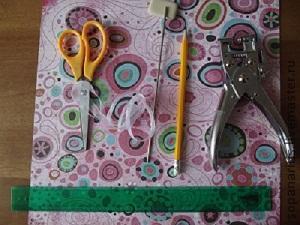
Materials and tools that we will need to make gift wrapping:
- colored cardboard or any other paper with a thickness of at least 160 grams per square meter;
- hole puncher;
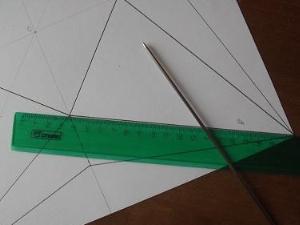
- ruler;
- pencil;
- knitting needle;
- office scissors;
- tape.
Let's get to work:
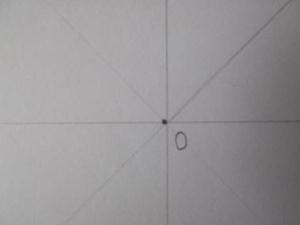
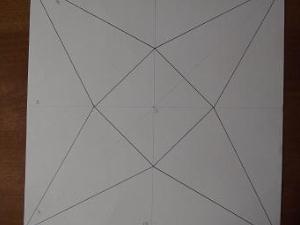
- We begin to draw. For drawing, we use cardboard, as it perfectly preserves the shape and does not deform as much as ordinary paper. We make the sides uniform, that is, the sheet must be square. In our variant, the sides are 30.5 cm. The sheet must be turned on the wrong side. Determine the center, for this you can draw diagonals. We denote the middle by the letter D. We draw through the center two more perpendicular lines. That's about how it will look like.
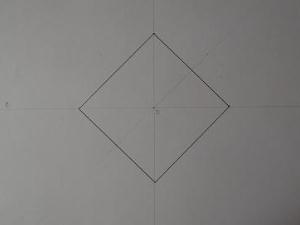
- Denote the bottom of the box. To do this, from the center along the auxiliary lines we draw fat lines with a length of 7 cm. An original squared square was obtained.
- We draw segments from the vertices of the inner square to the vertices of the outer. That's how it should look.
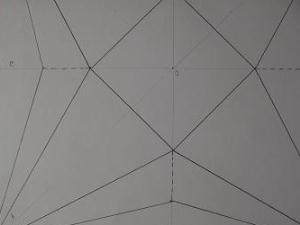
- From the top of the smaller square along the auxiliary lines we measure 4 cm, and mark these intervals with a dotted line. After this, we need to draw the segments to the vertices of the outer square.
- Draw all drawn lines with a knitting needle. Thus, we denote the places of bends. Do this carefully so as not to leave holes on the paper.
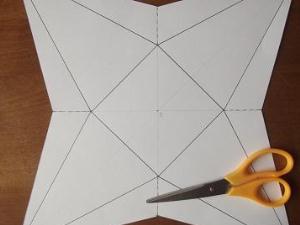
- Crop all unnecessary parts. Scissors walk along the outermost outer lines. You should get this way.
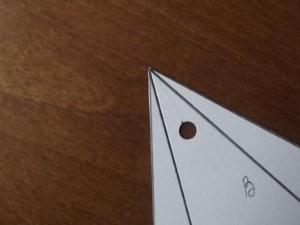
- With a hole puncher, make 2 holes in opposite corners.
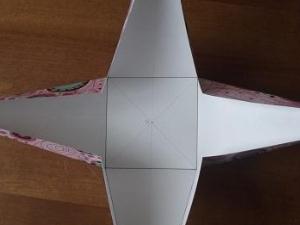
- The most important stage. Bend the box along all the prepared lines, all the folds should look inward.
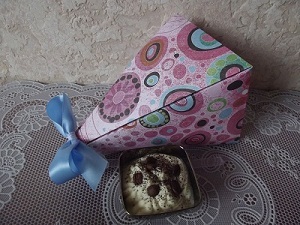
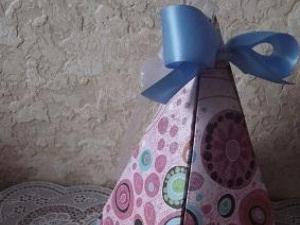
- Through the punctured holes we pass the tape, we tie a bow. We look at the workpiece and see that we have formed a smart pyramid.
A bit of advice: do not apply pressure to the pencil, draw inconspicuous lines so that they are not visible on the outside of the package.
This miracle miracle happened. We hope that we have helped you a little with the problem of how to decorate the packaging for a gift.