A thousand years ago, the discovery of glassware gave the needleworkers such multifaceted material as beads. Today there are so many spheres of its application that it is extremely difficult to even count them. These small decorative elements can be made of different materials. So, the beads are made of glass, ceramics, plastic and even metal.
The beauty of such a hobby as beading is that even beginners can create beautiful bracelets, earrings, pendants and pendants, because the technique is quite simple. Accuracy and patience - that's what it takes to create an artifact is important. Light, elegant and original figures - an excellent decoration of the home interior.
We offer a simple and detailed master-class for beginners, having become acquainted with which you will learn how to weave a bead with your own hands. A beautiful hand-made article can be used both as a pendant and as an original decoration for the hair, and as a decoration for curtains and curtains. Such lovely butterflies will give even more home comfort to your home. So, to the point!
We will need:
- beads;
- nippers;
- wire.
Choose beads in any color you like, but only round shape and size # 11, because with smaller beads beginners are hard to work with, and large ones will look rude in such a craft.
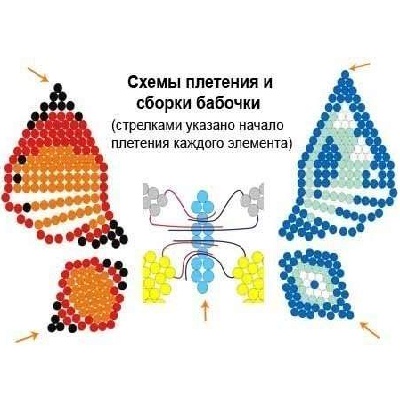
- To begin our master class on the creation of a butterfly from beads it is necessary to get acquainted with the scheme of weaving, presented below.
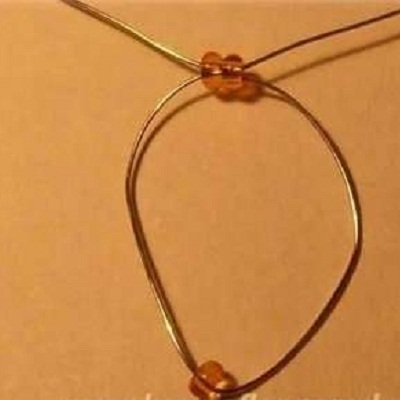
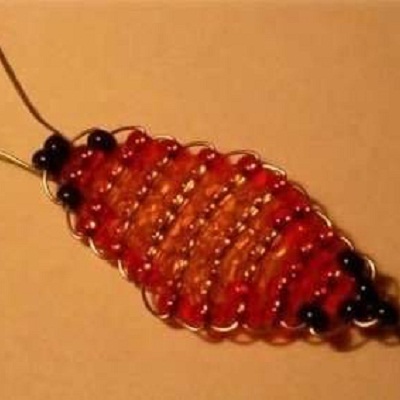
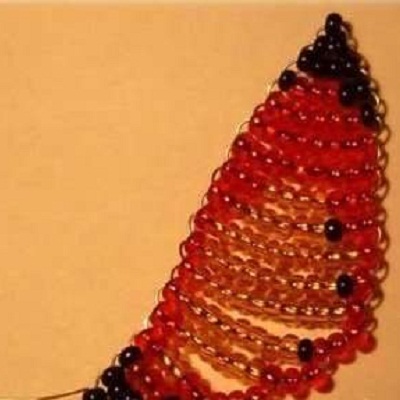
- Weave each wing of our butterfly from the color beads separately. Take for this 60 centimeters of wire and begin according to the above scheme to string beads on it. The first bead should be placed in the center - with it and the first row of crafts begins. Then on the tip of the wire we put on two beads, and through them we pass then the second tip of the wire. We tighten, getting the second row. Tear further on the same principle and in accordance with the scheme. In a similar way, we will also weave the second winglet.
- Now the lower porch of the butterfly is woven and you can start creating a pair of upper ones. Wire for this we need more - 80 centimeters. We act according to the same scheme.
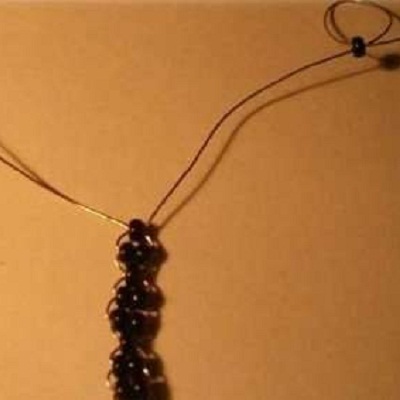
- It's time to weave a butterfly body. Please note that in the end of the work we will have to collect the butterfly from the individual elements we woven, so the wire will be passed through some beads not one, but two or three times. That's why for the weaving of the body, the beads need to be selected with large holes.
- The scheme of weaving of the body of our beautiful butterfly is the following: 1-2-2-1-2-2-1-2-1 (number of beads). After stringing, do not cut the ends of the wire, and fasten at the ends of one bead. The distance at the same time should be 2.5 to three centimeters from the last. Pass through this bead both ends of the wire. Antennae, which in this case turned out, twist the flagellum, and cut off the remaining excess wire with the help of wire cutters.
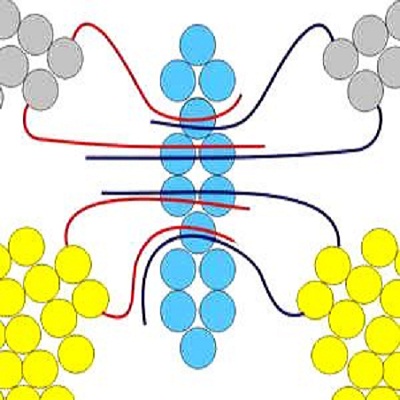
- When the weaving of all elements is completed, it's time to collect our butterfly according to the diagram below.
- Through two beads of the fifth row of the body, pass the upper tips of the wire of the lower wings, and the lower ones through the beads of the fourth row. Now through the beads of the seventh row, stretch the upper tips of the wire of the upper wings, through a pair of beads of the sixth row - the lower ones. It remains only to properly fix the ends of the wire.
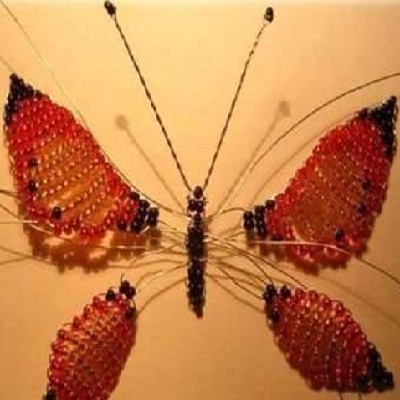
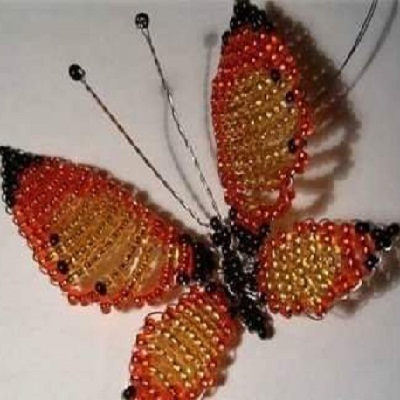
- We unite the upper wings of the butterfly with the lower ones on two or three rows with the free ends of the wire. Now our artwork is ready, and you know how to make a bright and original butterfly from beads in just an hour!
| | |
If you attach a usual pin from the back of the butterfly, then such a beauty will decorate the curtain, and with the help of a magnet it can be easily "seated" on the refrigerator door. And you can beautifully attach it to a bead tree made by yourself, or a flower: a daisy or a violet . Fantasize!