The technique of dry felting is gaining popularity. A variety of toys, souvenirs, ornaments made from felted wool are just a small part of what can be made from individual fibers of wool or felt. In this master class, we will talk about how to wool a panda in the technique of dry felting.
Funny toy
We will need:
- wool of white and black color;
- black powder paint or soot;
- a large needle.
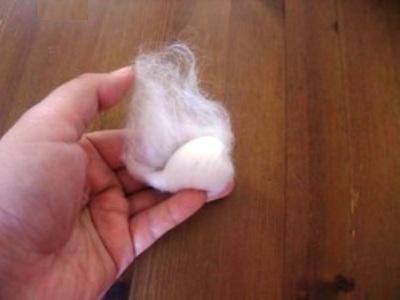
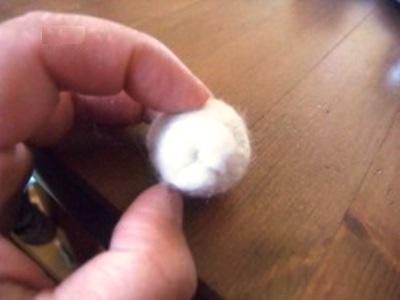
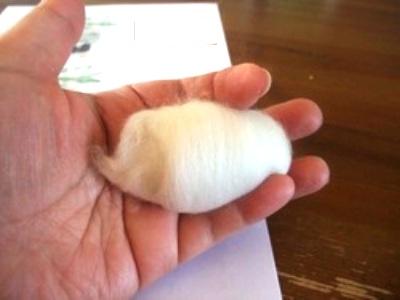
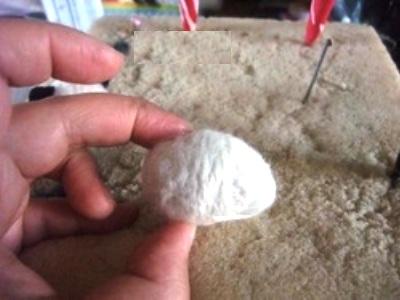
- Our master class on felting panda begins with the creation of the head. To do this, take a strip of white wool about 16x5 cm in size. Fold it in a ball, while trying to keep the fibers from sticking together not too tightly. This will make it easier to drive the needle. Then compact the ball with a large needle, and on the one hand, treat the ball so that the fibers remain slightly fluffy. This protruding part will serve as a spout and mouth of a panda.
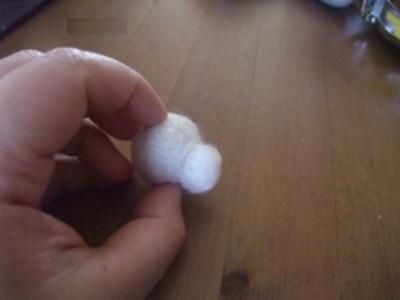
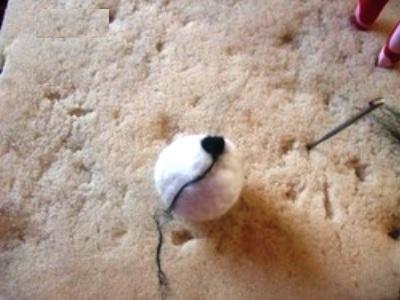
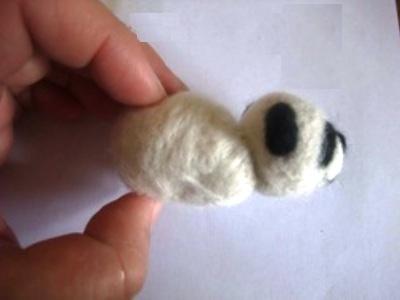
- Then on the protruding part of the muzzle, make a needle with a needle and a mouth, and after that take a little black wool and add it, forming a spout of panda.
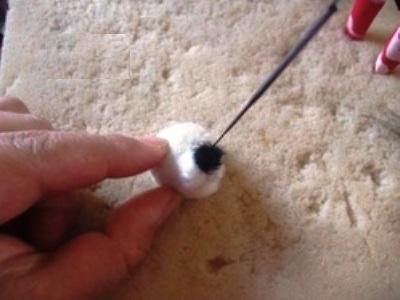
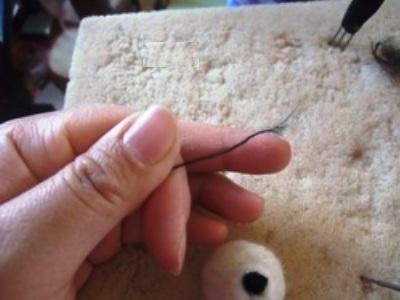
- Now make a mouth. To do this, use a needle to insert a thin black wool thread into the nose, and then draw it to the corners of the mouth along previously formed folds.
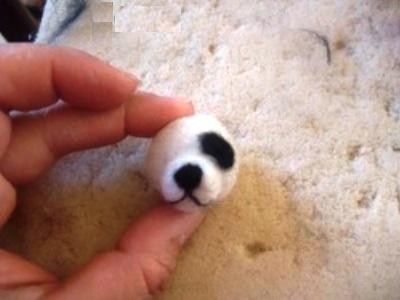
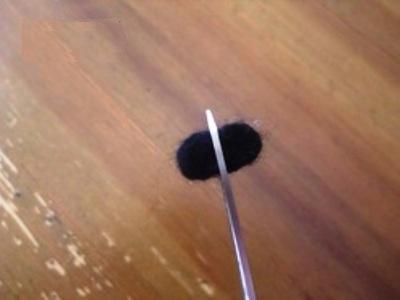
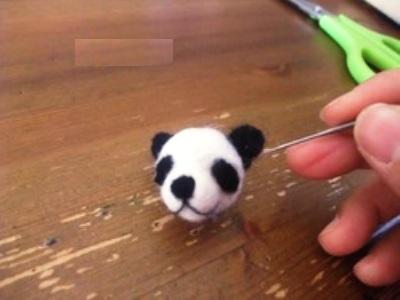
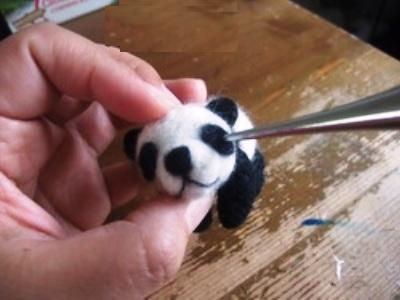
- Eyes of a panda paint with soot or black powder paint, shading her finger. And to create the ears use black wool, piled in a small oval. With a needle, attach the ears to the head.
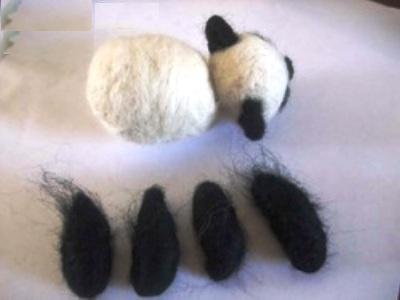
- It's time to start felting our little bull's calf. Use white wool for this. The band of wool about 25x5 cm in size, fold into the shape of the egg, fluffing the fibers along the edges. Then use a needle to seal the part. The larger the needle size, the faster you will make the body. You should get a tight elongated oval, one end of which leave a little fluffy.
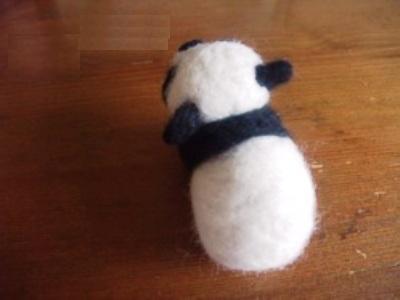
- Connect the body to the head with a needle. Proceed to felting the panda's paws. Use for this purpose a wool of black color (equal cloths of a wool in the size 10х3 sm). Give the details the shape of elongated ovals.
- Attach the paws to the body. Try to stab the needle deeper, so that the paws stay firmly. After that, using a small amount of fluffy black hair, decorate the teddy bear with the place of the connection between the head and the body.
- At the end of this stage of work you will get such a wonderful bear cub. It remains only to pick up plastic eyes for the toy, and glue them in the center of the ovals that you drew with soot.
Printed application
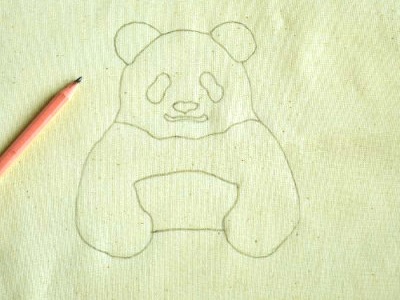
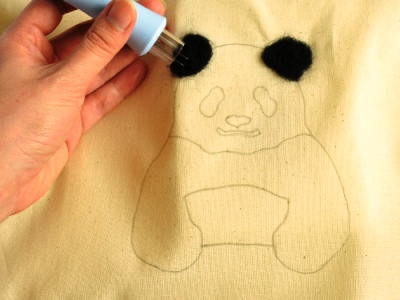
Want to get an original accessory or decorate a sweater with an unusual applique? A nice bear, made in the technique of dry felting, can easily cope with this task. Transfer the image of the panda onto the tracing paper or directly draw the bear on the fabric.
Divide the wool into fibers and start driving them into the fabric. If you do not have a special felting tool, use a normal needle. It will take a little longer, but the end result will be the same.
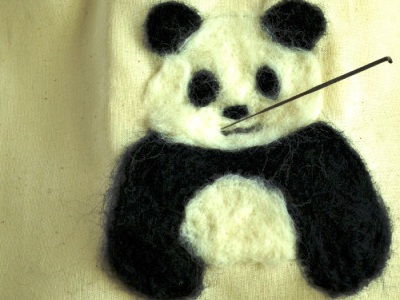
Similarly, fill the remaining parts with white hair. A thin thread make a mouth. From thinly twisted into the filament of fibers make a contour between black and white details. In this simple way, you will achieve a clear distinction between black and white.
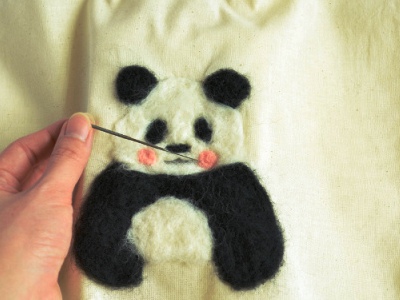
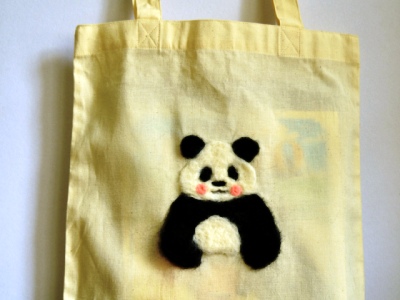
To revive black and white printed applications, make panda pink cheeks. To do this, fluff a small amount of wool pink. Once again, use a needle along the entire application to drive the sticking fibers of the wool. An excellent decoration for ordinary and unremarkable textile bags is ready!
Of wool, you can pile and many other interesting toys .