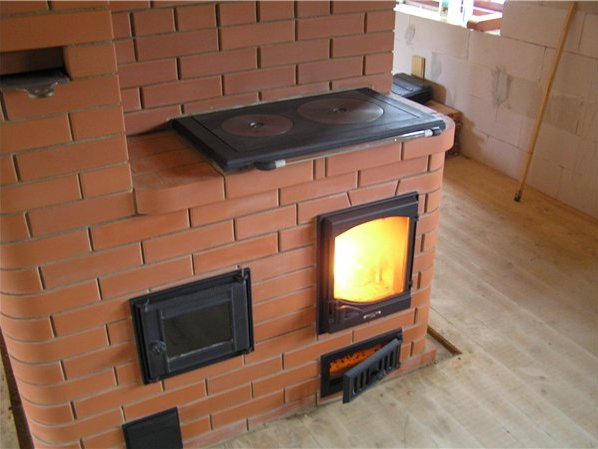
The furnaces are divided into several types according to their functional purpose. Small stoves for dachas , made with their own hands made of bricks, are limited by the function of cooking. The constructions more heat the living quarters in the cold. To keep the stove holding the heat longer, it is recommended to place it in a built-in inner wall, next to it or in the middle of the room. Many owners prefer the combined options, when a cooking appliance is attached to the heating furnace.
Building a brick oven with our own hands
- Tools and materials.
- Preparing the foundation for construction.
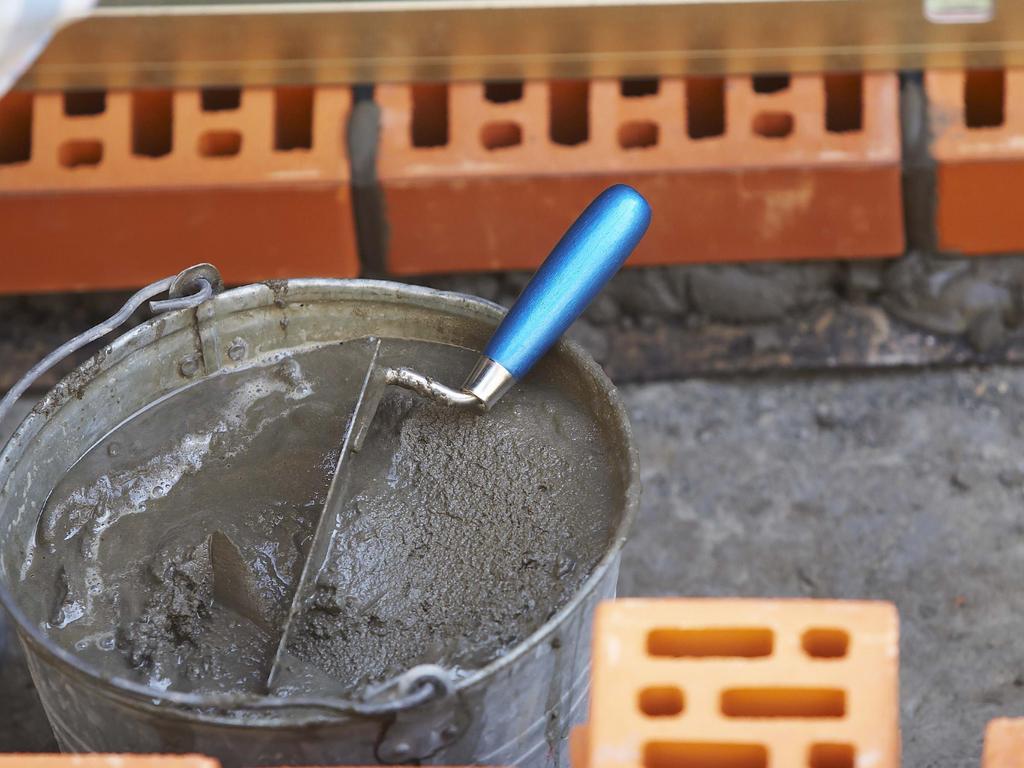
- We prepare clay-sand mortar for masonry or buy it in the store. Before its preparation, the clay is soaked for 24 hours, mixed, then add sand. The solution must have sufficient strength and toughness.
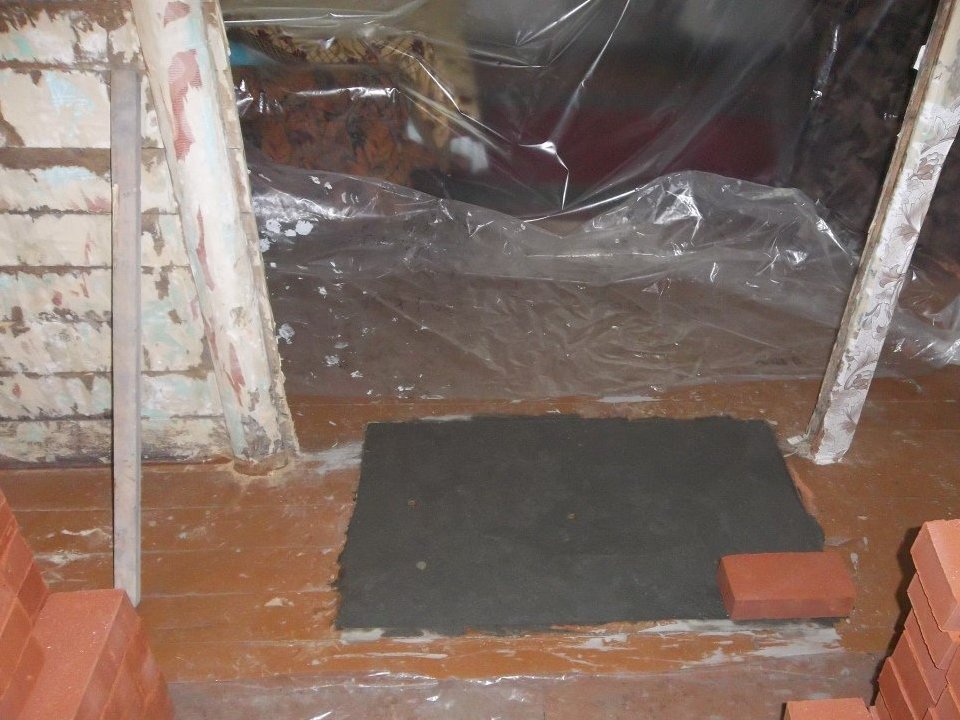
- We make waterproofing of the foundation with the help of roofing felt.
- We lay out the base of the furnace. Internal bricks can be bought of any quality, since they do not affect the combustion, but from the sight they are hidden by the outer layer of the masonry.
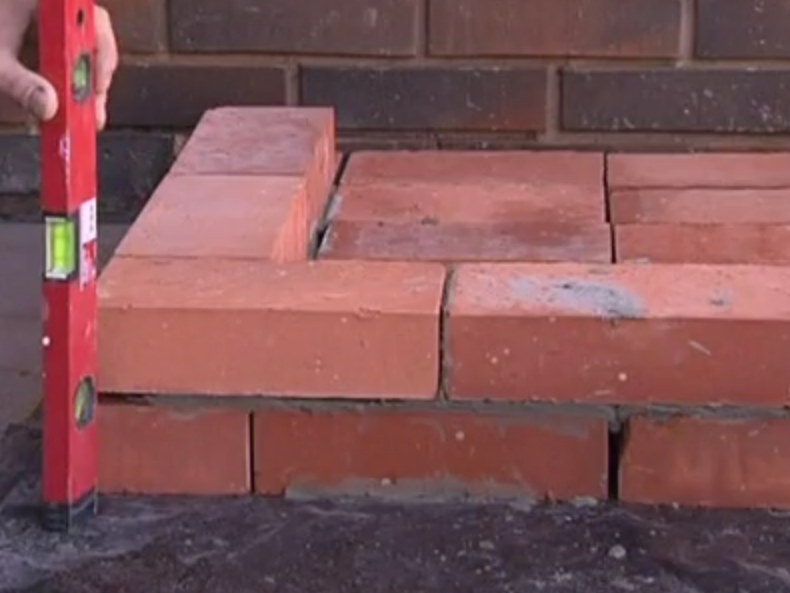
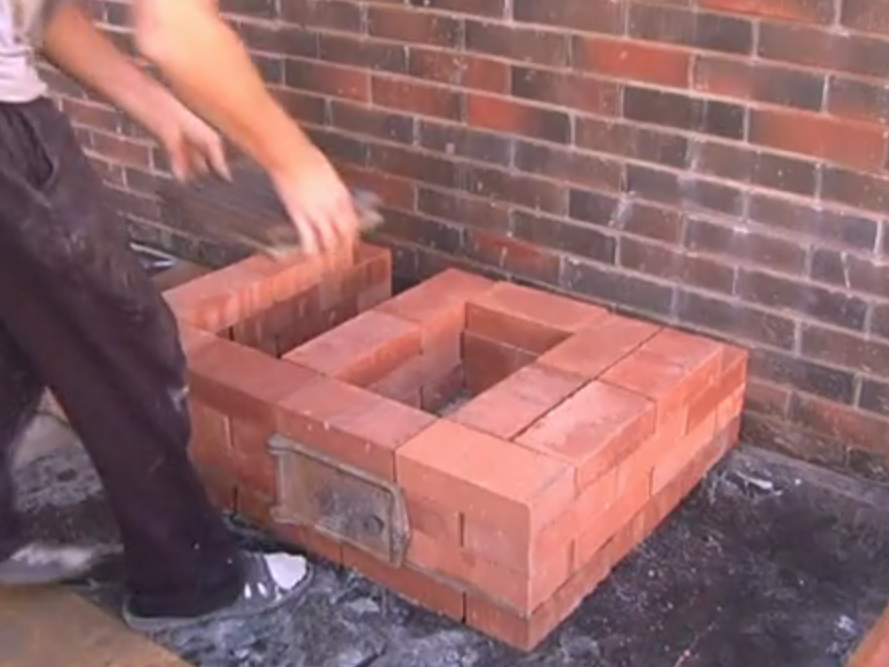
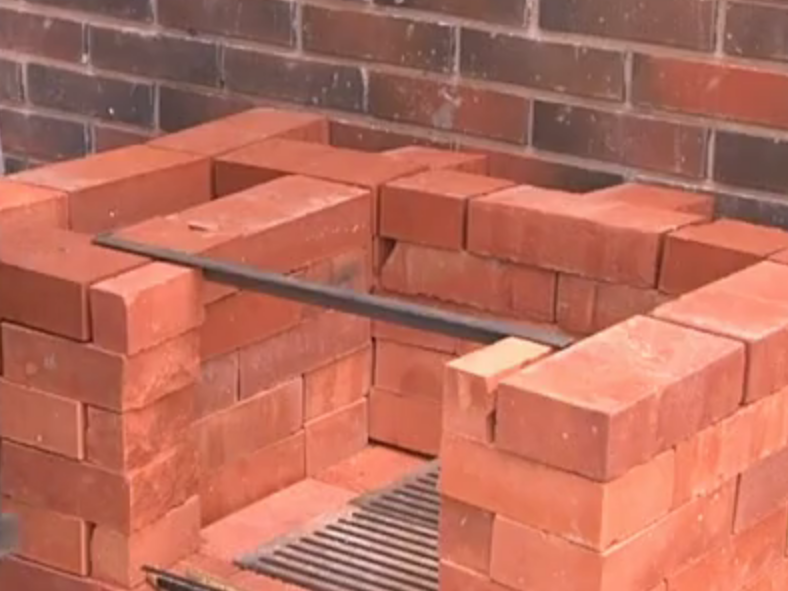
- We build an ash pan, which forms the first two rows. To achieve a close fit of bricks in the masonry, we use a rubber hammer that expels air bubbles from the solution. If this is not done, the seams during the furnace will begin to crack. We work so that the thickness of the joints is within the range from 3 to 8 mm. We control ourselves with the building level.
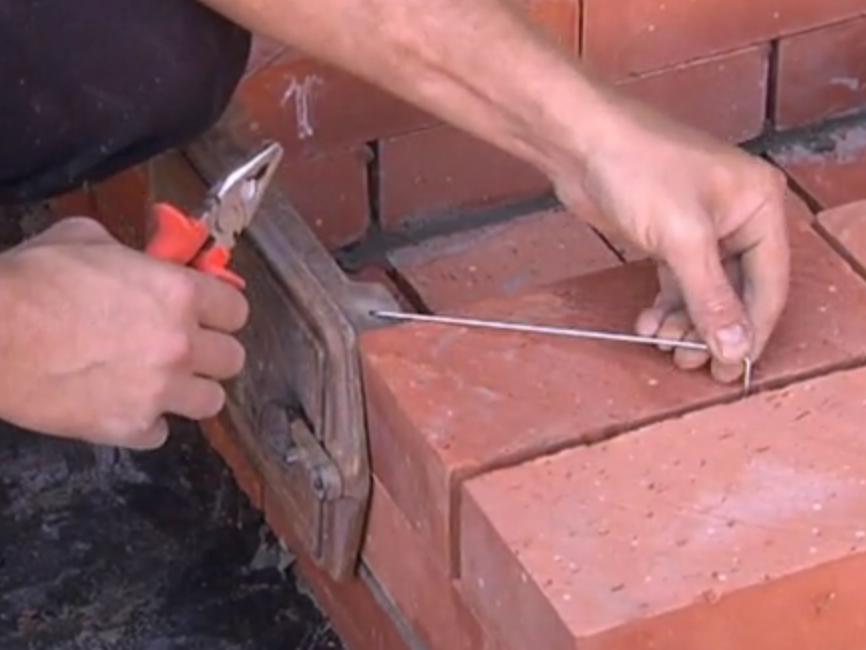
- We put the door and the door in the doorway. They are installed on a box of stainless steel, the length of which should be such that there is no air sucking.
- We fix the doors on the masonry with the help of steel wire.
- On top lay another row of bricks.
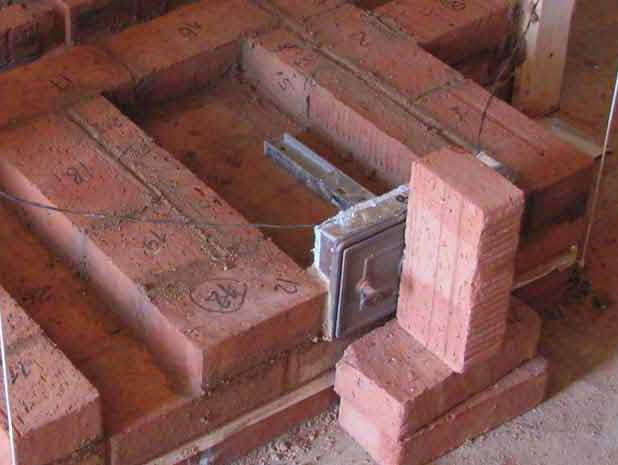
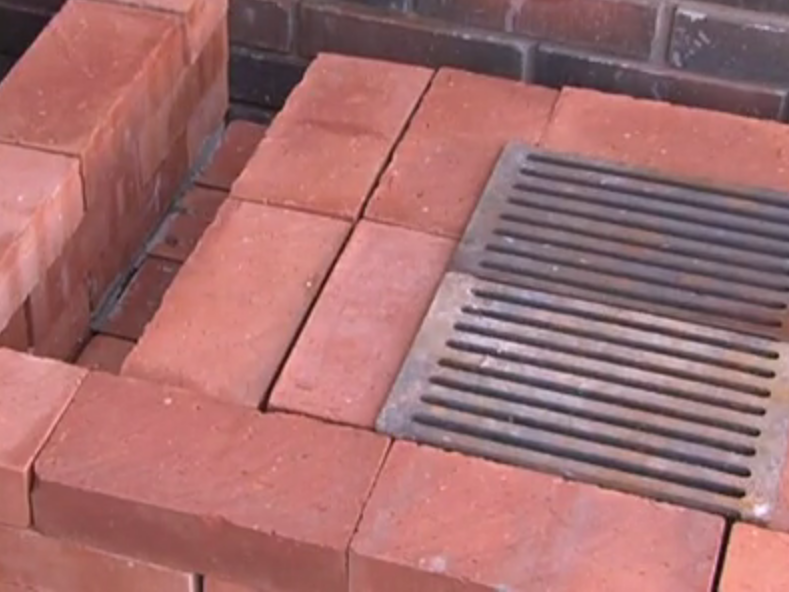
- Install the grate. During the masonry strictly adhere to the scheme, since the passage of hot smoke, which heats the brick, depends on the channels. Before installing the grate with a grinder, cut out for him a niche 1 cm wide around the perimeter of the grid to create a thermal gap. The presence of bricks and masonry it on the solution is not allowed. If necessary, the grate should be free to be removed and installed.
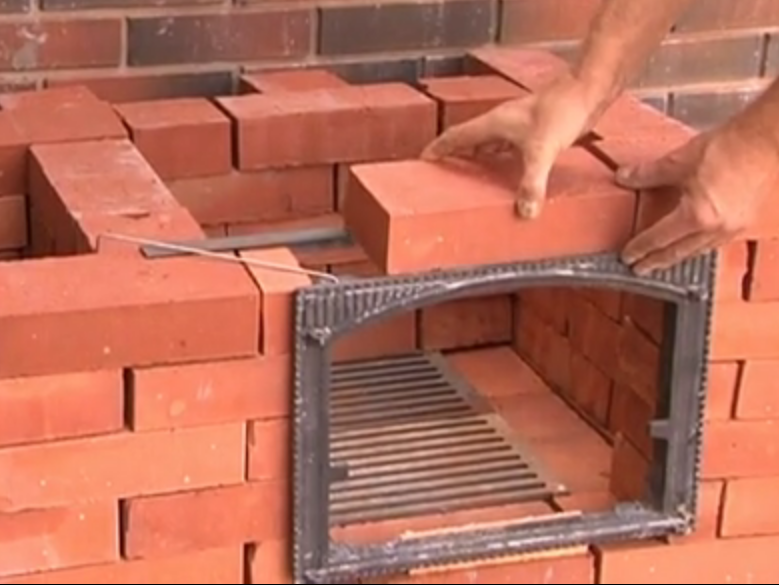
- We proceed to construct the walls of the furnace. We use firebrick to work.
- We install the door, designed specifically for furnace heating. We fix it like an iron door with steel wire.
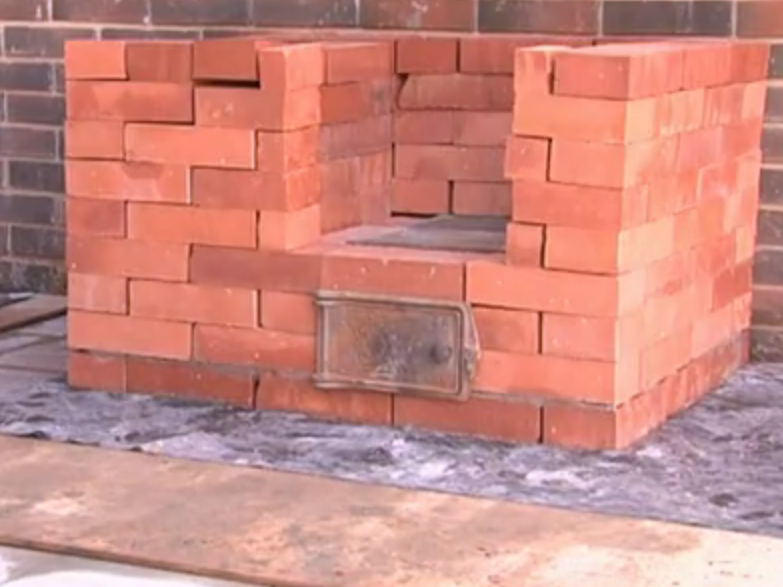
- Over the door lay another row of bricks.
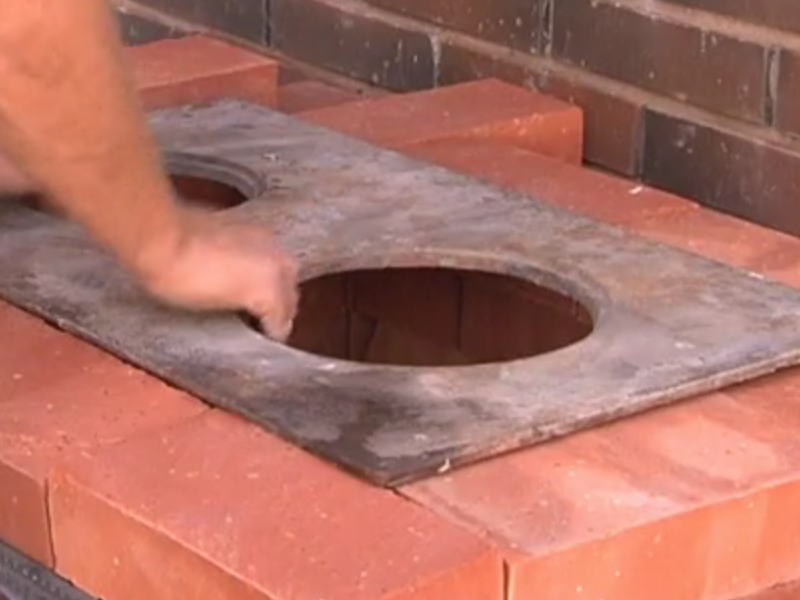
- On bricks we put a special cooking plate.
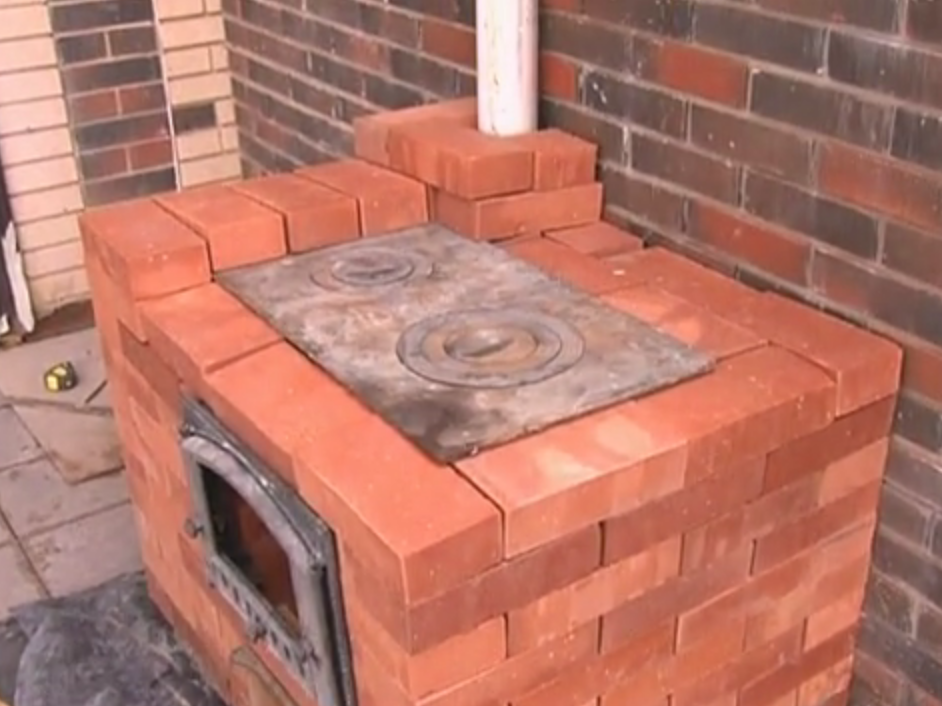
- At the last stage of the stroke we close the bricks and proceed to install the pipe. It is set on a number below, the product is closed tightly around the circle.
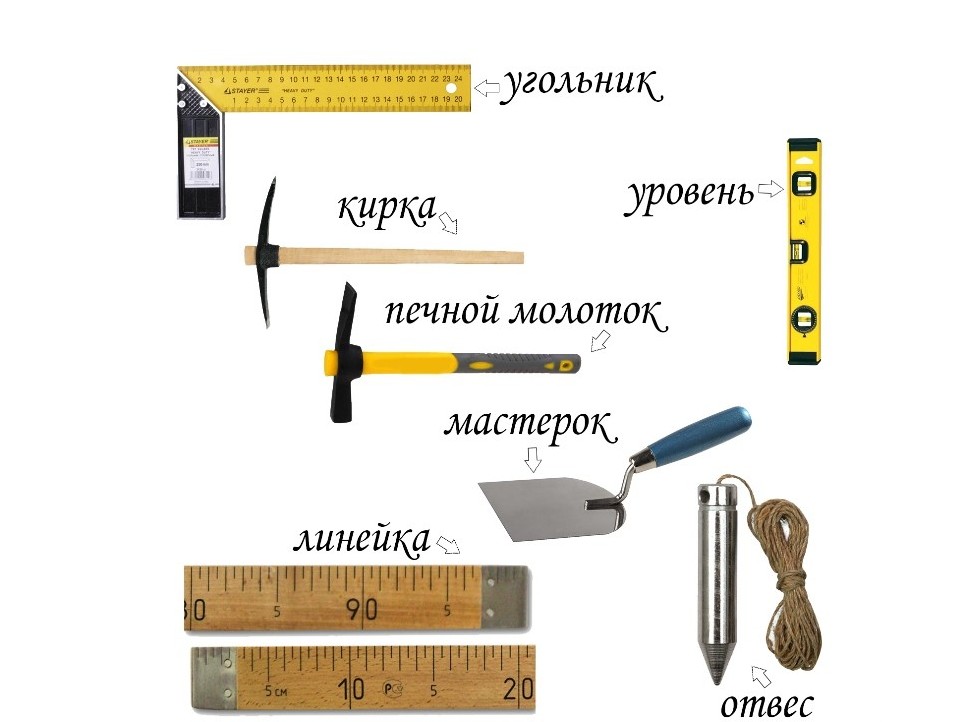
We buy chamotte and ceramic brick , sand, cement, crushed stone. It is necessary to purchase an ash-blast door and a fire door, a grate, a cast-iron plate. From the instruments we prepare roulette, level, trowel, solution tank, hammer, pickaxe.
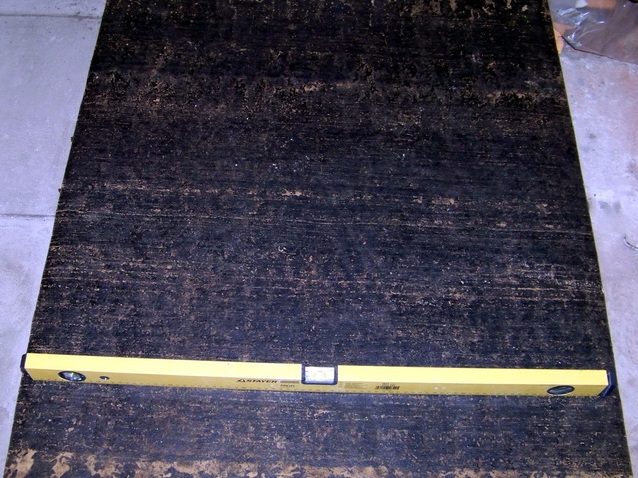
To do this, by the size of the oven, we remove the floor covering. The bottom of the excavation is a two-layer cushion made of sand and crushed stone (10 cm thick). Over the bottom fill the prepared mixture, which includes cement, sand and gravel. After solidification of the material, fill the surface with cement mortar, gently leveling it. We give time to withstand.
Many stove-makers, who have experience in building fireboxes, claim that making a brick oven with their own hands is a craft that is accessible to everyone. In doing so, they recommend to begin laying the masonry on a dry one. This process will help to avoid many mistakes in the future, such as the disassembly of several rows. In addition, the furnaces differ only in order schemes, having a general construction principle.