Rose - one of the most beautiful ornamental plants with a pleasant fragrant aroma . Rose is rightly considered the queen of flowers, she is the first in popularity among gardeners and just buyers.
As it turned out, chic roses can not only grow their various varieties on our personal plots, but also make their own. There are a lot of ways for this, and it's good that some of them are quite simple and do not require special skills and efforts.
Master class - roses from paper
We have picked up for you several master classes of crafts made from paper. And we will start, of course, with a simple option.
To do this, we will need PVA glue and paper squares. Squares can be any size (5x5, 7x7, 12x12 ...), this will depend on what kind of rose you eventually want to get.
Progress:
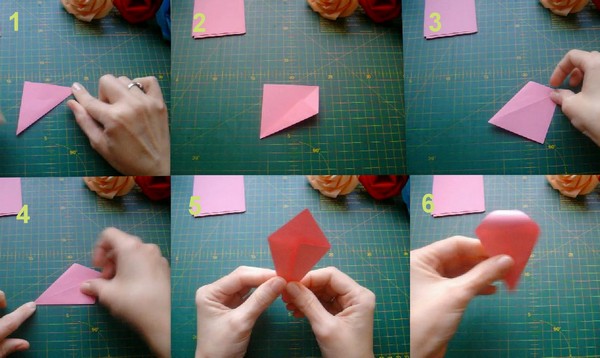
- Take the square and make a fold diagonally.
- To this line, bend the lower part.
- We turn the sheet and bend the other part to the central bend. You should get a detail, where one corner is from the front side, and the other - from the inside.
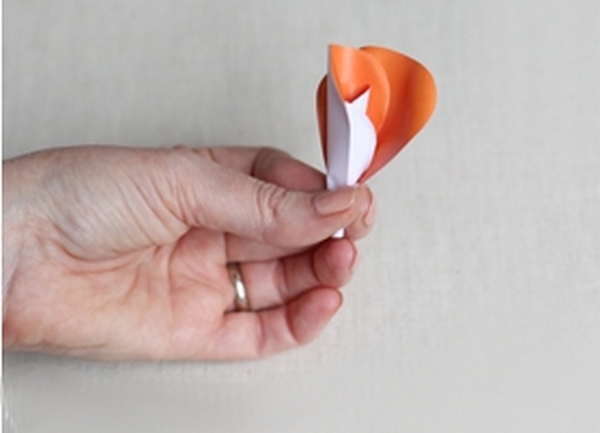
- Next, twist the top edge of the petal of your future rose.
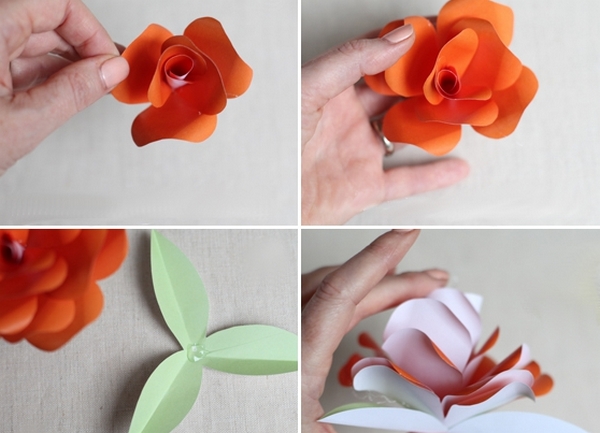
- Take our petals and connect each other literally with a small drop of glue.
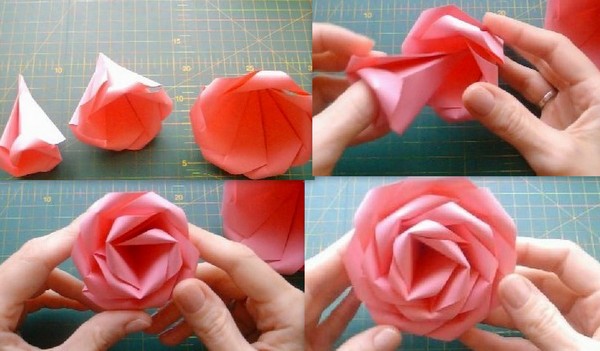
- Next, you need to connect the first and last petal to each other in a bud. When you have all three tiers, we connect them together.
It is better to make such a rose from three layers. The first - three petals, the second - five, the third - seven. When our petals are ready, the question arises, how to fold a rose from this whole paper. Very simple.
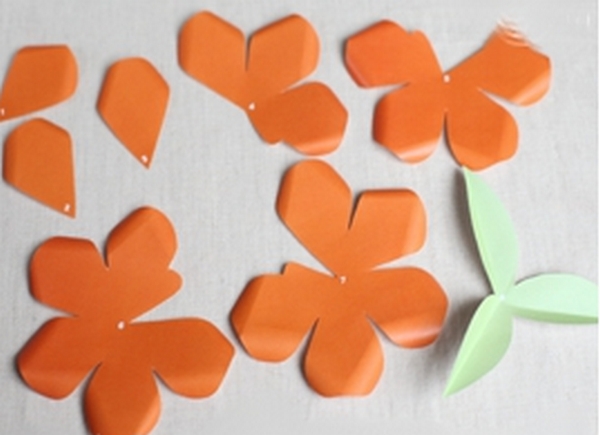
Rose from paper on a ready-made template
Another simple way to make a rose is to draw or print a rose pattern and cut out all the details. For your convenience on the template, all the petals are numbered.
Using scissors, each petal on both sides to twist, and each leaf bend in half (along).
| | |
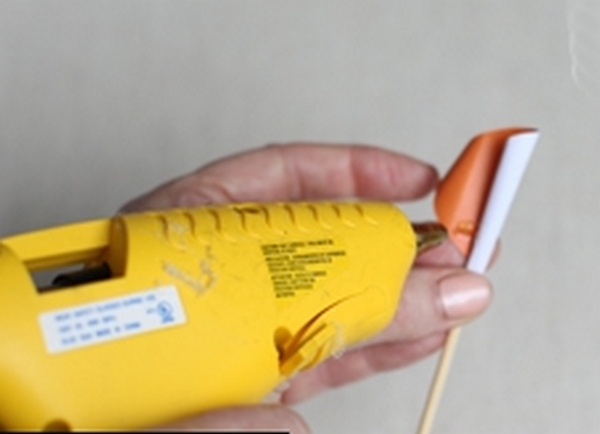
Then you can start assembling our beautiful woman. Take a toothpick and screw it on the petal under number 1 and secure with an adhesive gun or conventional glue.
Attach the petals 2 and 3 to the first petal.
Petals 4,5,6,7 curl in the form of a cone and glue one into one. Then merge the two half-buds together. And at the end we glue our leaves.
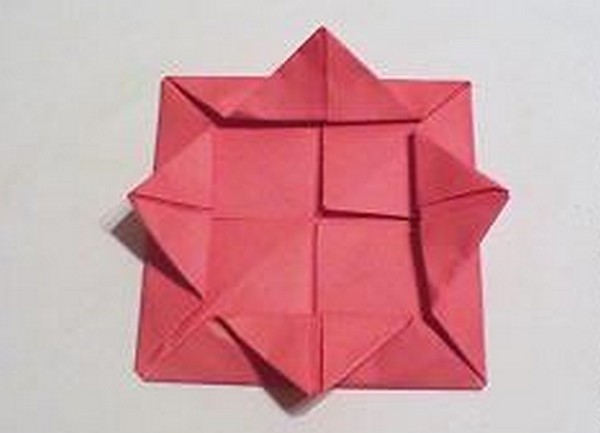
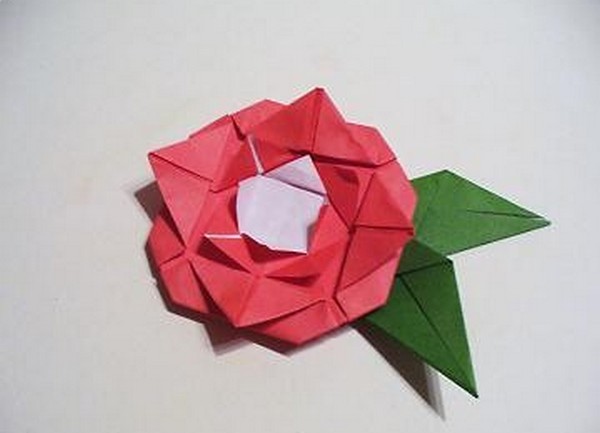
Rose from origami paper - scheme
And one more not so difficult master class of a rose from a paper. Such roses can decorate posters and postcards. Make them be able to anyone who has never even been addicted to origami.
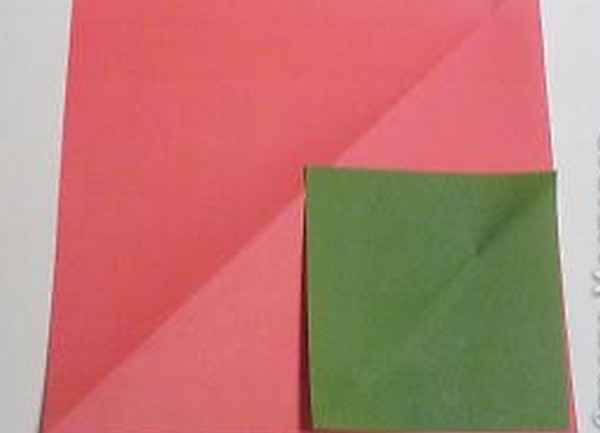
To do this, take two squares of paper. One is the color of your desired rose, and the second is green, for a leaf. The size of the square under the sheet should be ¼ of the square of the flower.
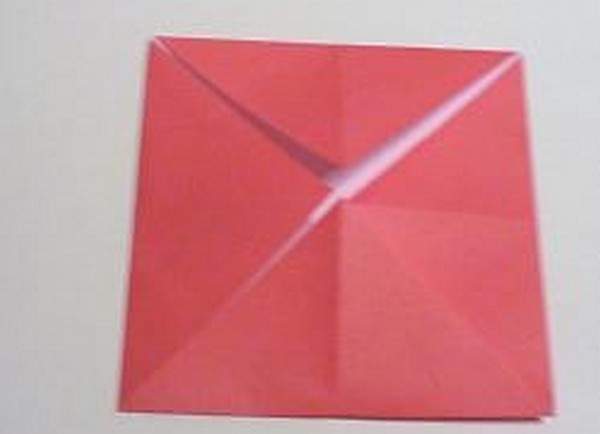
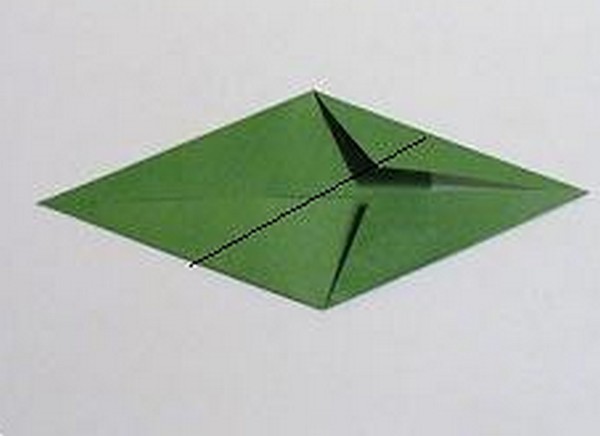
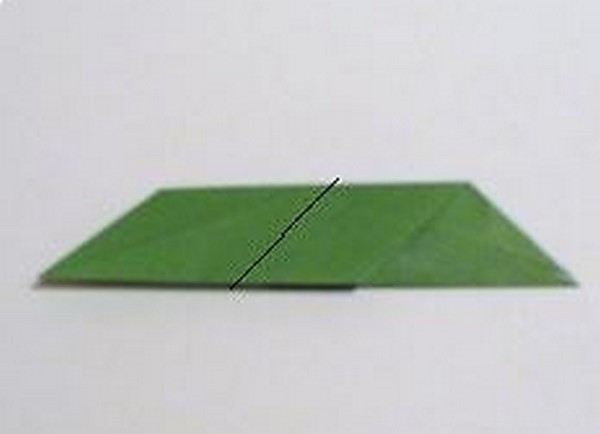
Take the square, make the bends on the diagonals in order to find the center of our roses. Further all four corners bend to the center of the square, you should get a blank as in the photo.
Then the corners again bend to the center, like the first time. At the workpiece, which we got, we bend the corners to the center for the third time. So we turned the corners three times. Pay attention - all the folds need to be ironed very well (press).
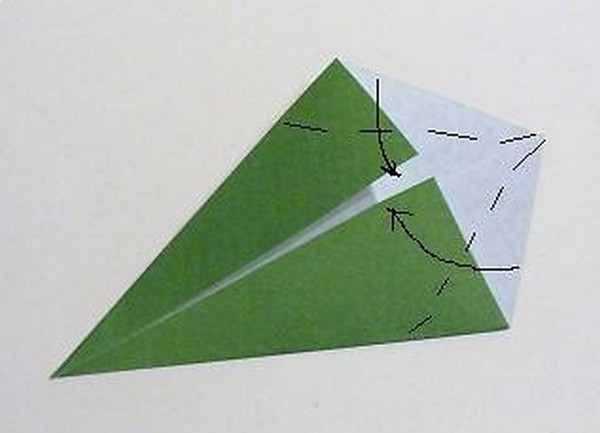
The bud is almost ready. Now we need to dissolve it. Take each corner and bend it from the center, do it so that the corner has gone beyond the limits of our workpiece.
Then bend the corners of the second layer, and then the third (last). Here is our bud and opened.
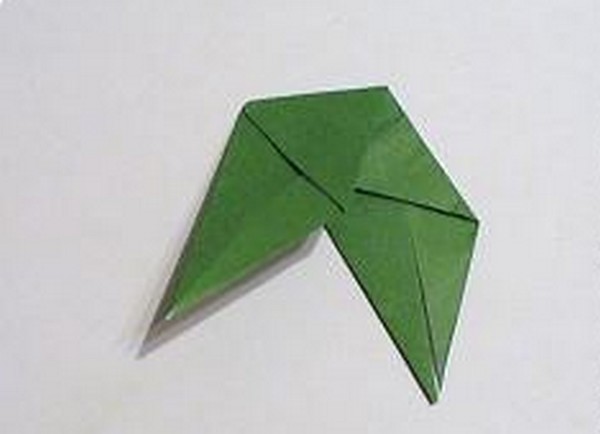
Now the sheet. Follow the instructions for photos 13-16, make a leaflet. When everything is ready to proceed to assembly.
| | |
| | |
We need to give the bud a more rounded shape. To do this, the lowest corners should be bent back. And to stick a leaflet.
We hope that the question "how is a rose made of paper" can no longer put you in a dead end.