From the most usual creme paper you can make very beautiful balls for the decor of the children's room . Let's find out how.
Master-class "Bulk balloons made of paper"
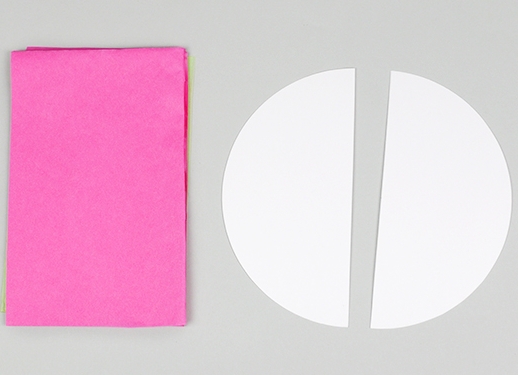
First, as always, prepare all the necessary materials so that they are at hand. To make a ball of paper you will need: a pack of colored corrugated or any other thin paper, two sheets of thick white cardboard, two colored felt-tip pens, glue-pencil, large scissors and a needle and thread. So, let's get to work!
- With the help of a circular draw a circle on the cardboard sheet. Its diameter should be equal to the desired diameter of the future ball. Cut the resulting circle into two parts. Corrugated paper, folded in a pile, cut into rectangles. For an average ball it will be enough to make 40-50 pieces.
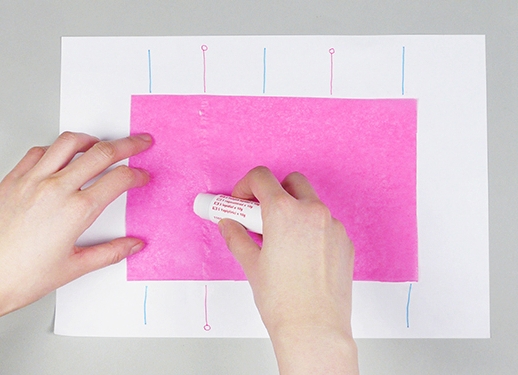
- On the second sheet of cardboard, place one of the colored corrugated sheets of corrugated paper. Use felt-tip pens to draw vertical stripes at regular intervals on the sheet. The number of cells on the finished ball depends on the number of these bands and their density. Special requirements are not here - try several different options to understand which one you like more.
- Moving from one mark to another, draw the vertical lines marked in blue in the figure. This should be done with a glue stick, holding it slightly at an angle.
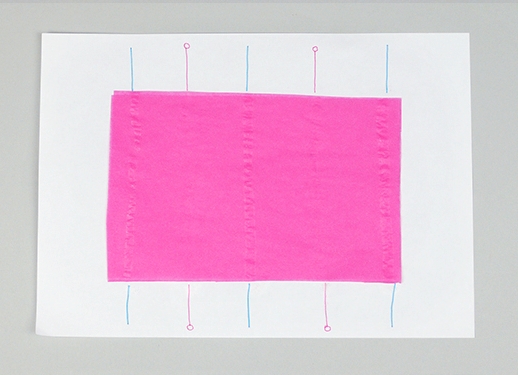
- Then take the next sheet of corrugated paper and repeat the procedure, this time connecting the bands marked with pink. So you need to process all the rectangles you have. Fold the glued leaves with a neat stack.
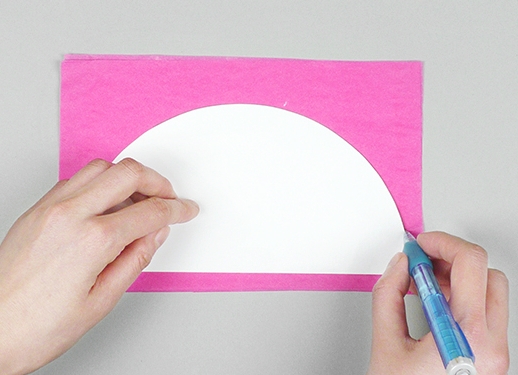
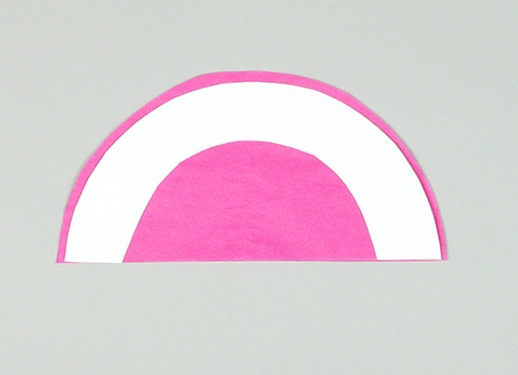
- On top attach one of the cardboard semicircles, press down so that the top layer of corrugated paper is glued to the cardboard, and outline it.
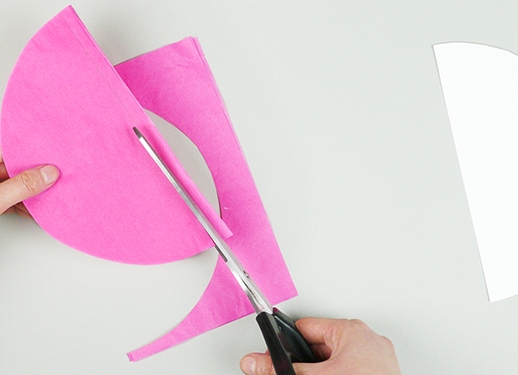
- On this line you should cut the future ball folded in half. Use large and sharp scissors, as there are many layers.
- Cardboard is necessary for gluing the ball. And that it was not visible on the finished hand-made, it needs to be slightly disguised. To do this, on the other hand, glue the second semicircle not completely, but pre-cut it in the form of the letter "c".
- In the corner of the craft, make a hole (gypsy needle or awl), and then pass a thread through it. Do not over tighten it, otherwise your ball will not open.
- Sew a second corner. One of the threads can be left - for it you can hang an artifact if this simple ball of paper is used to decorate the room. In this case, the thread must be, first, long enough, secondly, strong and, thirdly, to match the ball in color.
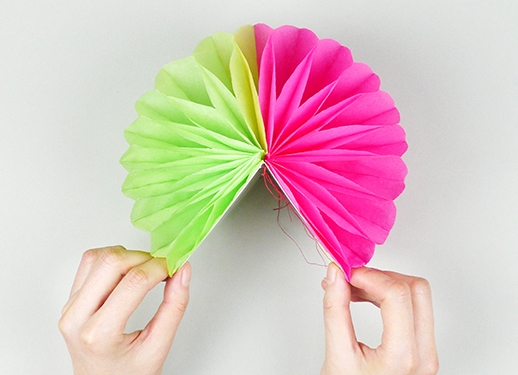
- Now comes the most crucial moment in the work - you need to open the ball. Take the hand-craft for both cardboard sides and gently spread them apart. Act very carefully so as not to tear the thin corrugated paper. If you have correctly completed steps 3 and 4, then you will not have any special problems with opening the ball (which is why it is so important to use a fresh glue stick). If the individual parts are not glued together, you can glue them in the course of work.
- This is how your ball looks at this stage. The cells from which it consists are the non-glued places on your rectangles from point 4.
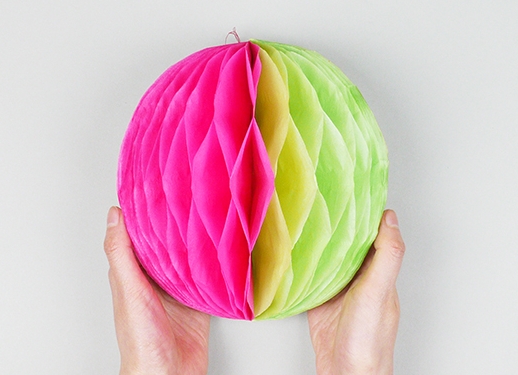
- Cardboard joints must be glued together, so that the sphere becomes whole and completely colored. As you can see, it was quite easy to make a ball of corrugated paper.
- Such two- and even three-color balls can be made for decorating your living room or a nursery. Similar crafts of different sizes and colors will also be very appropriate to look like Christmas decorations.