Fans of holiday homes will certainly have to think of a decorative well. In addition, it can be like a real well , with a deep concrete pit, and just decoration decorated with flowers. Often, a decorative well is installed in the dacha, transforming an unremarkable area, but you can also use it for a garden, placing it in a small grove of lush fruit trees.
In the article, we show how you can make a decorative well yourself from a tree.
How to make a decorative well for a garden?
In the master class we will be engaged in the manufacture of a conventional wooden decorative well. However, with a strong desire, the reservoir can later be made of it. So, in order to make a decorative well, we will need:
- wooden boards, preferably ash;
- a jigsaw;
- Sander;
- hand saw;
- nails;
- a hammer.
Having prepared everything we need, we can start work.
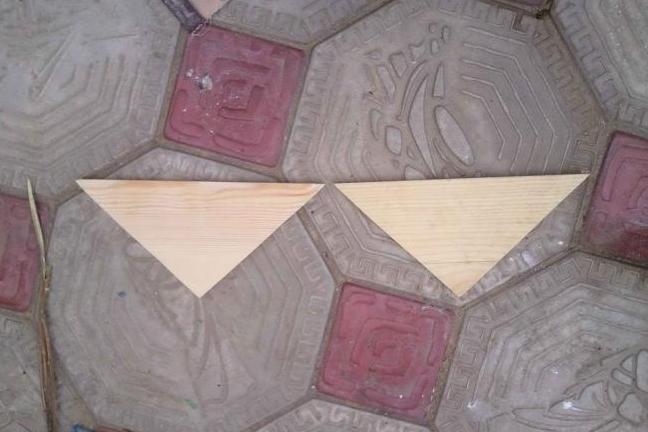
- Let's start with the simplest. Cut out two triangles from the board for the sides of the roof of the well. The dimensions of the triangle are determined based on the desired dimensions of the future product, we cut out the blanks 80 cm long and 65 cm high.
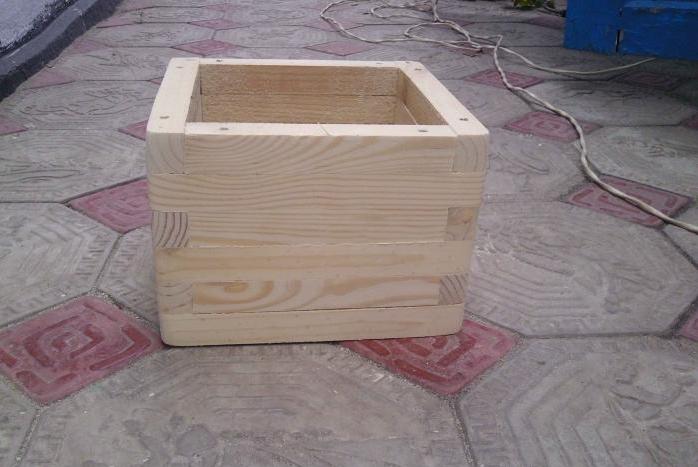
- Now we will manufacture the main part of our well. To do this, we cut the boards with a length of 1 meter and 80 cm using a hand saw. The width of our boards is 15 cm, we needed them in height 6. In total, we need to prepare 12 pieces of 15 cm x 100 cm and the same size of 15 cm x 80 cm.
- Let's proceed to assembling the base of the decorative well. To do this, we need a hammer and nails, preferably a size of 10 cm starting from the bottom, we fold the base in the manner as shown in the figure. Adding the first row, fix our design with nails. So continue until we add six rows.
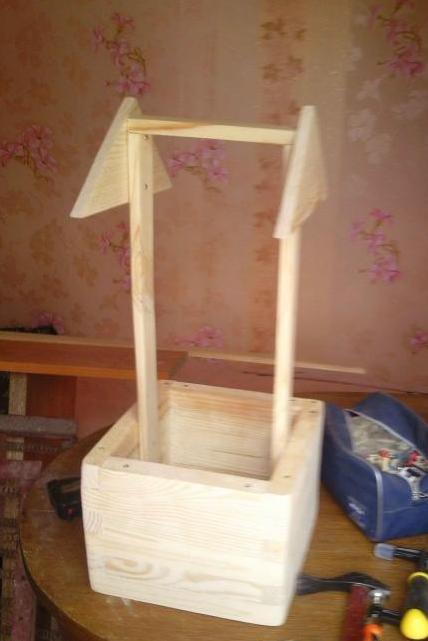
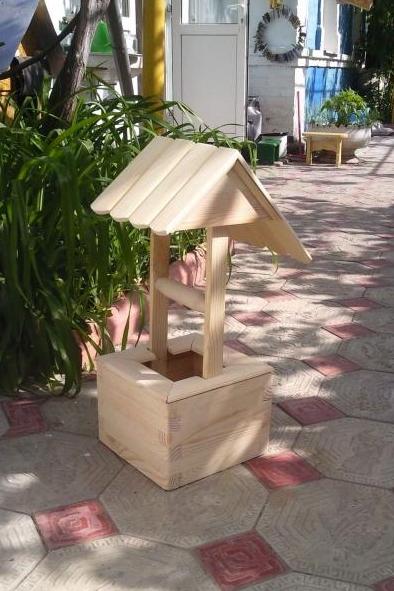
- Next, we need to prepare two boards with a height of 1.5 meters. We choose the width from our own preferences, on the one hand, the narrower the board, the better the decoration will look, on the other hand, the design should be reliable. We took as a "golden mean" a board with a width of 15 cm. We nail it to the bottom of the bottom of the well for greater strength. Similarly, we establish the second same board opposite the first one.
- Then prikolachivaem top board of the same width, connecting two tall supports.
- Now, take two triangles made at the beginning of the master class, and attach them to the sides of our construction.
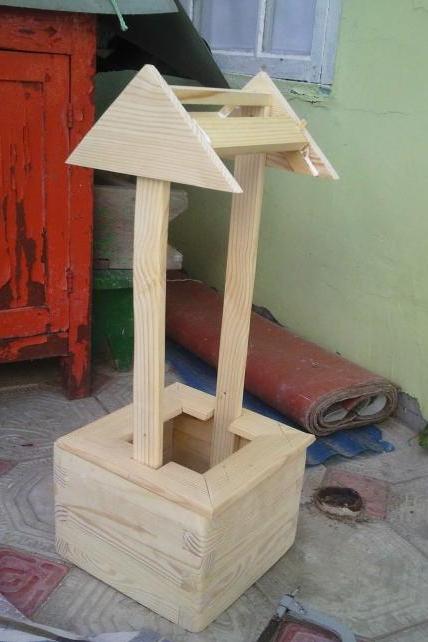
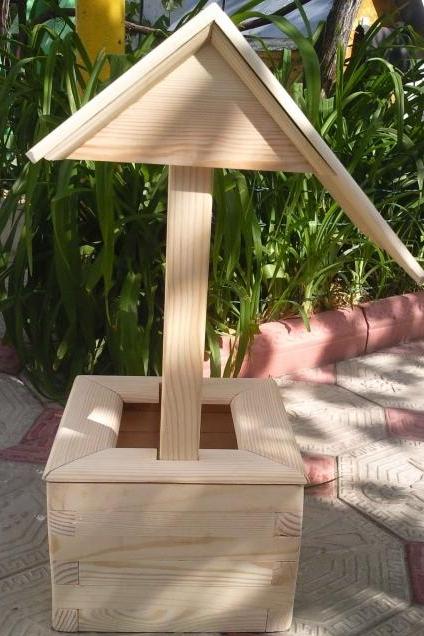
- Next, we'll take care of the sides for the well. We take a board 20 cm wide, using a jig saw to smooth out all the corners, grind it well and cut it under the supports. After this, we fix the construction with nails as imperceptibly as possible.
- Then take two wide boards and make the bar under the roof in the manner shown in the picture.
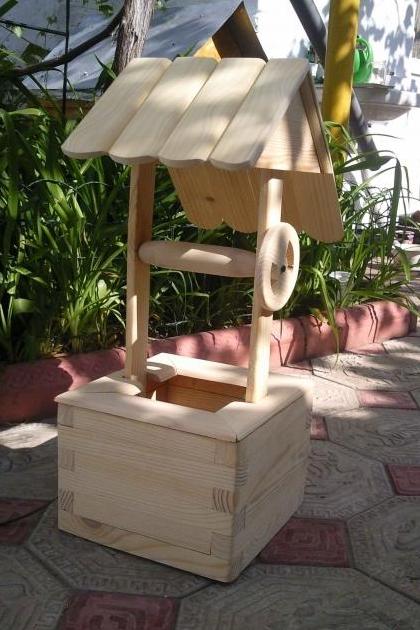
- Finally, we will manufacture the roof. Cut out 4 boards measuring 20 x 80 cm and 4 more boards 20 x 66 cm. Using a jig saw we round the edges, we cut all the corners and carefully grind them. After that, we will pin the boards to the slats and get the finished roof.
- There was the final moment - the wheel with the shaft. As a shaft, take the log from the log and jigsaw to reduce its diameter at the ends. From the wide board we will cut out the shape of the wheel and nail these elements with nails.
| | |
| | |
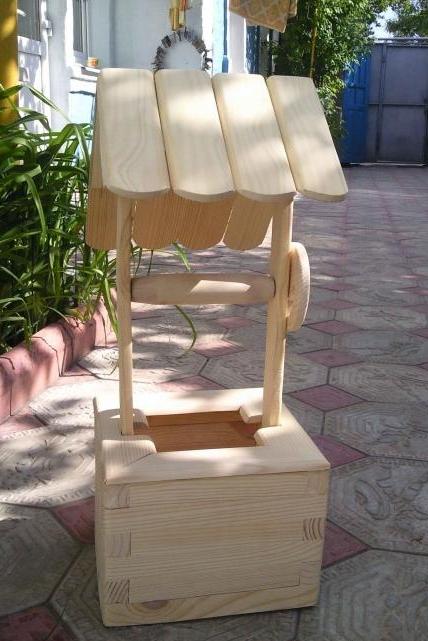
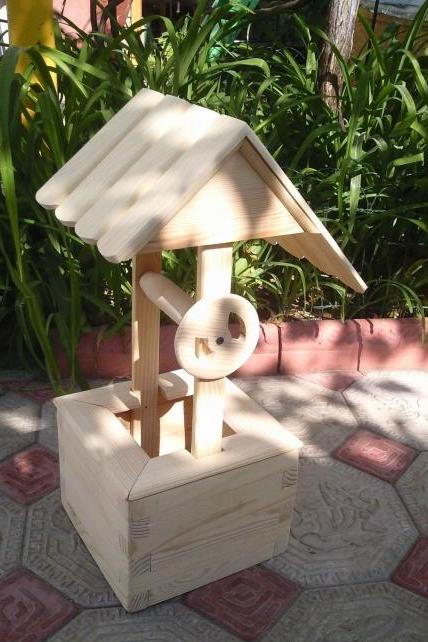
In conclusion, you can still grind our well, who likes the darker tone of the tree, you can cover the product with stains or special textured paint, giving it an original shade. We decided to leave the original color.
Now the decorative well, made by own hands, is ready. We enjoy the result of our work.
| | |
You can decorate the garden plot with other handicrafts that you can easily make yourself.