The older children become, the greater the problem, where to store children's toys? After all, there are so many of them and everything is necessary for playing your favorite shalunishka. We show you how you can make a bright and colorful chest for storing toys yourself, using materials that are in abundance in every home - a cardboard box, wallpaper cuttings and work accessories.
Children's Chest for Toys
To make a chest for storing toys, we need the following:
- a large cardboard box, of course, the size of the box for the future chest is determined to the best of the need, the packaging from the TV or air conditioning is perfect;
- roll of paint tape, you can use the usual, but preferably two-sided;
- the cut of the wallpaper is light color, the wallpaper should not be washable, as on top we will need to apply the paint, as is known, using washable wallpaper, we will have difficulties;
- a set of gouache paints.
Chest for toys own hands
So, having prepared everything you need, let's start:
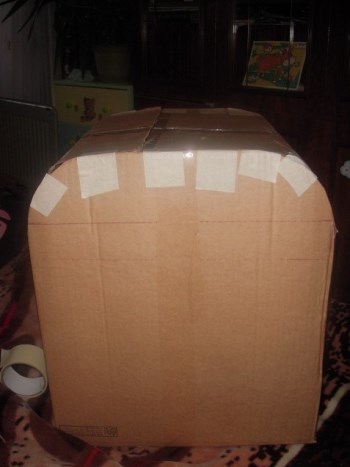
1. Prepare the box. With dimensions we have already decided, we will note the moment concerning color - there should not be large drawings and inscriptions on it. If you can not find a clean box, you can glue it with wallpaper or office paper.
2. Next, on the side walls with a pencil, let's mark the contour of the future cover, we determine the height of the chest, proceeding from the necessity.
3. Now cut out the contour and get the side walls of the chest.
4. Now bend entire walls of the box along the contours of the cut off walls and fix the structure with a paint tape and cut off the excess. We get the ready design of the chest, but you can not put toys into it yet.
| | |
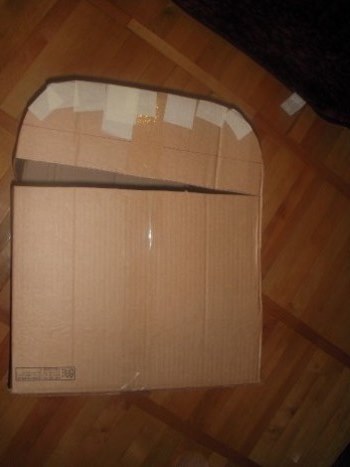
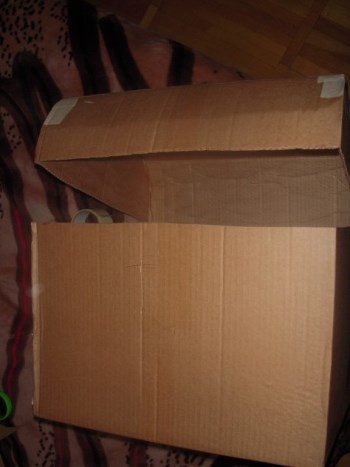
5. Now take a sharp knife and cut off the lid, outlining its contours in advance with straight lines using a ruler and a simple pencil. Leave the back wall not cut, this will allow the chest to open and close.
6. This is the construction of the chest we got. It remains to refine the look.
| | | |
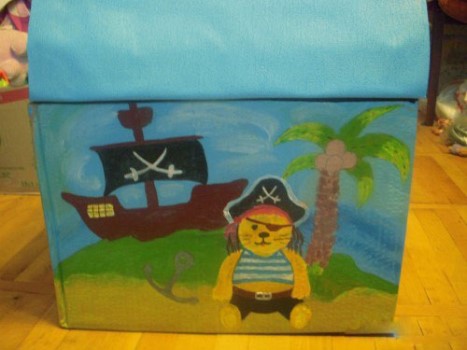
7. Let's get down to work on the look. We cut out cuts for covering the trunk lid from the wallpaper, the dimensions of the cuts are determined from the dimensions of the lid. Here is a cut for the lining of the side of the trunk.
8. Glue the cover with wallpaper using a double-sided adhesive tape. This is how our lid looks after the pasting.
9. Now we pick up a set of colors of gouache with a brush and turn the usual inconspicuous box into a pirate chest.
10. Cover the lid with blue paint, you can draw clouds.
11. Our pirate chest for storing toys is ready. We use it with pleasure!
| | |