Crafts in the quilling technique are subtle souvenirs made with thin strips of colored paper. This amazing technique is used both for children's applications , frames for photographs, paintings, and for voluminous crafts. In the master class we will show an example of a simple three-dimensional butterfly made in the quilling style.
Quilling a butterfly with your own hands
For the manufacture of butterflies in the quilling technique we will need strips of paper 3 mm wide, the length of the strips depends on the size of the desired product. Colors of paper are better to pick up the variegated, but flawlessly combined with each other. Also, we prepare a stencil or a quilling board for work, which can be purchased at handicraft shops or you can make cardboard from your own, as well as scissors, several pins, quilling tools, and a tube of glue.
Having prepared everything you need, let's get to work.
- First, we prepare the strips we need. If you have not mastered the quilling technique well enough, stripes can be made monochrome (one winglets of a butterfly turns out from one strip, in which case the winglet will be one-color), we will prepare four different colored strips of paper, gluing them in three different shades, from dark to light . The lightest strip in our case is half the length of the other two, it will be the center of the winglet.
- With the help of the tool, we cut the strips of paper into rolls, start to turn off the light side, then we knead them in the hole of the right size on the quilling board, for the upper wings we choose holes of smaller diameters, for the lower ones, respectively, larger, but the difference should not be too large. Now let's release the rolls, allowing them to turn around, then fix it with a pin, pressing the center closer to the circle, and with a bit of glue on one side. So we get eccentric rolls.
- When four butterfly wings are ready, we will make a calf. For the calf, we need to make two cones, and then connect them together. Strip the middle shade, wind on the instrument in a tight roll, fix it with a drop of glue, then gently pull the roll, giving it the shape of a cone. In the same way, we execute one more cone.
- Now take another paper strip of the same color, apply a thin layer of glue on it and connect the two parts of the butterfly's body.
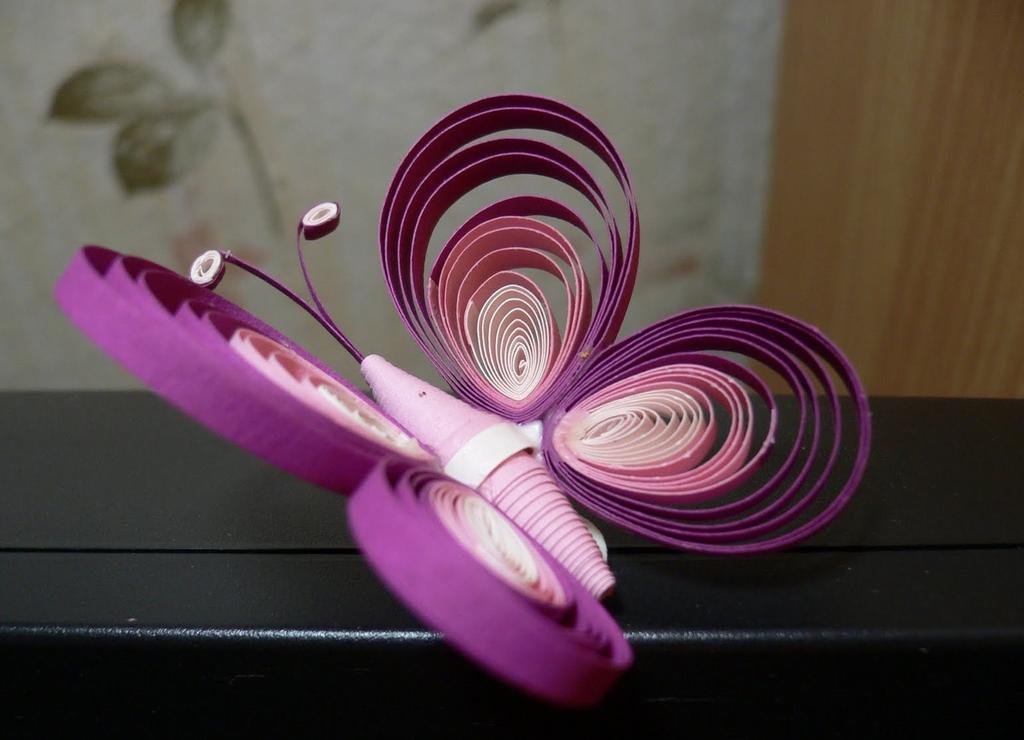
- Finally, we have all the details of the butterfly ready: the body, the two upper wings and the two lower ones.
- There remains one miniature, but very important detail of the butterfly - it is the mustache of the strips of paper. To do this, we need two short strips of dark shade and two medium light 1.5 mm wide.
- We glue the antennae, inserting them into a small hole in the upper part of the butterfly's calf. Now let's do light strips. We make two small eccentric rolls and give them a droplet shape. Carefully glue two rolls on the edges of the butterfly's antennae.
- It remains only to glue the parts of the butterfly's quilling. Work should be extremely accurate, so as not to spoil all the work at the final stage. Carefully apply a droplet of glue, in no case avoiding streaks, and using a pin, attach to the calf first one pair of wings, then the other. We pay special attention to the fact that the wings, right and left side, are not in one plane, but at an angle with respect to each other, which slightly complicates the work. It is more convenient to glue together parts of the body, fixing a butterfly's pin with a pin.
Our simple butterfly in the quilling technique is ready. It can become a decoration for a postcard, gift wrapping, an element of decor or simply a cute souvenir made by oneself.