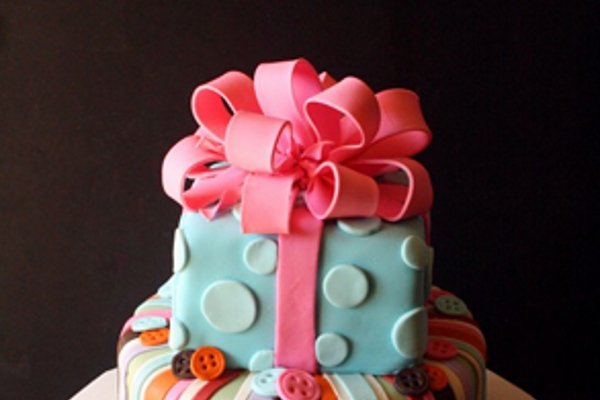
Such an element of decor as a bow is quite easy to make, and it will help in the design of the cake to completely different occasions. Bant will be appropriate and on wedding dessert , and a birthday cake.
How to make a bow of mastic - master class
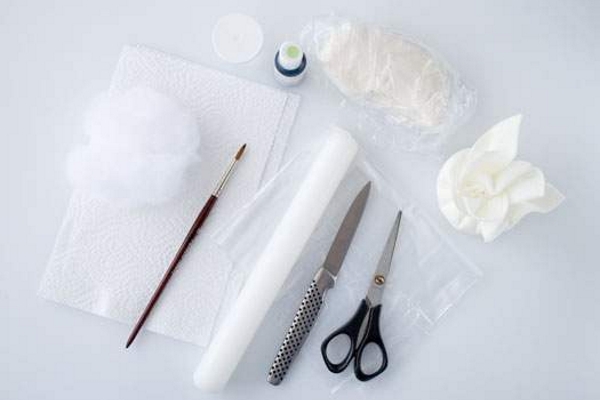
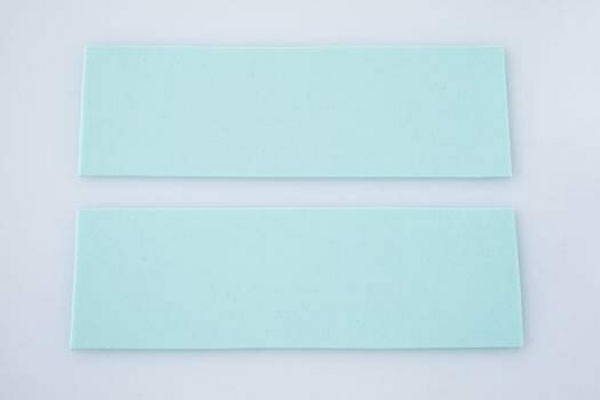
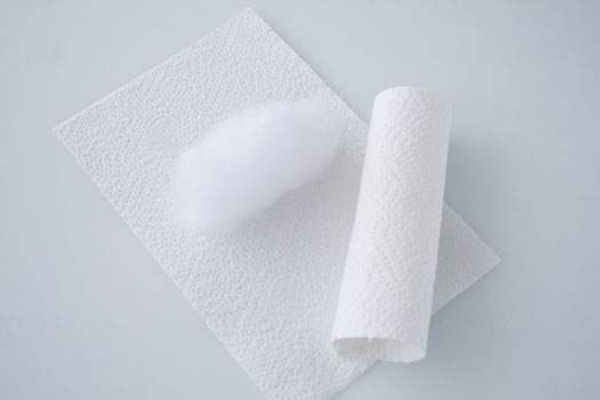
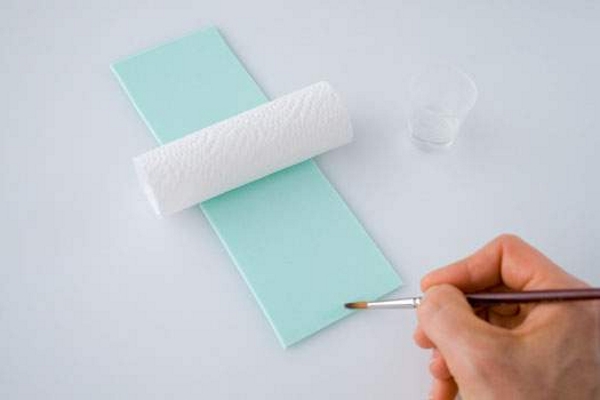
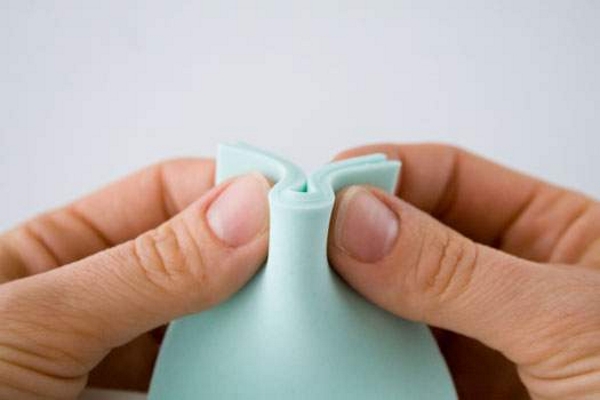
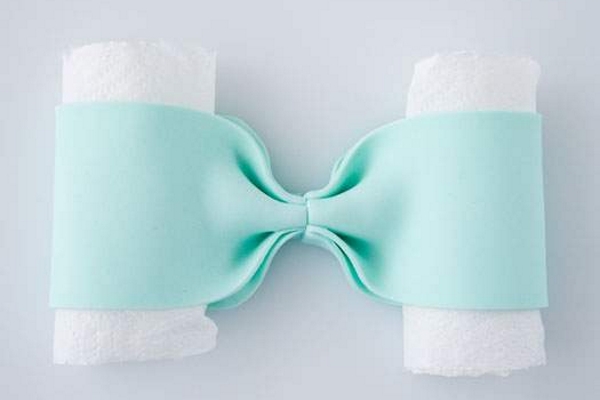
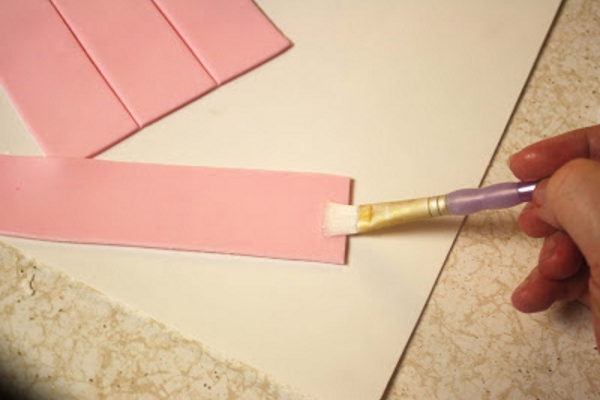
For the manufacture of this bow is useful all that you will find at home and of course mastic . We will roll it into a thin layer and cut out four identical strips. We need a cushion for the bow. To do this, we wrap in a paper towel or napkin a piece of cotton wool, you need 2 of these rollers.
| | | |
We lay the roller on the center of the strip, grease the edges with water and bend it in half, gluing the ends together. We form in the middle a crease, bending also the edges.
| | | |
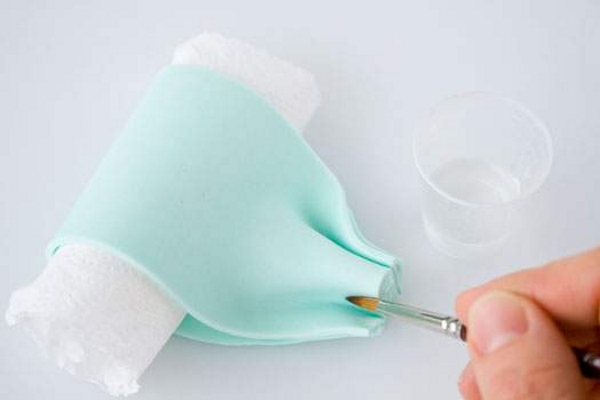
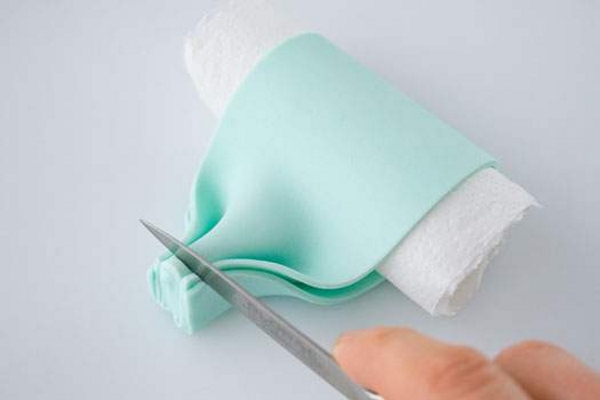
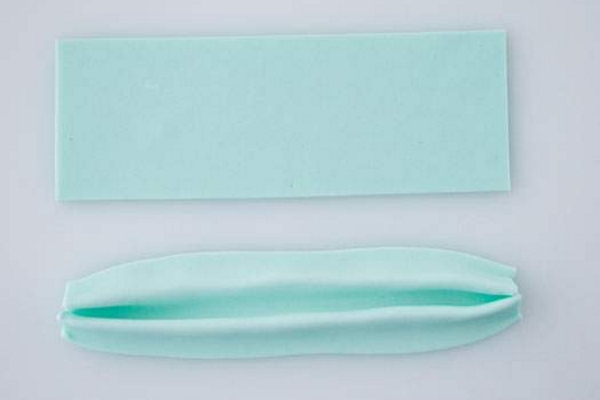
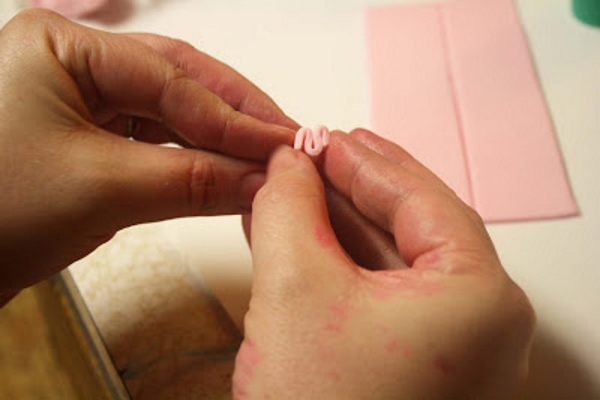
Bend the ends to the central crease. Cut off the unnecessary tail of the loop so that the cut is even. Doing all the same manipulations with the second strip, we get another loop.
| | | |
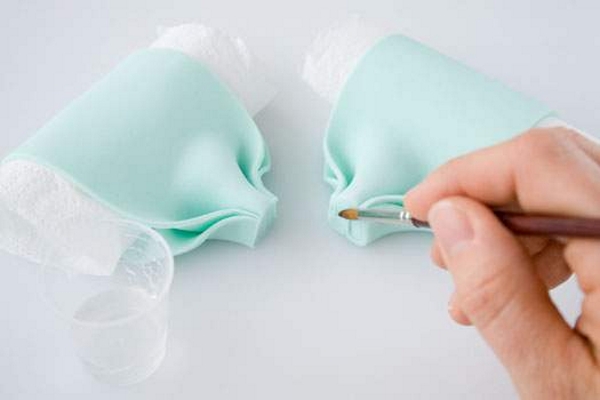
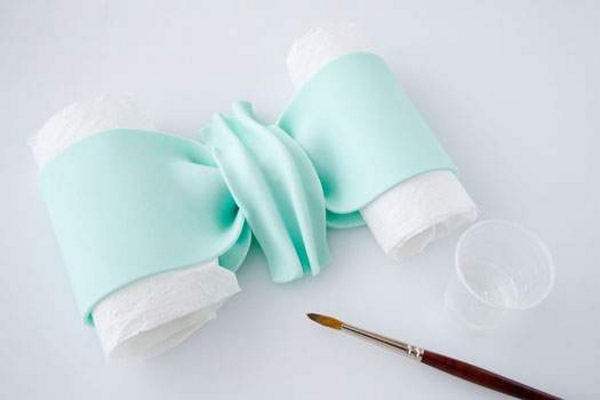
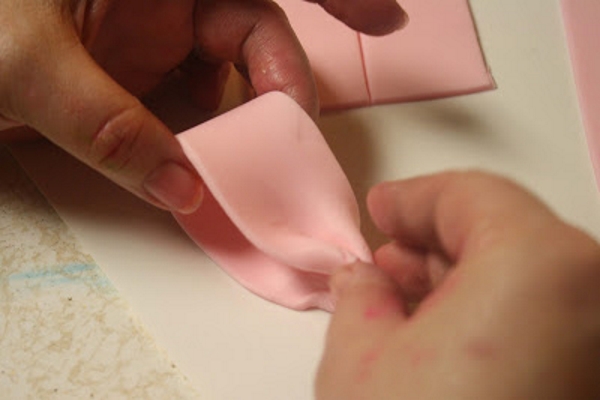
We glue the loops together. The third strip is bent along to get a notch, and the edges bend to it. The ends are compressed to the center, we moisten the junction of the two loops and lay a strip on top of the closing joint.
| | | |
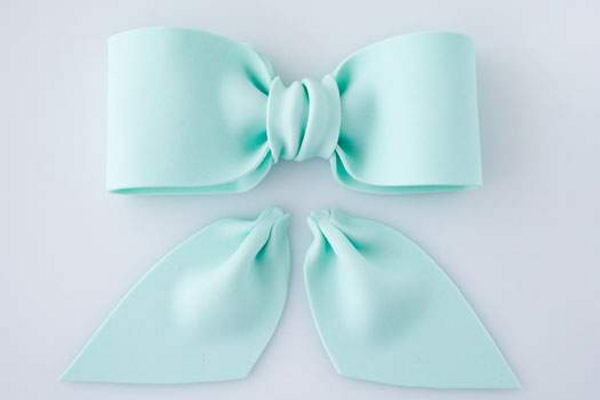
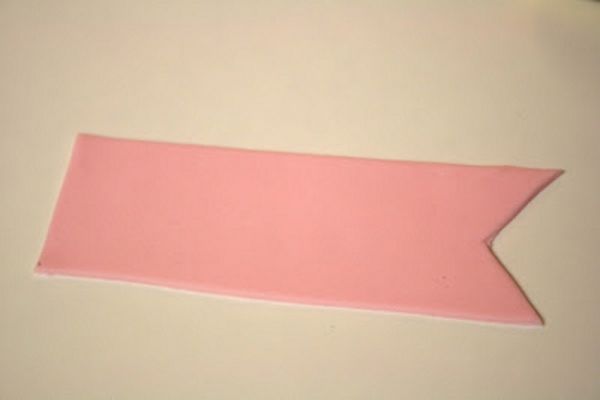
The edges of the central tape are wound back and glued together. The fourth strip is cut in half diagonally. Smooth the edges and glue the bottom of the bow.
| | | |
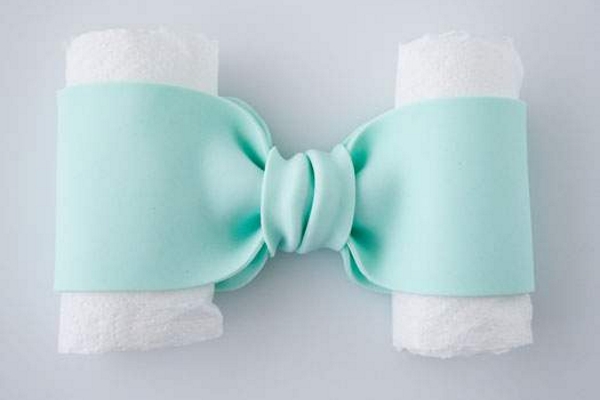
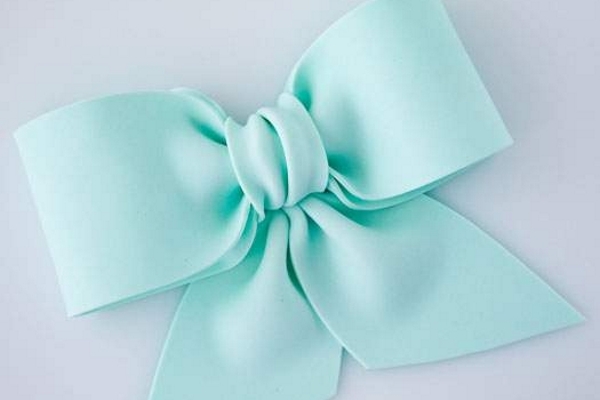
Before you attach a bow of mastic to the cake, let it dry for a few hours.
A large bow of mastic with your own hands
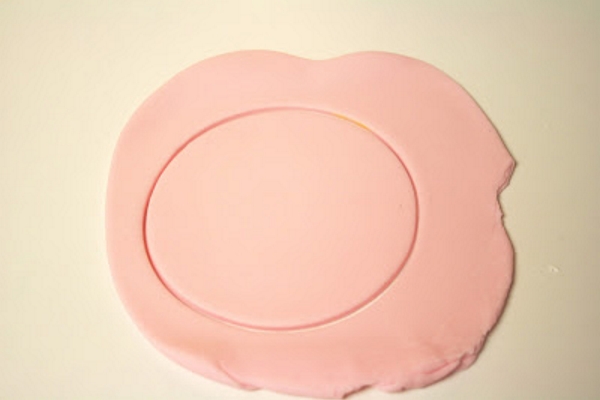
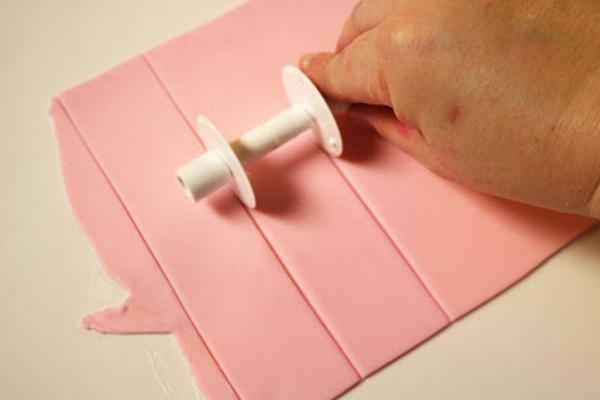
We will roll out the mastic with a thin layer about 0.3 mm, we cut out of it a circle with a diameter of 9 mm. The remains of the mastic are collected, kneaded and re-rolled, cut into strips 3.5 cm wide and 17 cm long. The remains are reassembled to be used for the following parts. A total of 12 identical strips are required. Lubricate the edges of the strip with water.
| | | |
We make a triple fold at each end, and then join the edges. From the remnants of the mastic we make two ribbons for the free ends of the bow. You can make more than two, but a long 7-12 cm.
| | | |
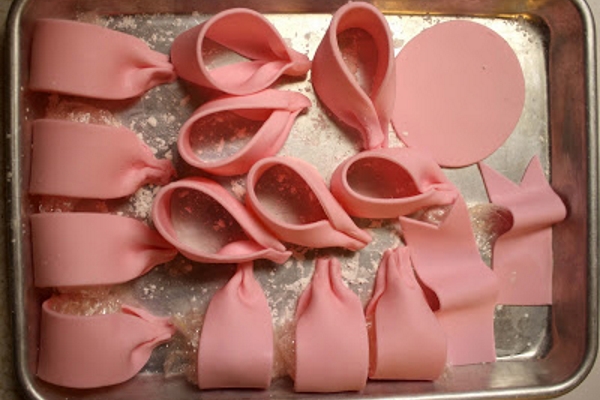
Now lay out on the tray, starch-strewn with our details. The first six loops put a layer under the walls of the tray, put the hank of the food film inside the loop so that the parts keep the shape well. The rest of the loops are placed side by side so that they do not have a flat side, like the previous ones. The end bands are laid, raising the edges and making a crease in the middle, we fix with the help of a film. You can immediately tear into a triple fold an even edge, so it will be easier then to fasten. Leave to dry for at least 12 hours.
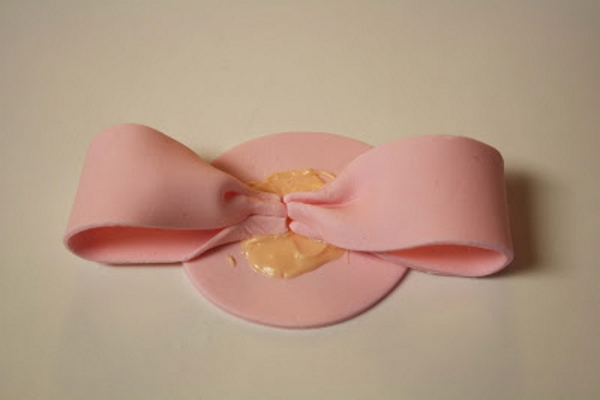
At the center of the circle, we apply melted white chocolate or glaze, quite a lot to glue the first six loops, those with a flat side.
| | |
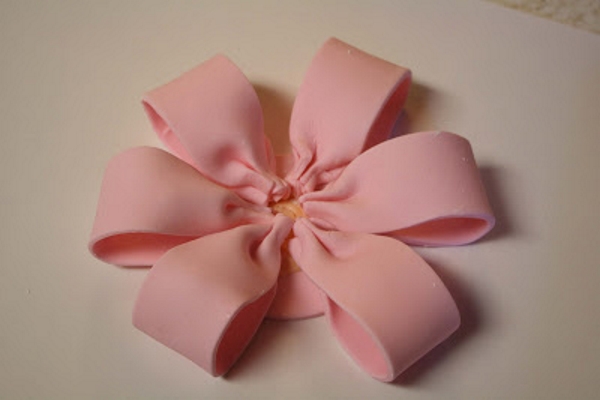
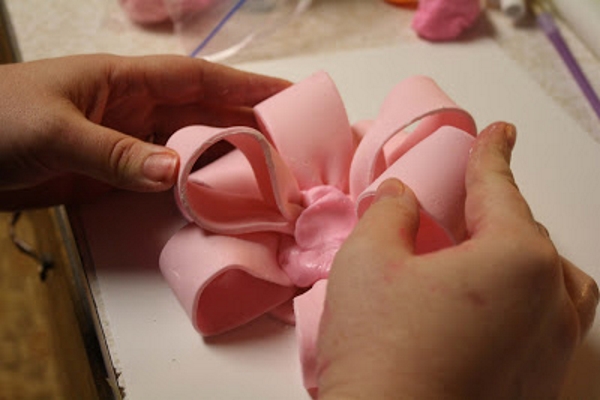
It turns out while the flat bow. Now take a ball of mastic with a diameter of about 5 cm and wet it well until it becomes soft and sticky. Then we lay it in the center and insert the other loops into it one by one.
| | | |
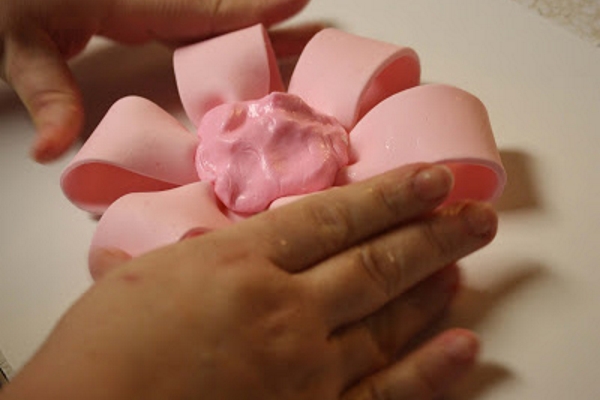
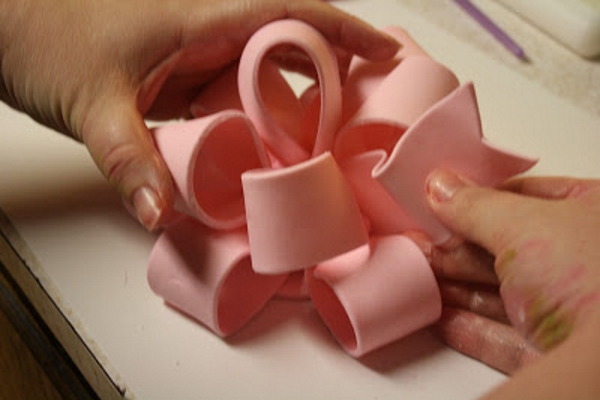
In the second row there should be five loops. They can be put directly, and on their side, so it will only be more interesting. The last loop is fastened directly to the center, and the end ribbons are inserted into the free spaces between the loops. We check whether the structure has parted, if necessary we correct and leave to dry for 12 hours.
| | | |