Everything new from abroad we take is quite warm. For example, the famous celebration of Halloween is celebrated today by young people at home. One of the most important attributes of this holiday is considered to be a pumpkin. What the craftsmen do not cut out of it. If you just try your hand at this art, then start safely with the most simple and not demanding special skills of sculptures. A pumpkin coach for Cinderella is a great way to spend time with a child and learn carving.
How to make a pumpkin coach?
First, look in the children's books for a picture of the coaches for Cinderella. This will simplify your task with decorative elements. You can decorate your craft with a pattern. In addition, in advance, consider what exactly you want to get in the end. In our case, we will make a candlestick-decoration, so that the size of the pumpkin should be appropriate. So, let's start creativity. The first step is to prepare all the necessary materials and tools:
- a small pumpkin;
- wire;
- plasticine or plastic;
- PVA glue;
- white paper;
- paint of golden and white shades;
- a contour of golden color;
- knife.
For beginners hand-crafted pumpkin carriage can seem quite a complicated process. First of all, this concerns excision. The larger the pumpkin you take, the easier it will work. It is also worthwhile to prepare several differently sized knives. Now consider a step by step master of making a pumpkin coach.
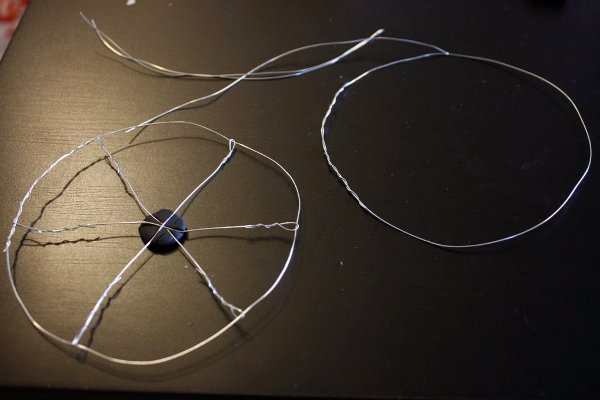
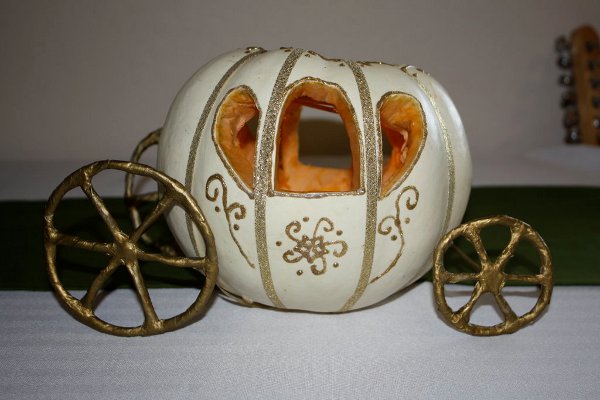
- The first stage of manufacturing a coach for Cinderella is the wheels. We take the wire and twist it into a ring. Then we cross a few more twigs and make spokes for the wheel. Remember that the two rear wheels are larger than the two front wheels. To ensure that the spokes are securely fixed, they can be additionally fastened with a piece of plasticine in the center or twisted together.
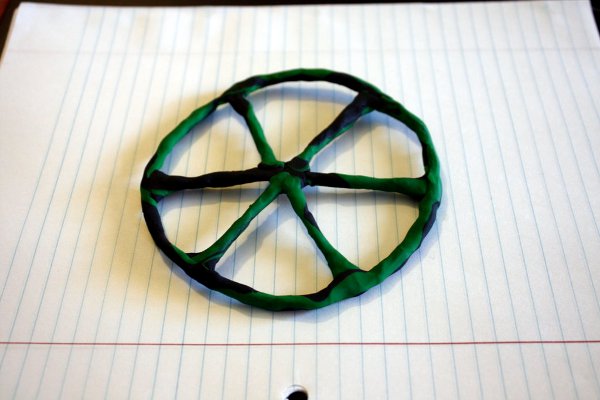
- Now each wheel is strengthened with plasticine.
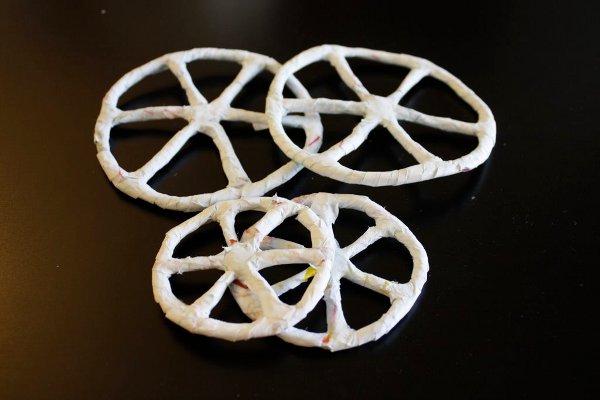
- We raise the PVA glue in water and use a mortar and thin paper to cover the workpiece with a layer of papier-mache. This will make the design more solid and reliable.
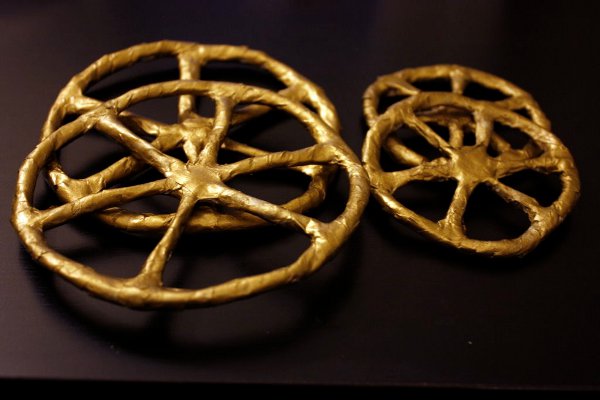
- Let the workpieces dry completely. It remains only to paint the wheels for crafting a pumpkin coach in golden color. We measure the approximate width of the pumpkin and cut the rod from the wire to make a shaft for the wheels. Instead of wire, you can take a skewer or something similar.
- If you've ever dealt with plastic, you can make wheels out of it. In this case, you can dazzle the whole structure at once and bake it. After cooling, remove and paint.
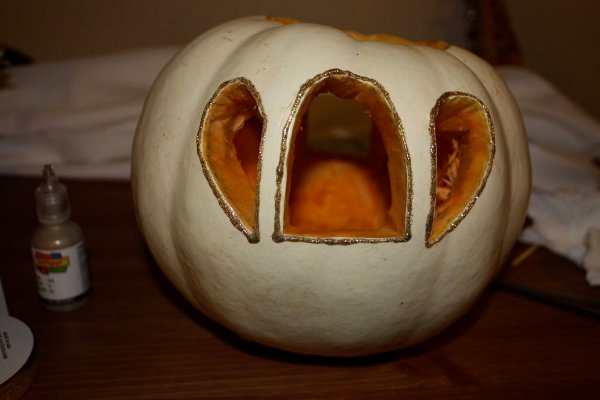
- Now let's get down to the basics. For work best suited white pumpkin, but you can take any other, using paint from a can of paint it in the right shade.
- How to make the windows of the pumpkin coach: we plan the place of the cutout, then gently cut the contour with a small thin knife.
- Then, with the help of any convenient means, we gradually remove part of the pulp. This can be done with a spoon.
- To the cutout did not seem too rude and sloppy, on the edge of the gold contour draw an opening. In this way we apply patterns and decorate our carriage. You can use thin ribbons or acrylic paint to paint the base and make it look like a carriage from a fairy tale.
- It's time to collect the details of the pumpkin coach with your own hands. For these purposes, you can use an adhesive gun. But almost certainly, this method of attachment is not reliable enough. It is better to use wire. It is bent and stuck in a pumpkin together with a shaft of wheels.
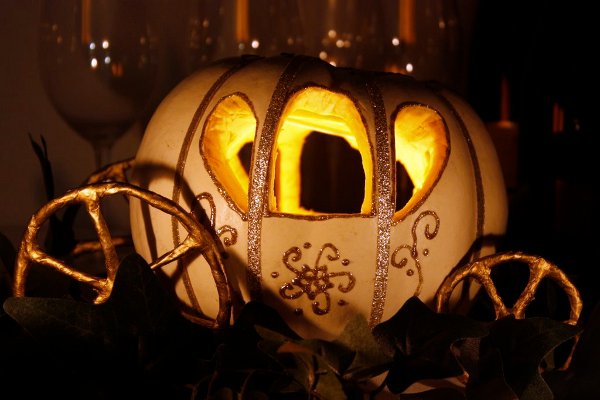
- It remains only to put inside the pumpkin carriage with your own hands a candle and you will get a fairy-tale candlestick and an excellent decoration of the festive table.
| | |
From the pumpkin you can make other interesting crafts , among them: a vase and a house .