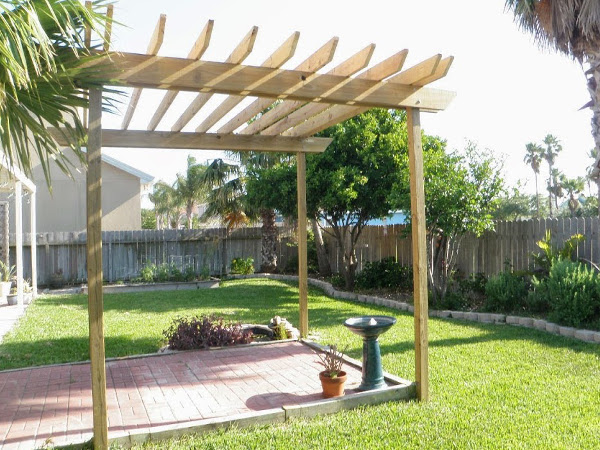
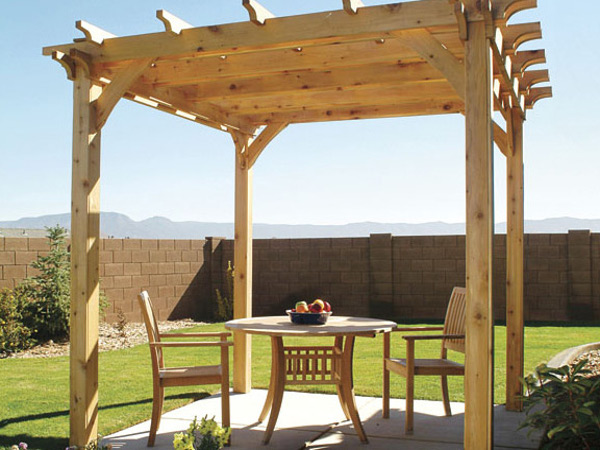
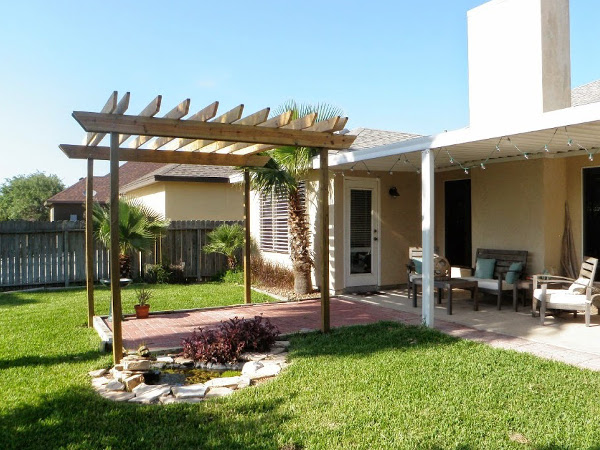
For arrangement of a cozy place on a country site for rest there is nothing better than a pergola . It is attached to the house, built separately and lined with lianas, equipping the place with a brazier. In short, a wooden structure will always be associated with rest and a measured pastime in the air. Making a pergola from a tree with your own hands can seem complicated. Really, it is necessary to put a lot of effort, but the result is worth it.
How to build a pergola with your own hands made of wood?
The first option provides for installation in a specially designated place. The site was previously prepared and concreted.
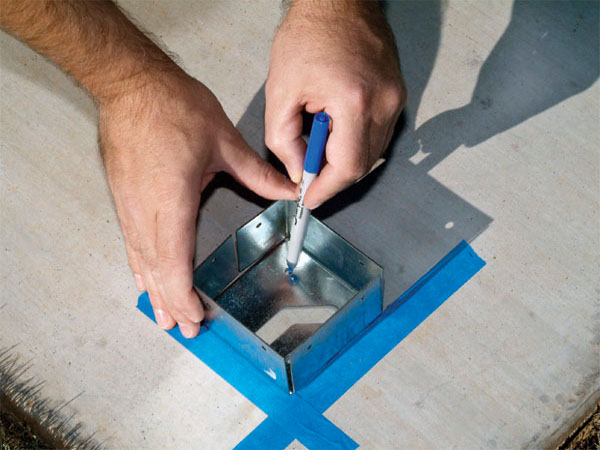
- First we establish the base. These are the places where we will install the racks, they will be the basis of the whole frame.
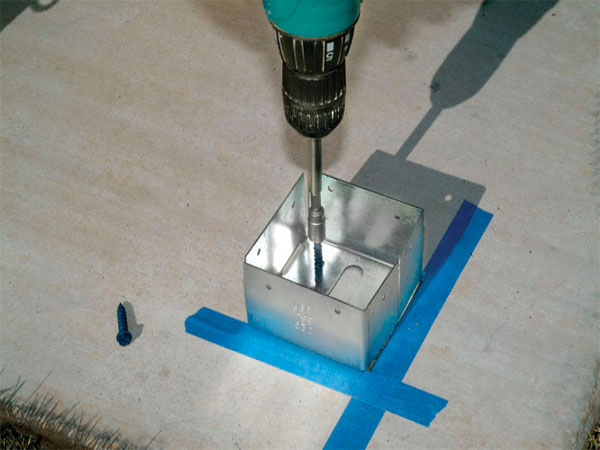
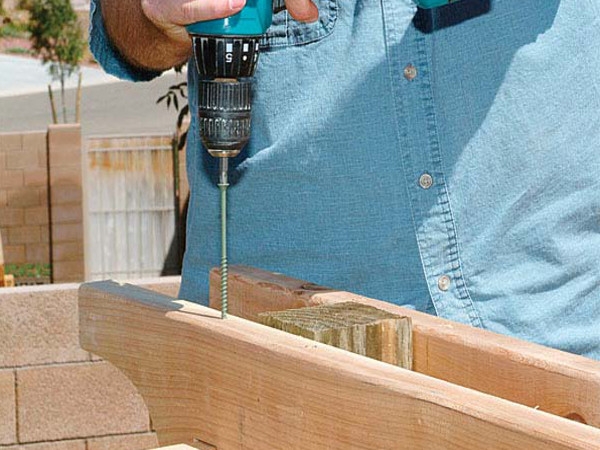
- After we have marked out the places for the screws, we drill them. With a perforator, make holes for screws with a thread of at least 3/16 inches.
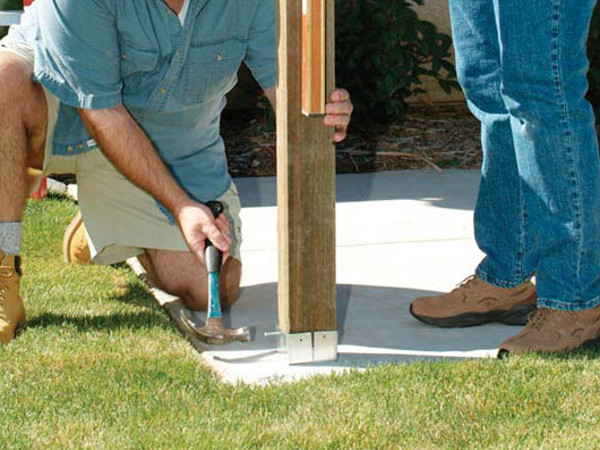
- We strengthened the iron "glasses". Next, with the help of anchors, we begin to form a skeleton.
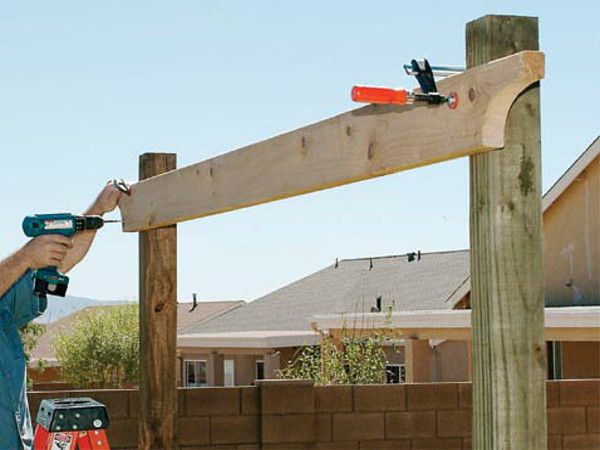
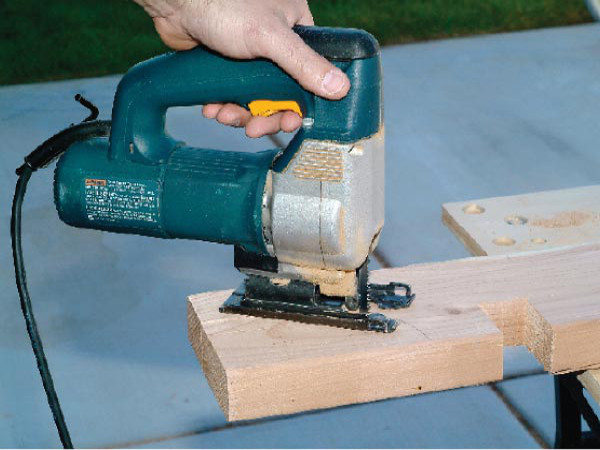
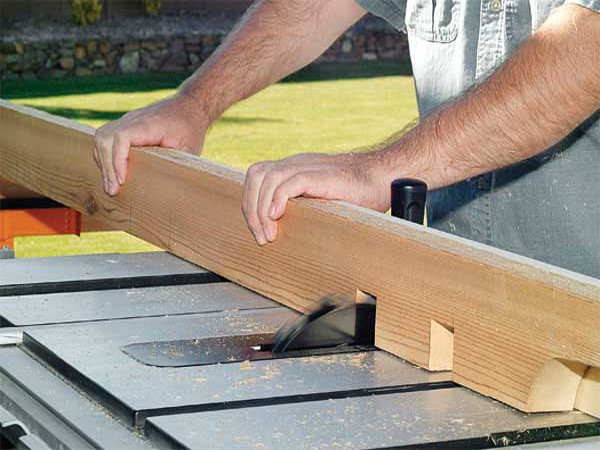
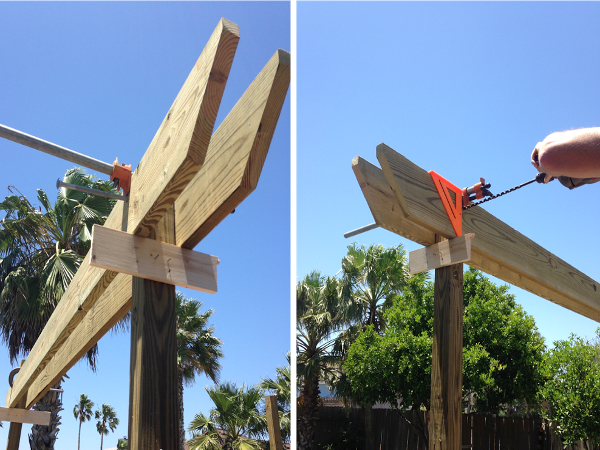
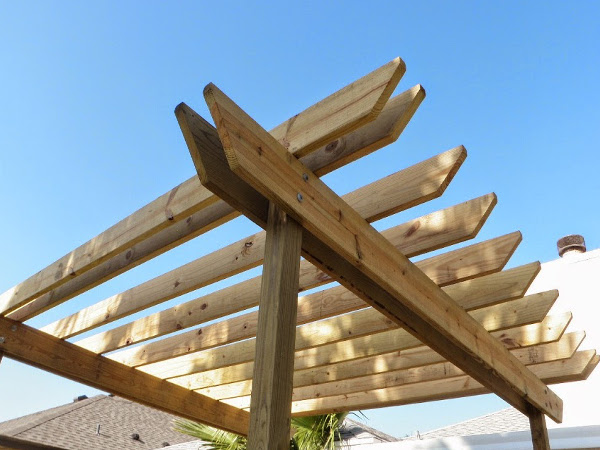
- Next, consider how to make your own hands fastening the supporting beams pergolas. Previously, we make figured cuts at the ends. This is done with the help of special stencils and figured jigsaw. Temporarily fix the beams with clamps so that you can accurately build a right angle. After all is built, you can finally fix the supporting beams with 3-inch screws. We fix each end with three such screws.
- The subsequent installation of supporting beams for pergolas with their own hands is carried out with a constant control of the horizontal. We check everything on the first beam.
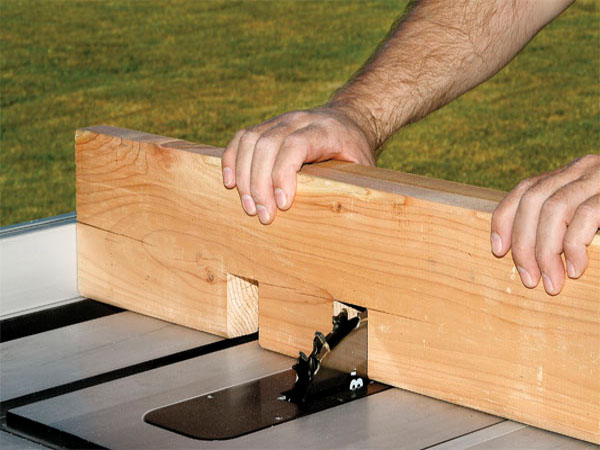
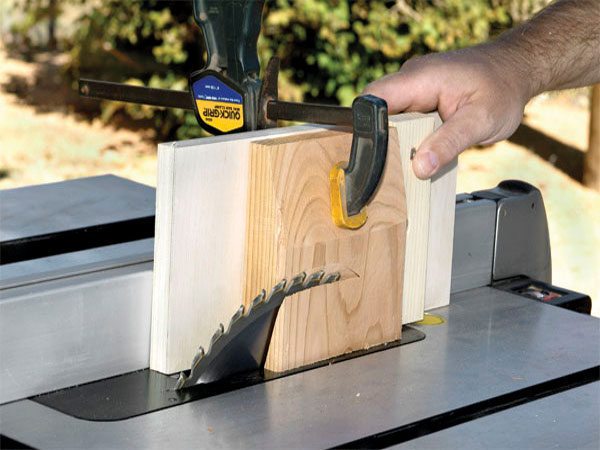
- The next stage of making pergolas from wood with their own hands is the cross beams. In them we will cut out grooves corresponding to the width of the supporting beams. If there is no machine with a saw, you can always use a jig saw.
- The same curly slices at the ends.
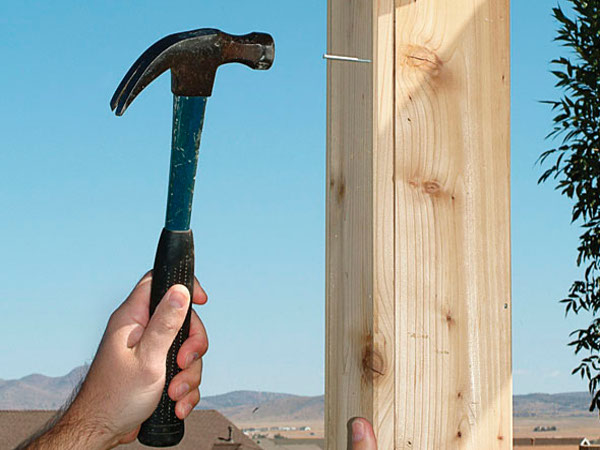
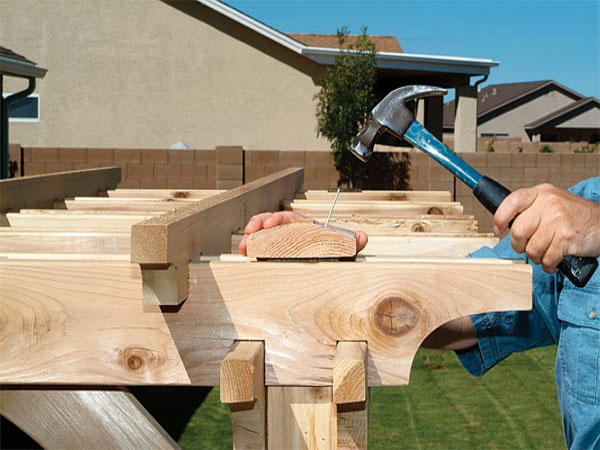
- When the crossbeams take their places, make a through hole and screw the screws.
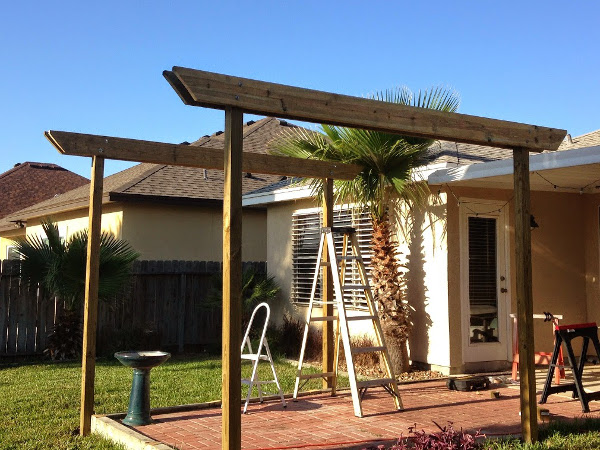
- It remains only to arrange racks.
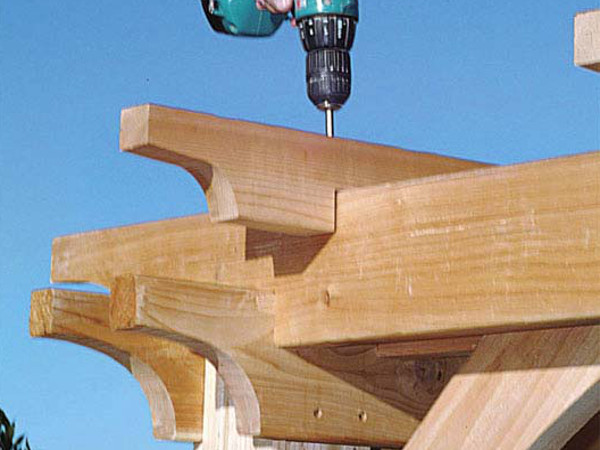
- Then fasten the decorative staples. Each cut at an angle of 45 °.
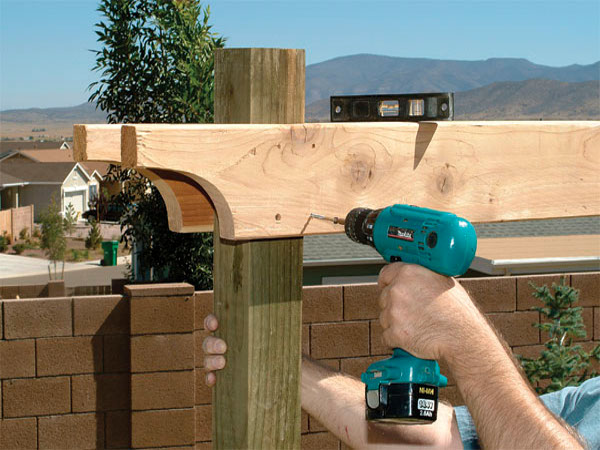
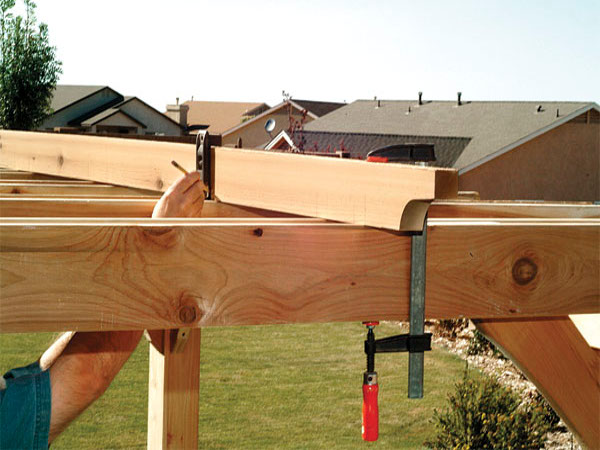
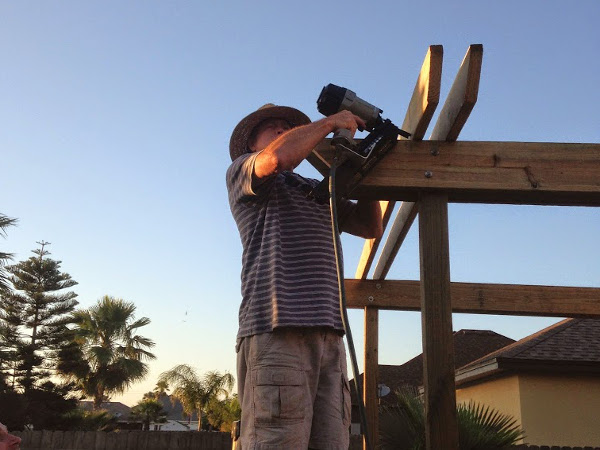
- It's time to set the upper crossbeams. Again, we use clamps to temporarily fix and trim the beams.
- Mark the place of the grooves and cut out each.
- Already by a familiar method, we fix and fix the top overlaps of wooden pergolas, built by our own hands, with screws.
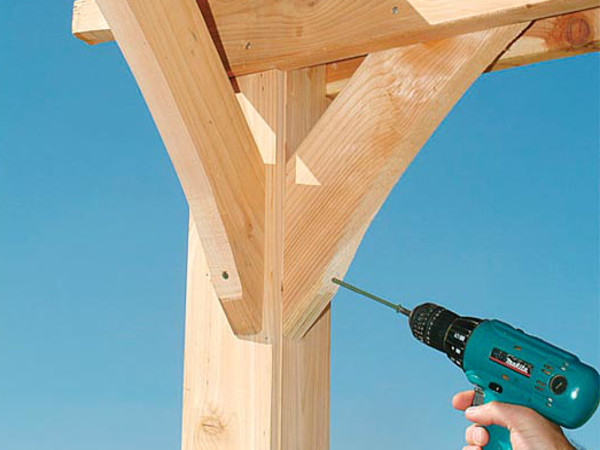
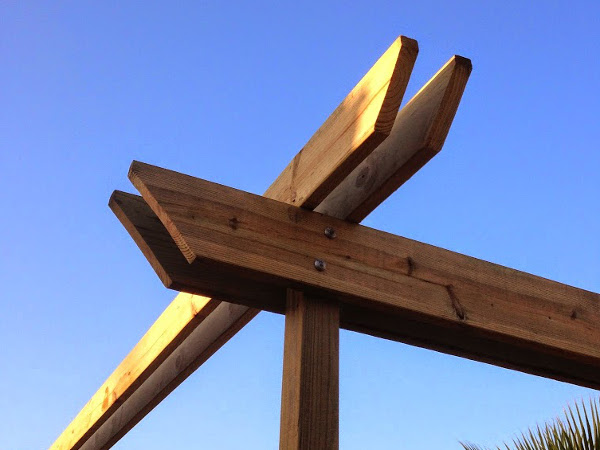
- The final touch is the tip of our support. At an angle of 15 °, cut the top and get this kind of detail. We fix it in place with glue and decorative nails.
How to make a simple pergola with your own hands?
Who said that without figured jigsaw and similar tools you can not build a beautiful summerhouse? If you are only just getting acquainted with this type of construction, it is worth considering a simplified version.
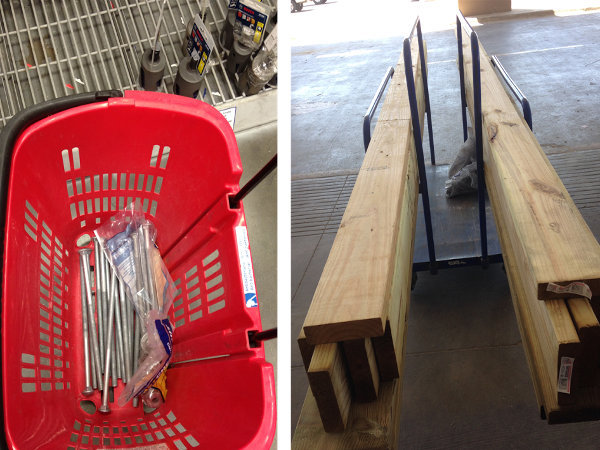
- And again we need anchors, wooden boards and a bar for racks.
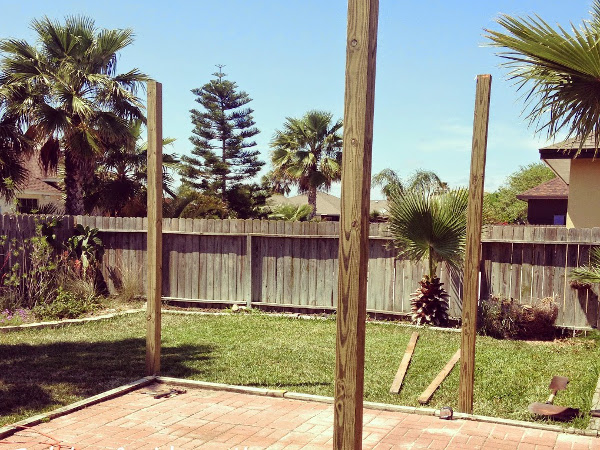
- This time, we will bury the racks. The photo shows that the area is tiled, and the racks are outside its area. In this case, we will bury the racks to a depth greater than the depth of freezing of the earth in this place.
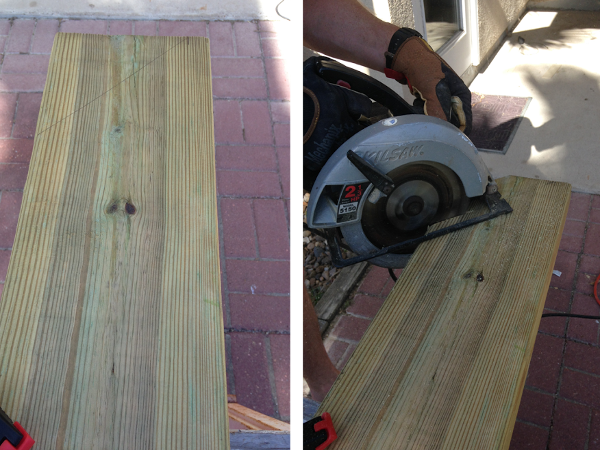
- Cut the edges will be at a right angle without any curly lines.
- For convenience, we first nail a small board to get a right angle. Then we will install the supporting beams and temporarily fix them with clamps.
- On top of the crossbar. This time, we will not cut the grooves, but we'll have to drill the holes for the fasteners at an angle.
- Similarly, we set all the other bars. And we will get a completely satisfactory result, but with minimal effort.
- As a result, we got a pergola made by ourselves, in a simplified version, but it is absolutely no worse than the previous structure.