Mishka-tilda is a wonderful element of decor , which is suitable for a children's room, as well as for a kitchen, living room, hallway. He also can easily settle in the shop window, in the cafe and even in the office.
In our master class we will show how to sew a bear with our own hands, this will not be a problem for you.
Bear made of cloth by own hands - master class
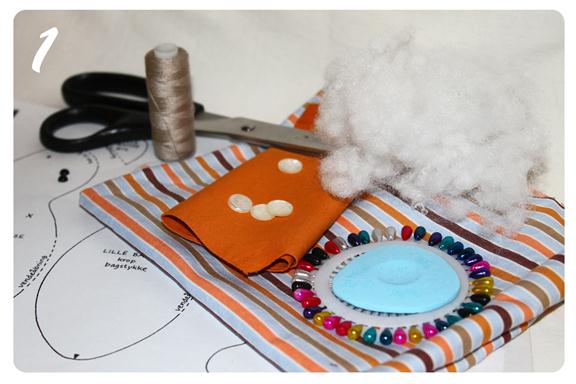
To create a teddy bear you must:
- the main fabric and a small piece of fabric of contrasting colors;
- pattern;
- thread;
- sewing machine or thread with a needle;
- filler;
- puhovki (4 pcs for connecting handles and legs with the body);
- eyes (fit black beads, or half-beads);
- needles for chipping;
- thread floss for embroidery spout;
- Chalk or any other tool for drawing a pattern on paper.
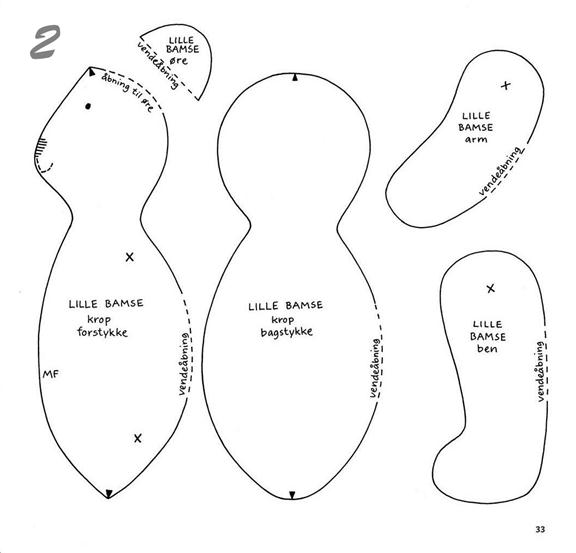
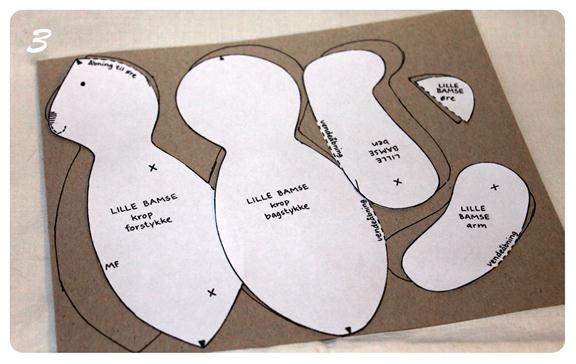
Below is the pattern of the bears. Print it on the printer. I usually carry the details of the pattern on the cardboard, it is more convenient to outline it on the fabric.
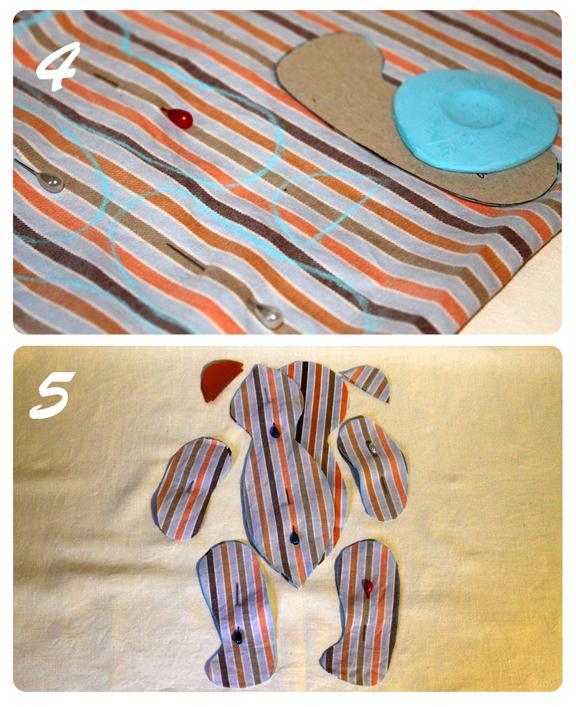
When all the details of the pattern are ready, we put it on the fabric and circle. We need:
- front body - 2 pcs .;
- the posterior body is 1 piece;
- legs - 4 pieces;
- pens - 4 pcs .;
- ears - 2 pcs. of the main fabric and 2 pcs. of extra fabric.
- Then we split the double parts with needles and carefully cut out.
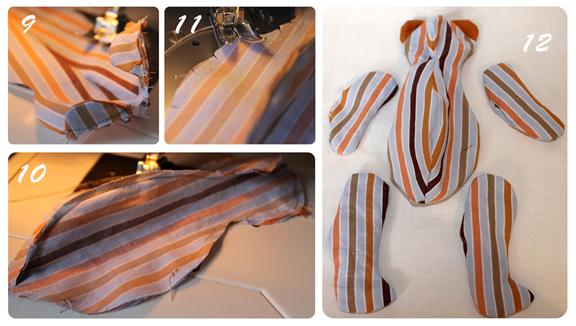
We proceed to sewing:
- Sew the legs, handles and ears, leaving uncrossed spaces for turning and stuffing. The details of the front body are sewn only along the front seam.
- Now we turn the ears and sew them to the front calf. Then we sew the front and back of the bears, leaving a place for turning and stuffing. We make incisions in the most rounded places and we turn out all the details.
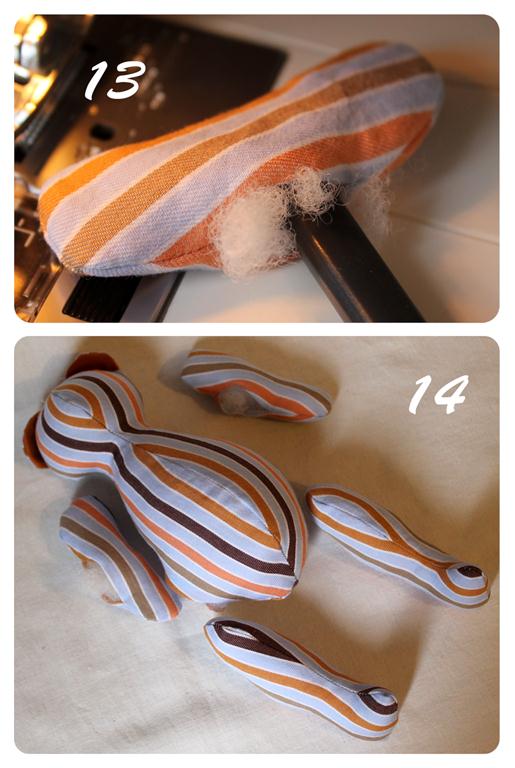
- We proceed to packing. We take small pieces of filler (I have holofayber) and pencil with a pencil.
- After they have stuffed all the parts of the bear, we sew the uncrossed places with a secret seam.
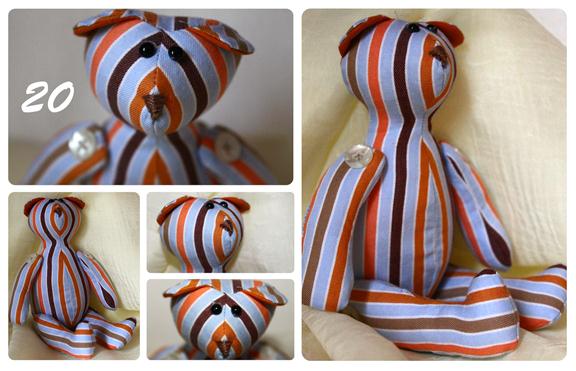
- It remains to collect our teddy bear. Sew our hands and feet together with the buttons. See that they are symmetrical. Then we sew (if you have beads) or glue (if half-beads) eyes. And at the end we embroider the spout with threads of mulina.
- Our teddy bear is ready!