Origami is an amazing and unusual art of folding various shapes from paper (animals and birds, flowers and trees, houses, cars, almost anything). Throughout its centuries-old history, this kind of art is gaining more and more admirers. The process of creating beautiful and original figures will certainly enthrall both children and adults. And in this master class we will talk about how to make a rabbit from paper.
Necessary materials
In order to create a hare figure you will need:
Instructions
Now let's talk more about how to make a rabbit out of paper:
- First, prepare a sheet of colored paper and cut it to the size of a square. To create a paper rabbit, it is best to take two-sided colored paper so that the finished figure is completely monochrome. However it will be interesting to look and a bunny made, for example, from a packing paper with an ornament or a pattern.
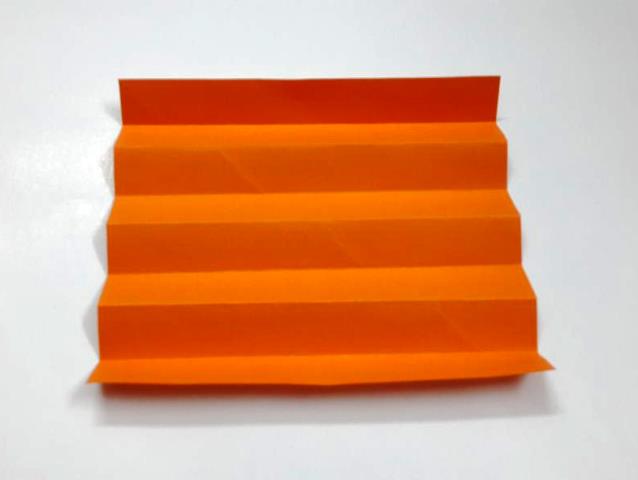
- Fold the square of paper with an accordion, thus defining seven folds and dividing the workpiece into eight equal parts.
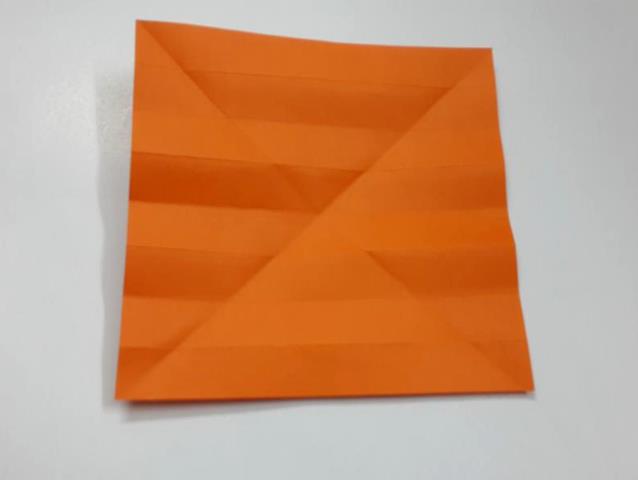
- Now add a square on both diagonals to create auxiliary lines.
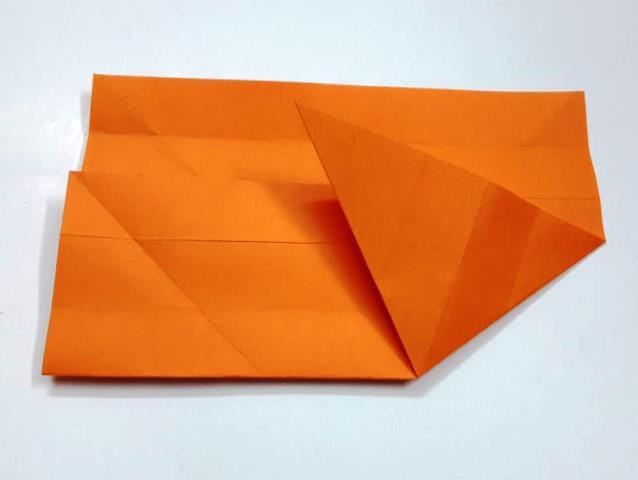
- Fold the three lower parts of the square upward. On the auxiliary diagonal line, bend the right corner, which will soon become the ear of our paper hare.
- The next two parts of the original workpiece bend inward, and with the remaining three do the same as with the first.
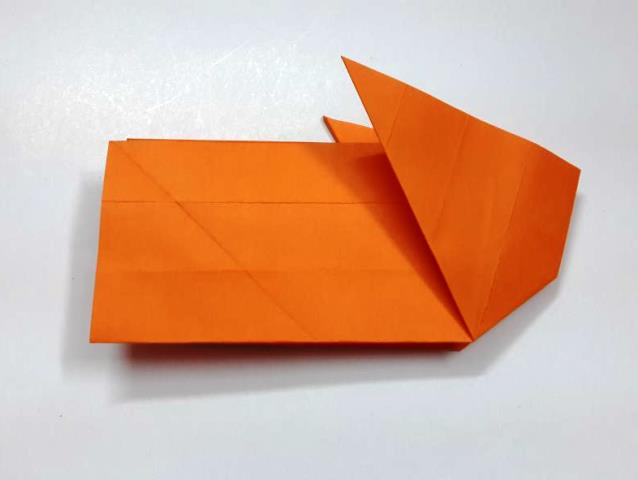
- Twist a small corner, equal to two parts of the body, one and the other. And on the lines outlined, fold the figure, as shown in the figures.
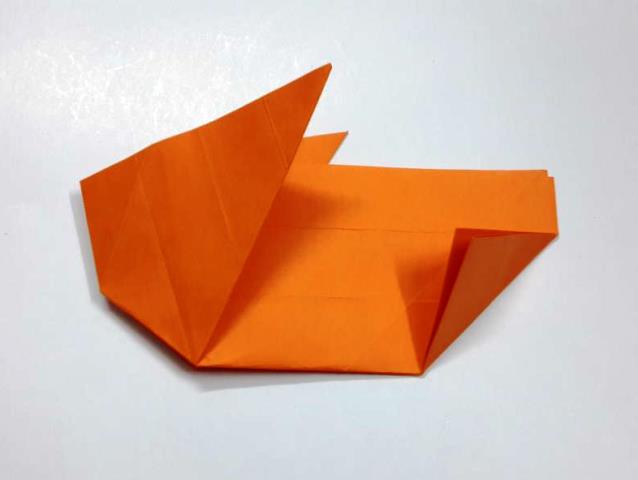
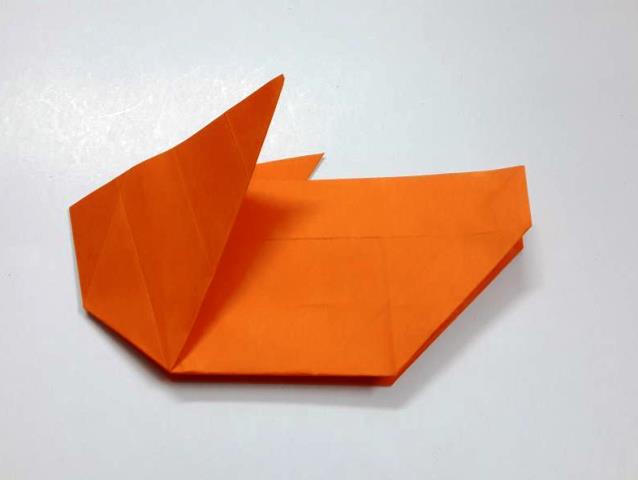
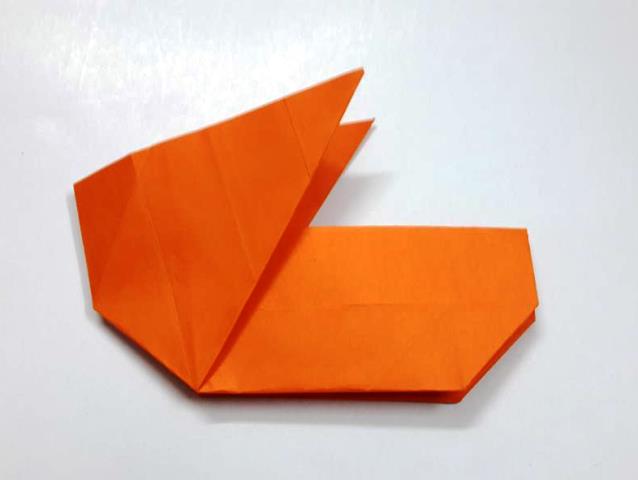
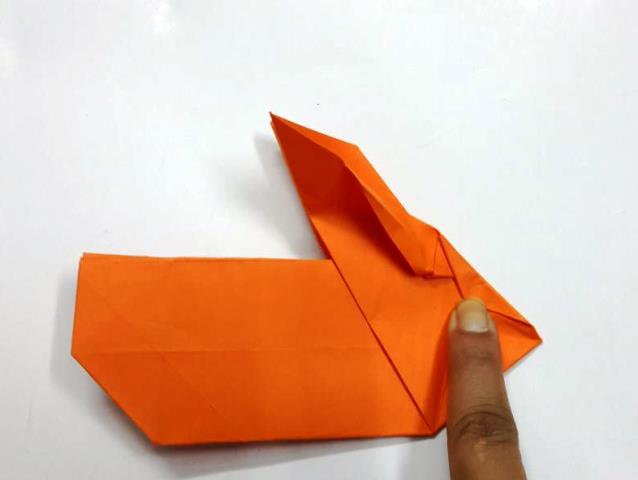
- Lateral parts wrap inside the workpiece.
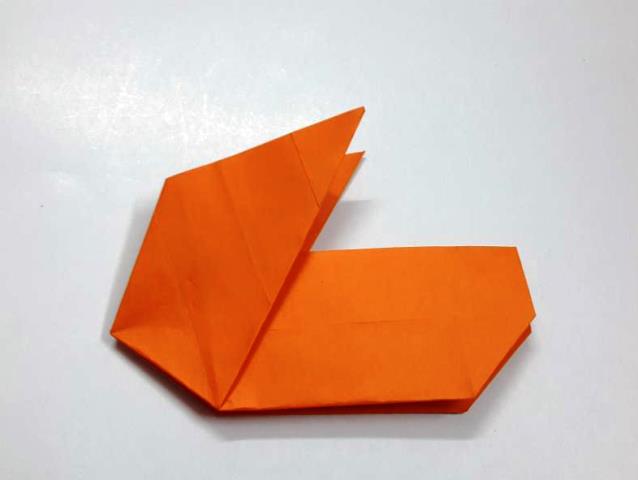
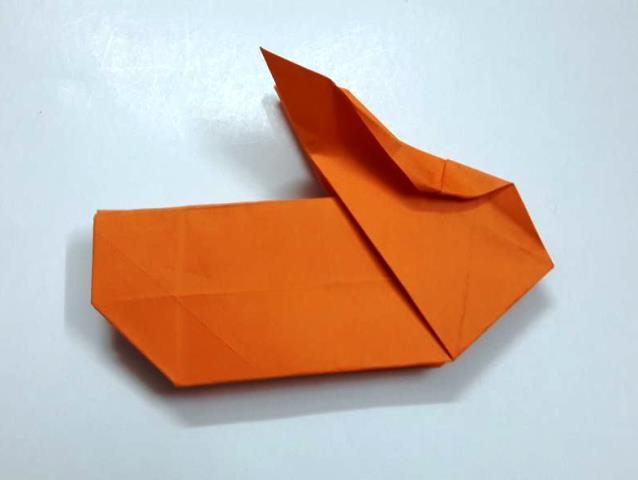
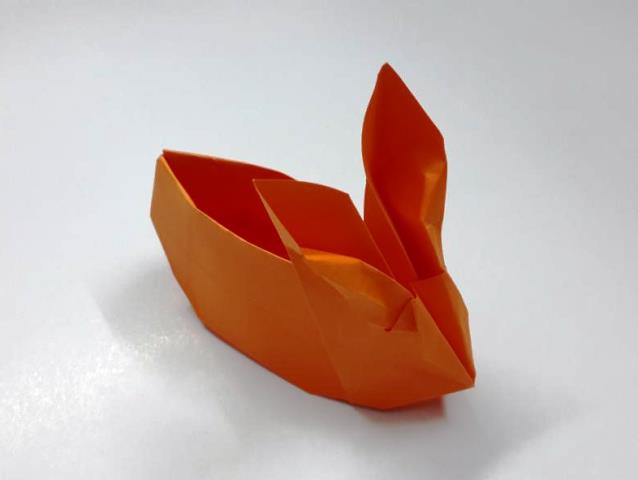
- Now rotate the hare-origami sideways, as shown in the master class and bend the upper parts of the figure inside, creating an inner pocket.
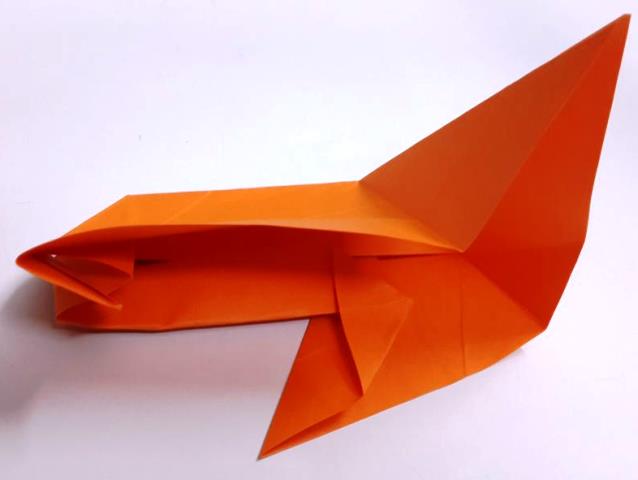
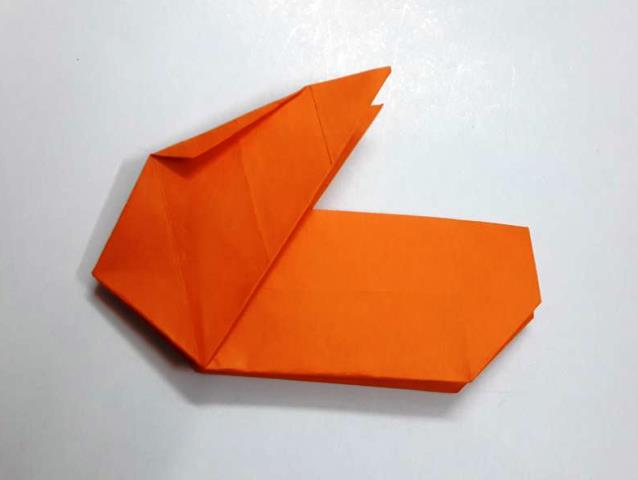
- For already existing auxiliary lines, wrap the inside of the muzzle.
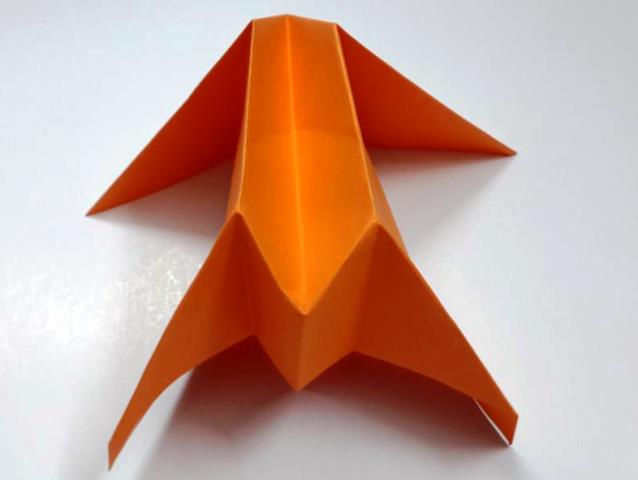
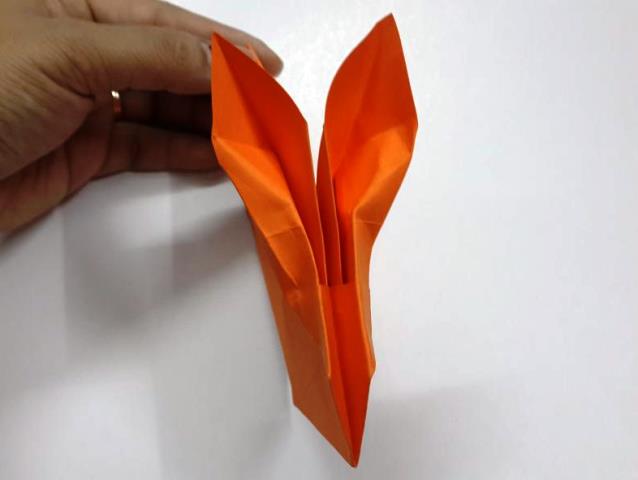
- Now form the ears of the hare from the paper with your own hands, following the photographs of the instruction. Unbend the small corners on both sides, twist them slightly and spread their ears, creating the necessary shape.
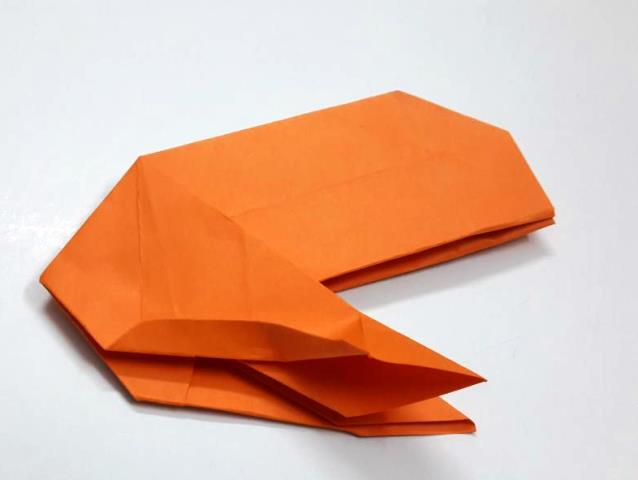
- Unbend one more small corner to form a muzzle.
- Pull the corners in different directions to straighten the muzzle.
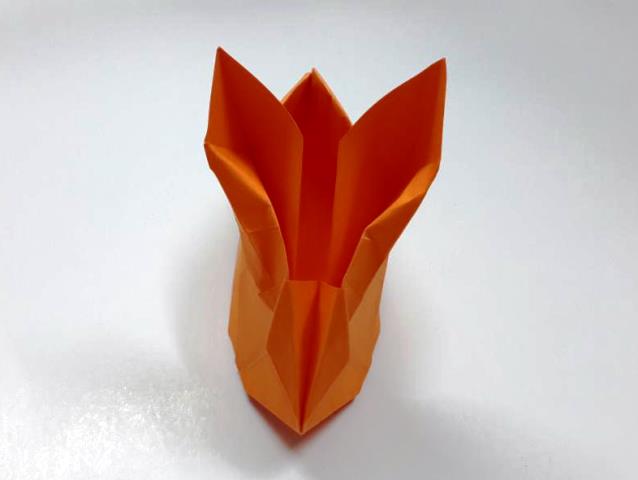
- Now spread out the entire figure, opening the formed pocket.
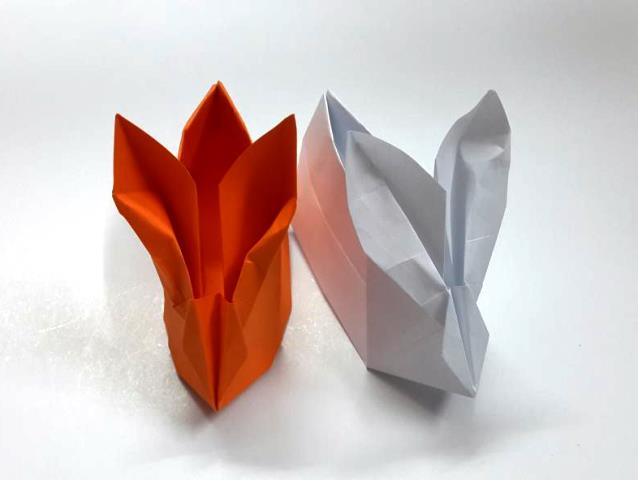
- Our bunny is ready! If desired, you can add applications from paper to the hare to decorate it, or draw eye sights. And the resulting pocket can be filled with sweets, small secrets and just pleasant little things.