Everyday procedure for applying makeup is almost in the past with modern developments in cosmetology. To date, a woman can make minimum efforts to always look great, thanks to a variety of techniques. Today we will consider an independent extension of eyelashes at home, find out what is required for this manipulation and how to perform it as high as possible.
Types of eyelash extensions
There are two main ways to give depth and mystery to the look:
- Beam lash extension. This method consists in attaching blocks of natural or artificial hair to the edge of the eyelid. It allows you not to spend much time on the procedure and in the shortest time to buy long thick eyelashes.
- Sedimentary build-up. This method is certainly more painstaking and requires a certain skill. It is based on gluing the material to the eyelid along one hairs. Despite the laboriousness, this procedure provides tremendous effects after eyelash extensions - they look as natural as possible, acquire a density and splendor.
What do you need to build eyelashes yourself at home?
First of all, you need to determine the desired quality of raw materials. The best materials for eyelash extension, of course, are natural. It is not necessary to flatter the low cost of mass consumption kits for the procedure under consideration. Most likely, they consist of completely synthetic hairs and glue, which can cause allergies, irritation and even dermatitis. It is recommended to purchase materials either in specialized stores or in beauty salons, paying attention to the composition of resin and raw materials for hairs.
The procedure for eyelash extension requires special tweezers to ensure the most accurate attachment of the material to the skin. It should be long, with thin rough edges at the ends for strong retention of the hair.
In addition to eyelashes, glue and tweezers, the following will be required:
- cotton wheels;
- cosmetic or vegetable oil ;
- clean soft brush;
- toothpick.
Crescent build-up:
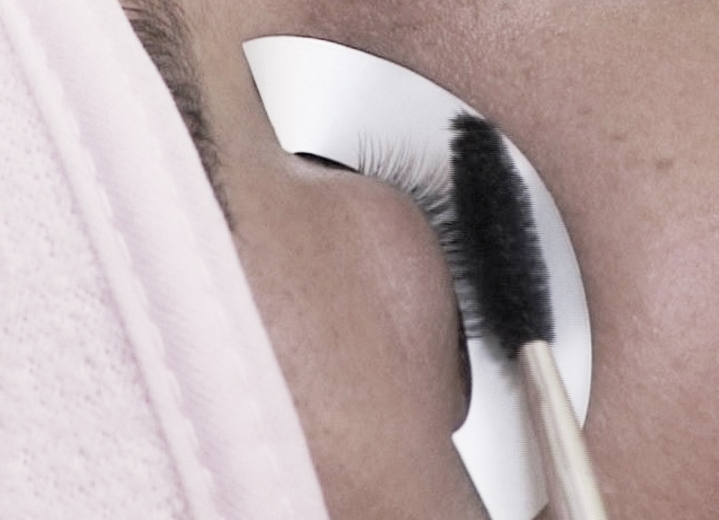
- The beginning of the procedure is a thorough cleansing of the skin surface of the eyelids from cosmetics by means of milk or other habitual means. The next step is to cut the cotton wool in half, and place each semicircle under the lower eyelids. Instead of cotton wool, you can use paper napkins or any other soft material. Then it is necessary to carefully comb the pre-prepared brush with your own cilia to separate them and remove the dropped hairs.
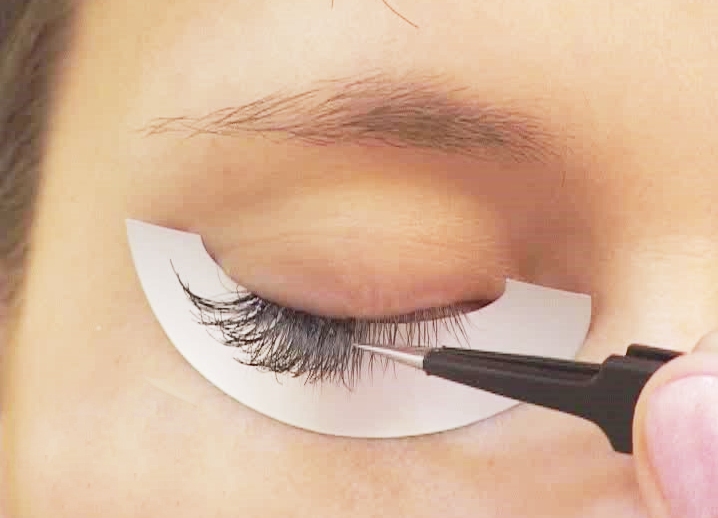
- Now begins the procedure of building. You should choose the smallest eyelash from the set about 7 mm long (for the inner corners of the eyes), grab its upper edge with tweezers, and gently dipped the lower tip into the glue. Hair should be attached as close to the line of growth of your own eyelashes, in order to achieve naturalness. To fix the position of the root of the glued cilium can be with a toothpick, slightly pressing down the tip of the fastener.
- Similarly, the other eyelashes from the set are glued. You need to move from the inner to the outer corners of the eyes, gradually increasing the length of the hairs to 12 mm.
- After the perfect manipulation, you should not open your eyes for a while and do not blink to make the glue dry, and the material is well entrenched on the skin.
The extension of the lower eyelashes occurs in exactly the same way as the upper ones. The only thing you need to remember is not to glue too long hairs to the lower eyelid, they will look too artificially and visually reduce the size of the eyes.
Beam Eyelash Extension
This method, in principle, does not require special skill. Already ready bundles of hairs dipped in the glue around the perimeter of the base and gently attached to the skin.