The mania of weaving rubber bracelets captured many needlewomen. Among the most popular types of weaving can be called the "Bicycle chain" - a cute and easy-to-manufacture bracelet made of rubber bands. Let's find out how to do it!
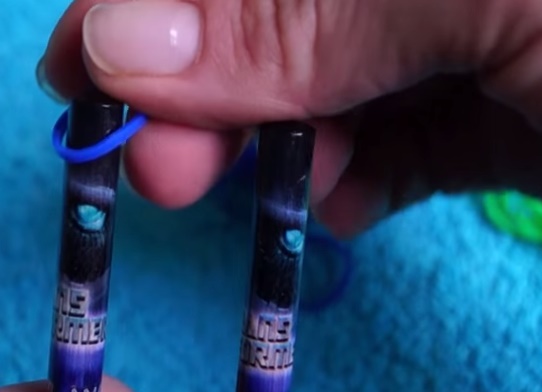
The main feature of weaving the bracelet "Bicycle chain" is that for this purpose only two bars on the machine are sufficient. And this means that even if you do not have this machine, you can easily make a bracelet "Bicycle chain" out of rubber bands, without it, on your fingers or on two pencils. It will only need a special little hook - it usually goes in a set with rubber bands.
How to make a bracelet from rubber bands "Bicycle chain"?
Consider the course of work:
- Take two ordinary pencils and put on an elastic band on the first one (the one that is to your left).
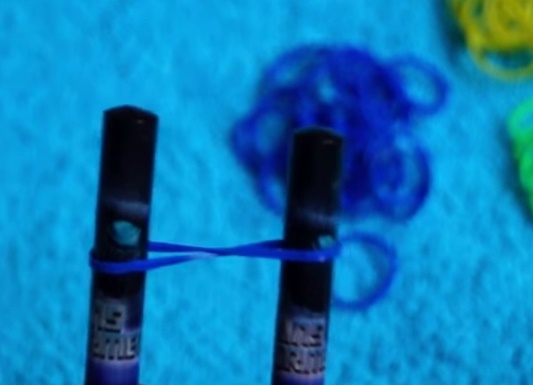
- Then stretch it and put it on the second pencil, before crossing it in the form of a figure-eight.
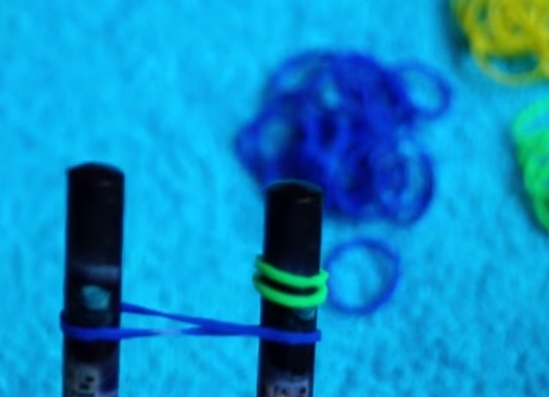
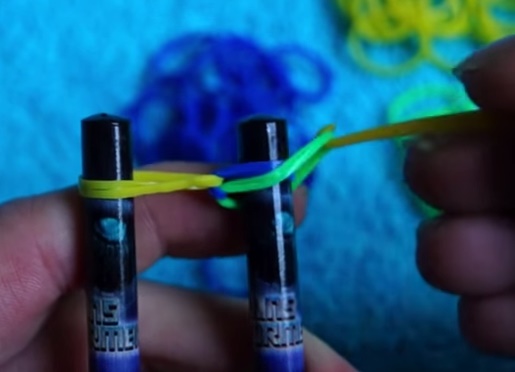
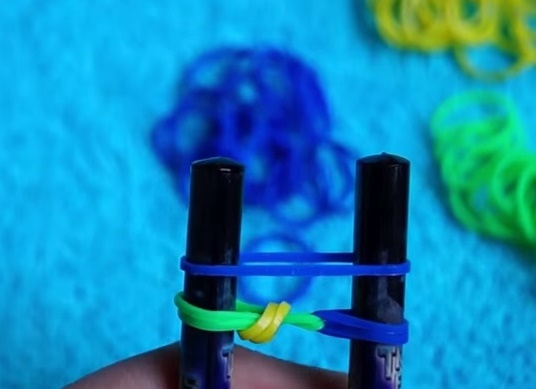
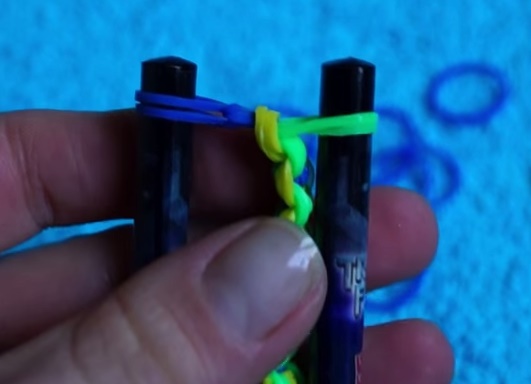
- On the right pencil put on an elastic band of a different color (in the photo it is green).
- Cross it and put the second loop on the right pencil.
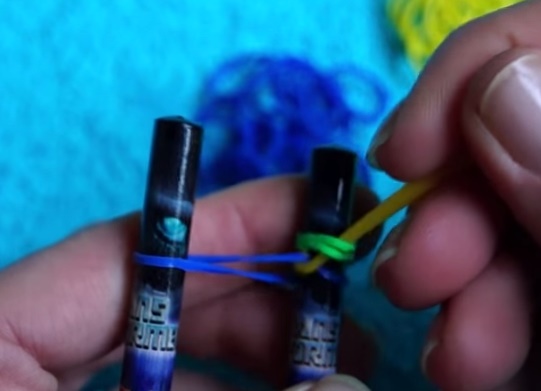
- Now take the hook and, passing it under the green rubber band, pick up the first blue loop located under it.
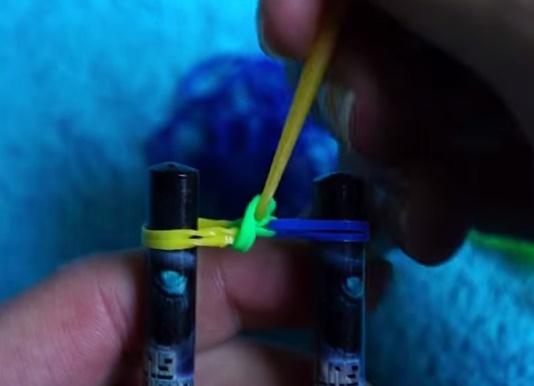
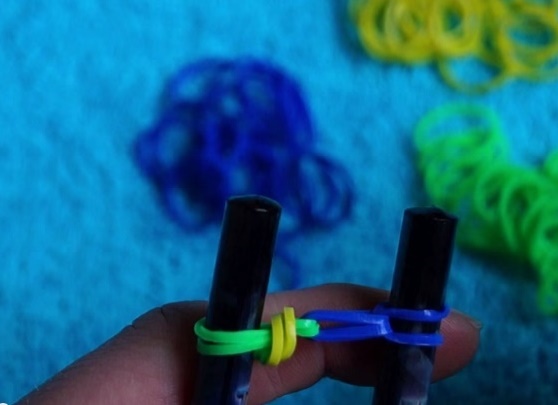
- Pull it out and move it to the left pencil.
- Next, we put on it an elastic band of the third color (yellow) and repeat paragraph 4. To make it convenient, it is advisable to pre-arrange all the necessary rubber bands in colors.
- And now, by analogy with point 5, we pull out from under the yellow blue rubber band - also only its first loop.
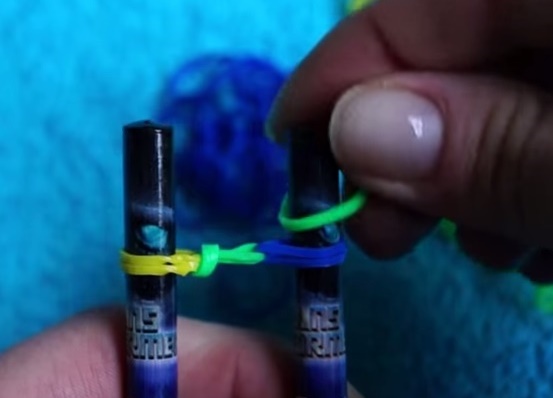
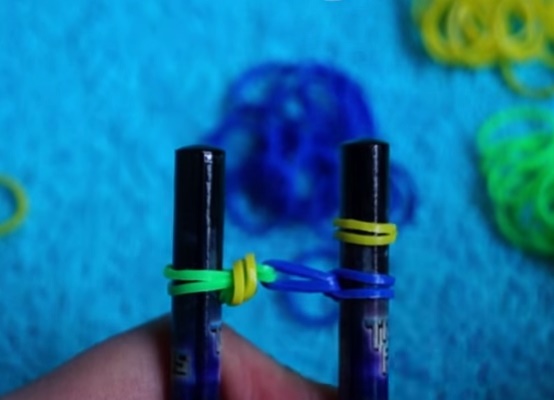
- And move it to the right pencil.
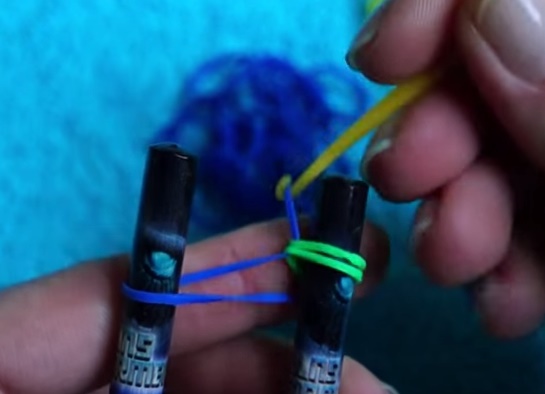
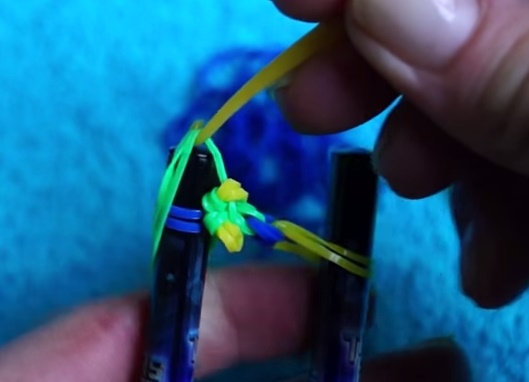
- Pick up the crocheted green below the rubber band.
- We move it through the blue to the middle of the future bracelet from the rubber bands "Bicycle chain" and just let go.
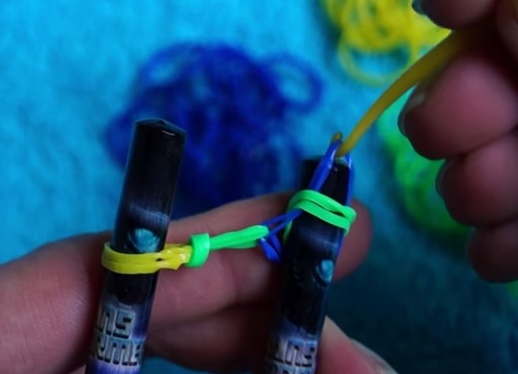
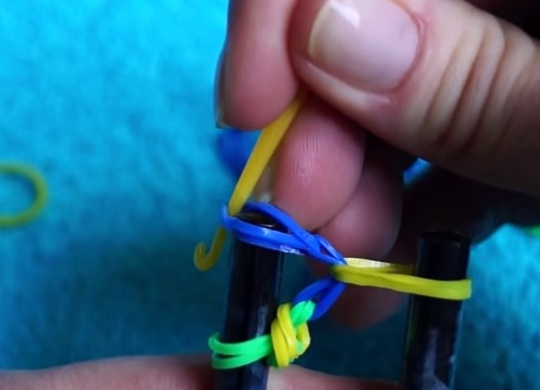
- Now put the green pencil on the right pencil (or, if you chose other colors, the same as the currently located bracelet center).
- We form two loops from it, and the blue elastic band, which is located below, is pulled out by hook - only this time it is necessary to pick up both loops.
- We move them to the left side of the weave.
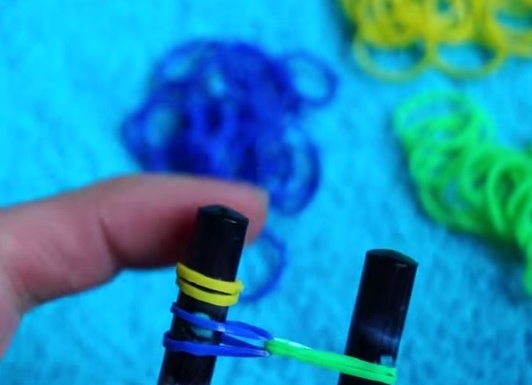
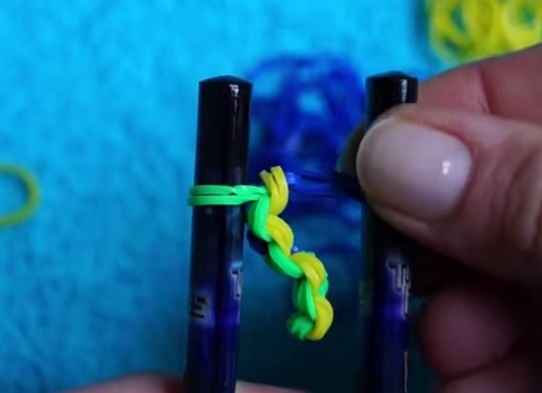
- And now - be careful - turn the pencils in their hands so that they swap places. As a result, on the right pencil you should have a green rubber band, and on the left pencil there is a yellow (bottom) and blue (from above).
- Pick up the last crochet and again move from one pencil to another.
- Then remove the yellow elastic band, loosely let it go to the middle of the bracelet.
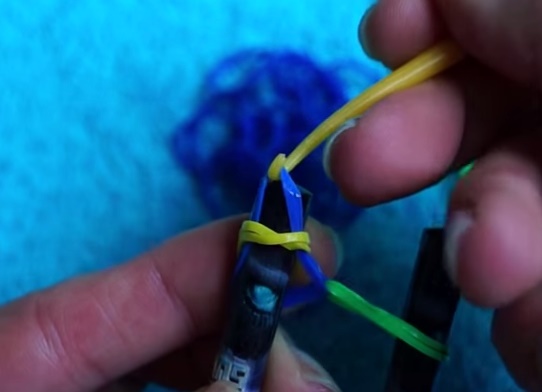
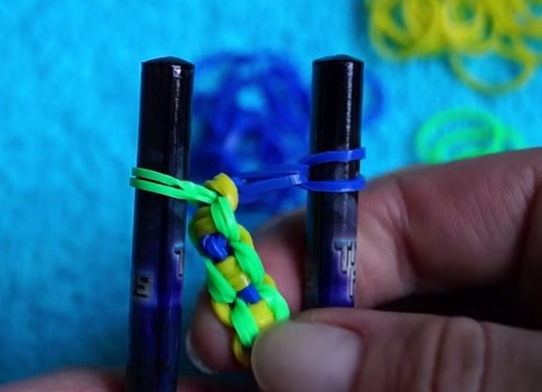
- We put on both pencils a new blue rubber band, wrap it around twice about one of them (right) and hook with a crochet over the blue rubber band of the previous row.
- We put on the right pencil a yellow elastic band, also wrapping it around the support twice.
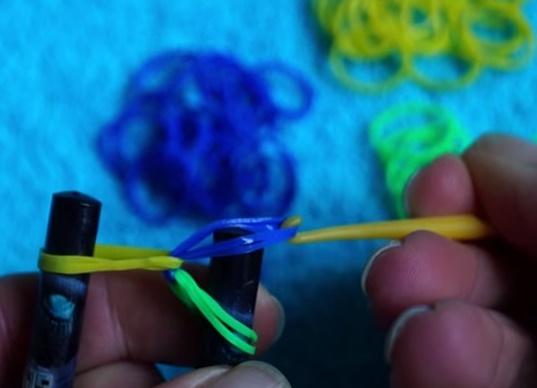
- We will stretch through the two loops a blue rubber and move it to the left pencil.
- And now - the most important and decisive step. Pick up the green rubber on the bottom of both hinges and pull it through the blue.
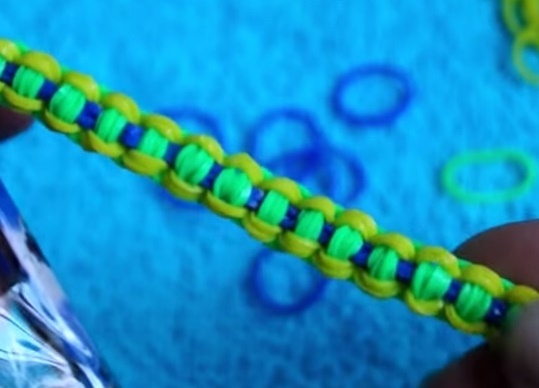
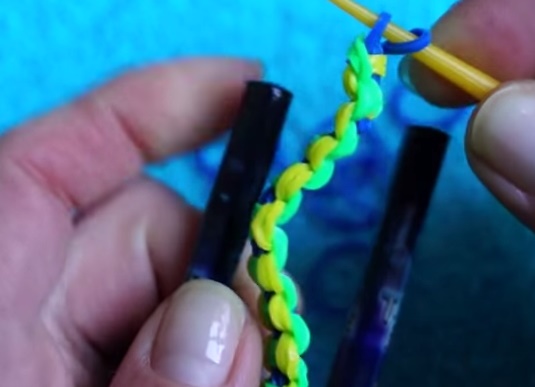
- Repeating steps 1-21 several times, you will get here such a path (side view).
- It really resembles its own kind of bicycle chain, as gum of one color goes along the bracelet, and two other colors alternate across, inside this chain.
- This is how it looks when the chain links become bigger.
- And now we will learn how to finish the weaving of this pattern. When you twist the last link, on the right spoke there will be a green rubber band, and on the left - blue, yellow will go in the center.
- Pull the blue rubber band through the green and remove it on the hook.
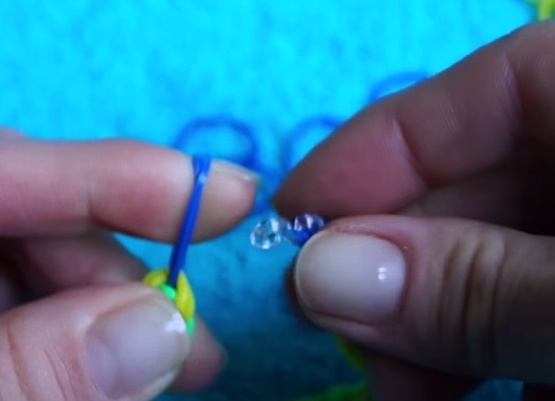
- Hook the S-shaped fastener by the loop first at one end of the bracelet, and then on the second.
| | |
| | |