Actually, therefore, the nearest free evening we offer to kids and adults to devote to the creation of a wide variety of paper toys. It can be animals, dolls, plants, machinery: volumetric and flat, large and small, mobile and still figures. Depending on the idea, you can use a variety of paper and techniques to perform. For example, in recent years, the so-called origami has become increasingly popular . By the way, we did origami as a child, without even knowing it. Remember the paper boats and airplanes - which of us did not master the technique of performing such figures in due time. However, now this art has acquired a global scale, and the finished works of these masters amaze with beauty and functionality.
Of course, it is too early for us to claim the title of master of origami, so we will begin to improve our skills with simple crafts.
So, voluminous toys made of paper with their own hands for children - your attention is a few master classes on this topic.
How to make toys from paper with your own hands?
Example 1
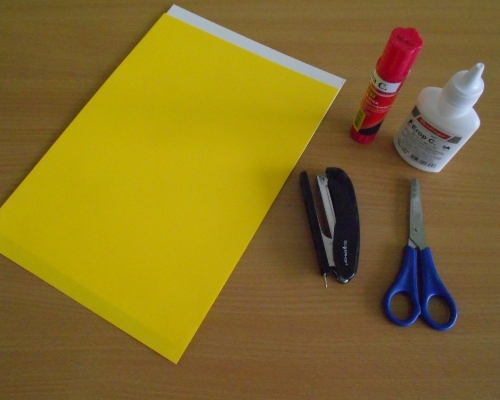
If your child does not have a pet enough, try to offer him an alternative. Funny kittens are simple in execution, do not require much time and expensive materials. All that is needed for their manufacture is a sheet of colored paper, cardboard, scissors, glue.
So let's get started:
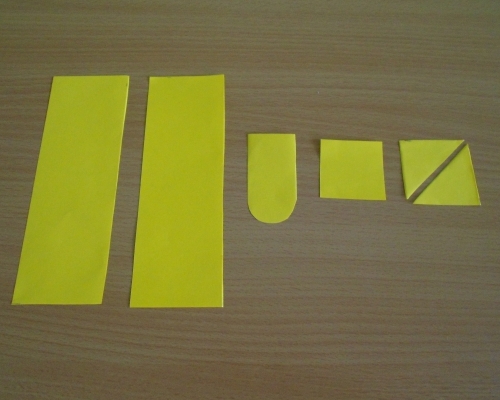
- To begin with, we cut out the blanks: two rectangles 5x15 cm; one square of 4x4 cm; one rectangle 3x6 cm; and a 5x12 cm cardboard base.
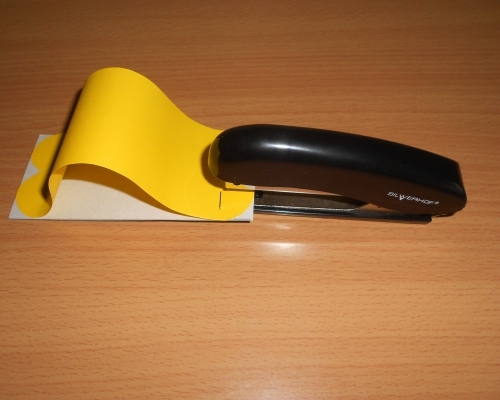
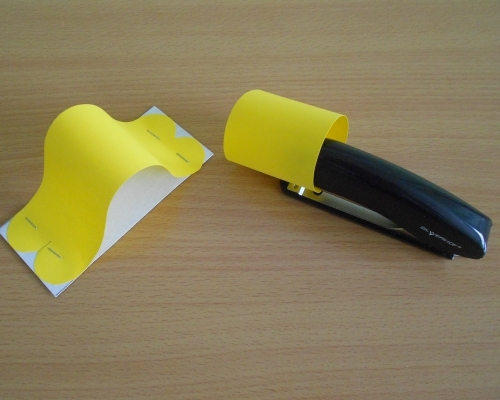
- Now from one large rectangle we make a trunk.
- From the second rectangle we make the head and glue it to the trunk.
- Next, add our tail to the kitten, to do this, the rest of the rectangle is rounded with scissors and glued in the proper place.
- After that we'll make the ears - cut the square diagonally and paste, the triangles received to the head.
- Now we draw the muzzle and, in fact, our first three-dimensional toy made of paper is ready.
Example 2
Not every home collection of toys can boast of a wise hamster.
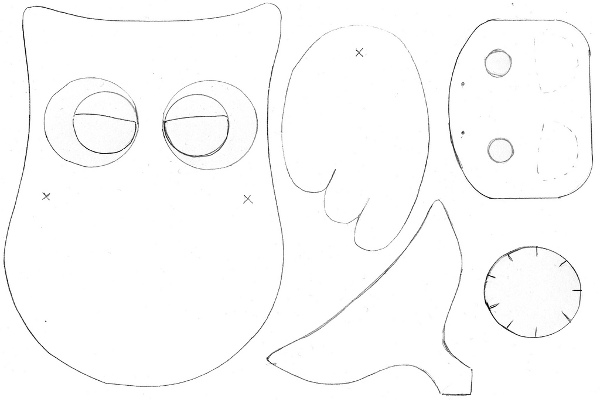
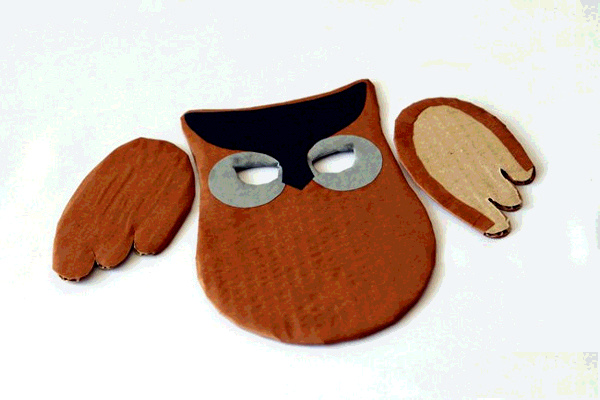
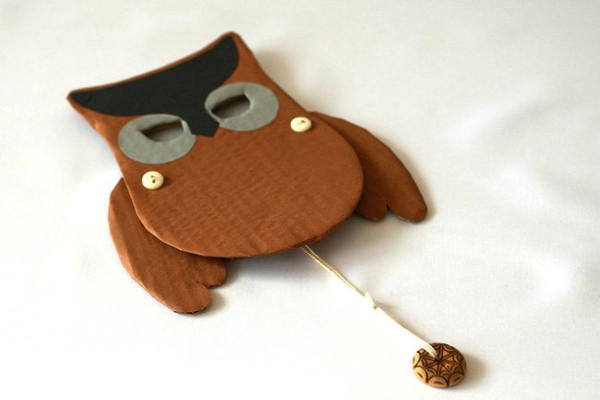
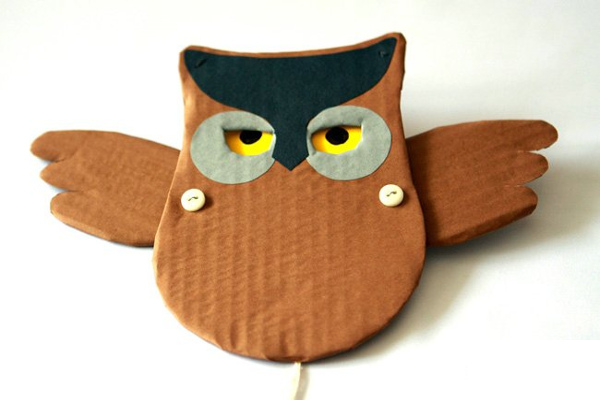
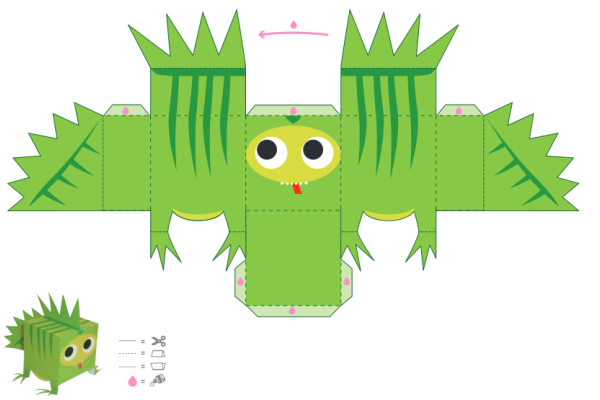
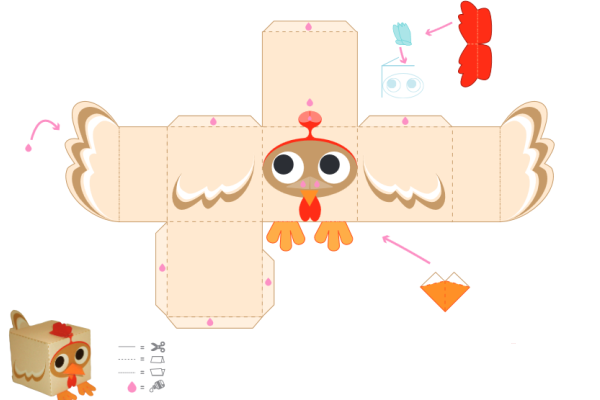
We bring to your attention a simple scheme how to make a movable toy-owl from paper and cardboard with your own hands:
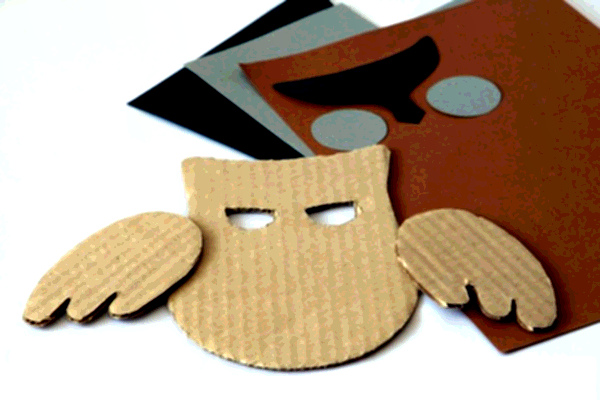
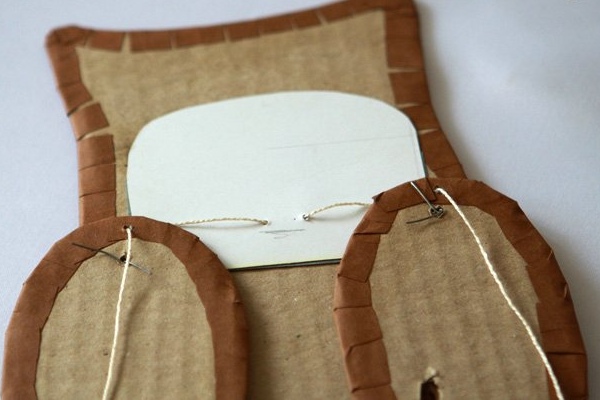
- Using the workpiece, we apply the contours of the body and wings of the bird to the cardboard, and cut them out.
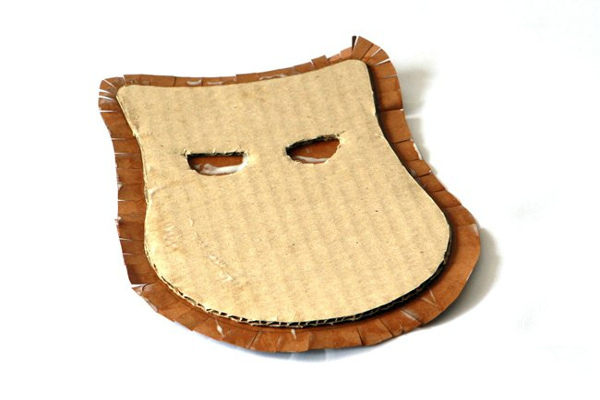
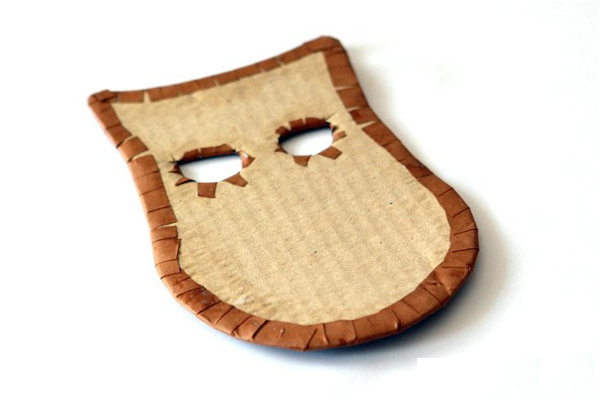
- Then glue them with brown paper and dry.
- We paste the details of the head.
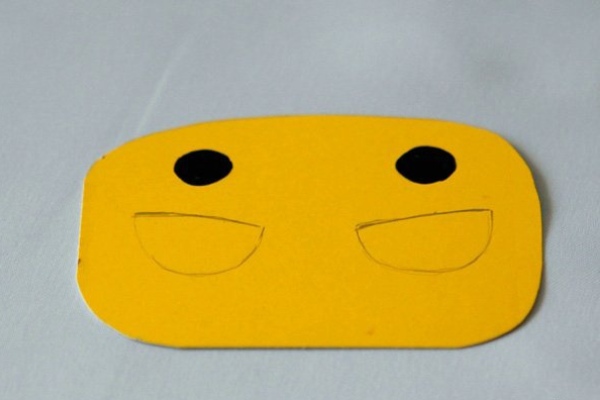
- Now we take a sheet of yellow cardboard, we cut out a detail with pupils and a simple pencil outline the contours of the eyelids and the pupils themselves.
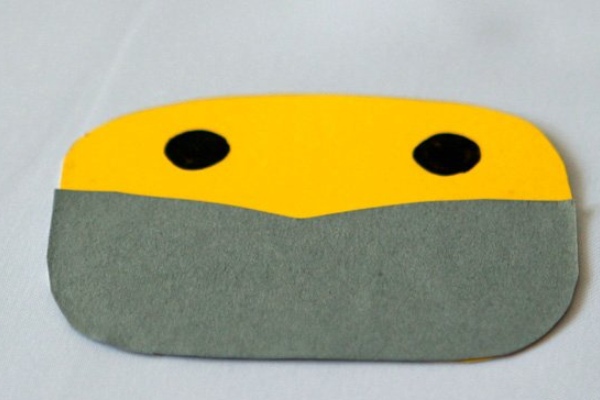
- Part of the part where the eyelids are located are pasted with paper of the same color as around the eyes.
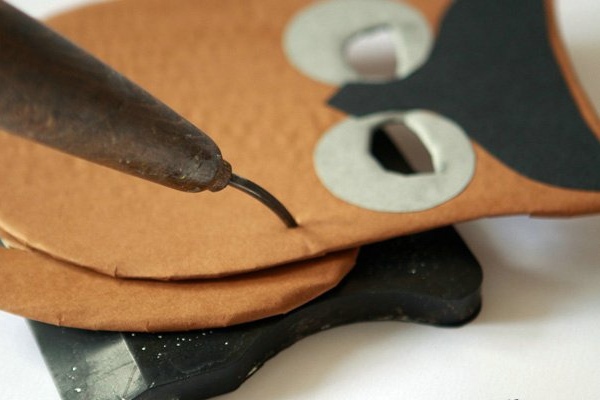
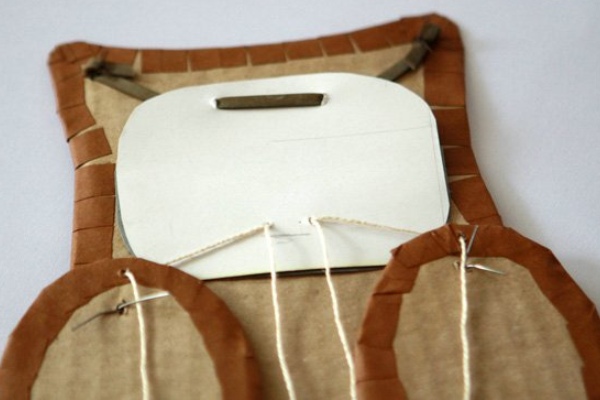
- Apply the wings to the body and make two punctures with an awl.
- Further we will fix.
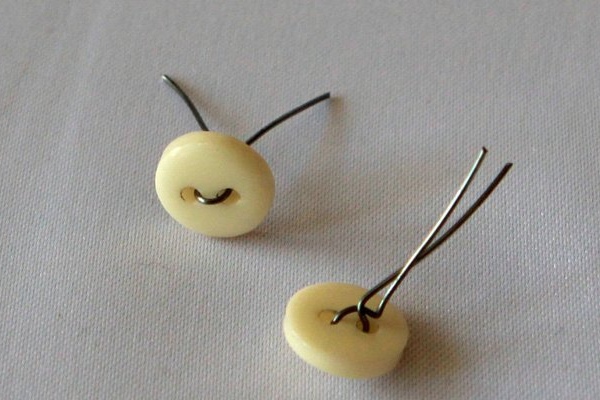
- Our next task is to set the owl in motion. To do this, we make holes in the upper part of the wings and the lower part of the part with pupils, we extend the threads through them. Now one more thread is stretched only through the holes in the details with the pupils.
- A detail with pupils is fastened to the ears with the help of elastic bands.
- Next, adjusting the length and tension of the threads, we bind them together, we tie the ball to the end.
- Now it remains to finish the small details with a felt-tip pen, and we can assume that our mobile owl is ready.
| | |
| | |
Example 3
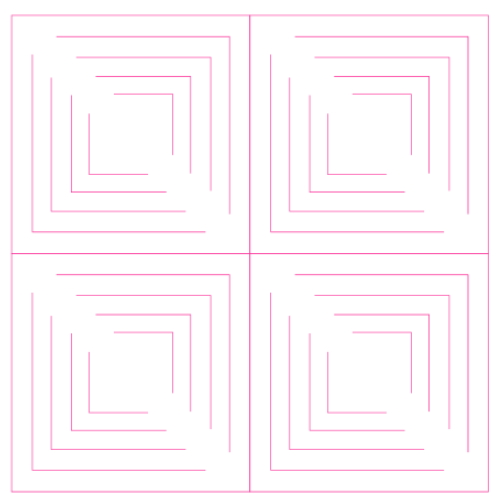
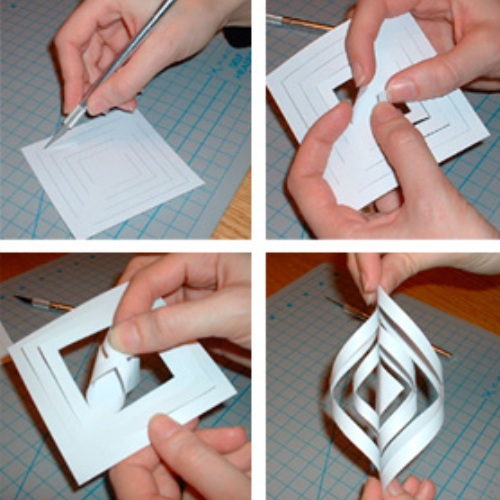
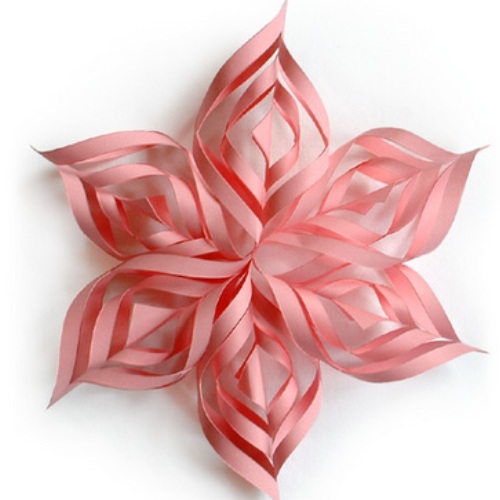
New Year's toys deserve special attention. They help to create a festive atmosphere in the family, fun and usefully spend leisure time. Try, with the help of the workpiece and detailed scheme to make a beautiful volumetric New Year's toy snowflake from paper with your own hands for children. Let's start:
- First, print the circuit on the printer.
- Next, we make cuts along these lines.
- We glue the corners, as shown in the photo. Thus, we will have one petal, and for a snowflake we need 6 such.
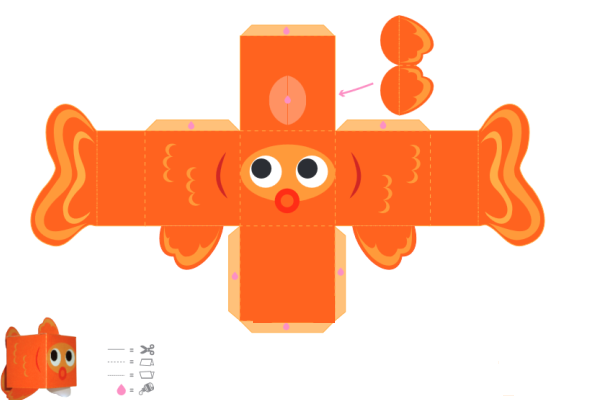
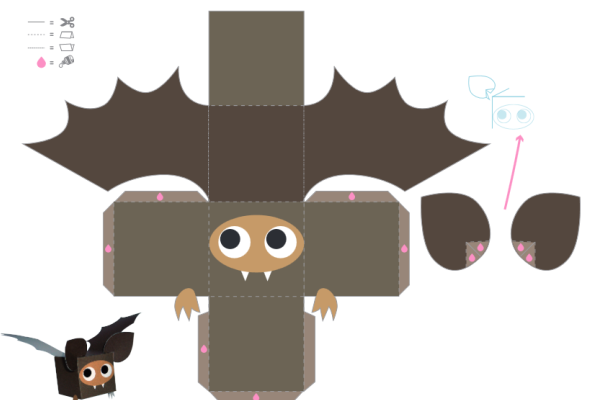
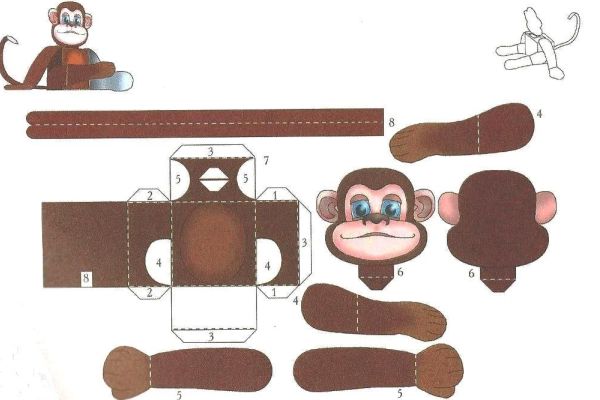
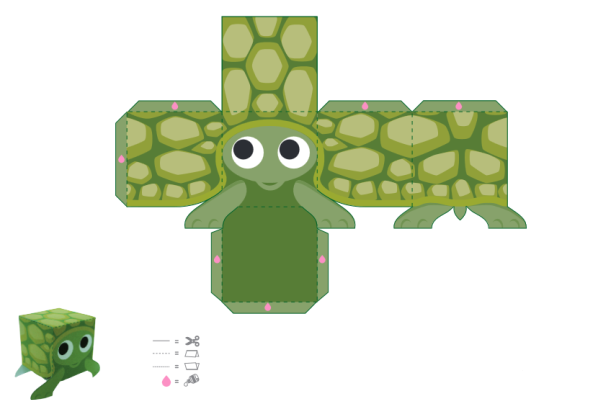
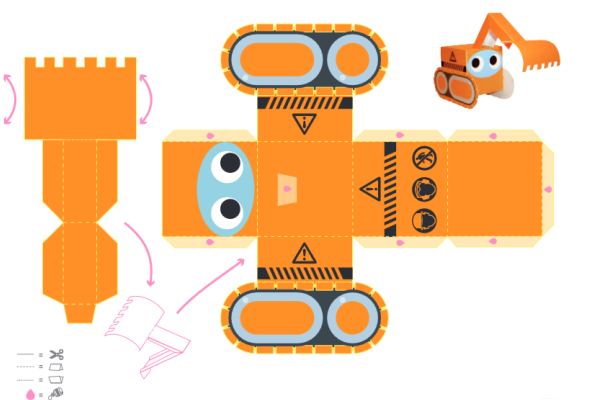
If the process of creating paper toys, you liked, you can use ready-made templates that are enough to print and cut. And then fold out and glue the toy from the finished parts.
| | | |
| | | |
| | | |