A small toy plastic helicopter is one of the favorite toys of modern children. And do you know that you can make a similar flying machine on your own from paper? It is done very simply, and this process takes very little time. Of course, this "model" will not last long, but what prevents you from having enough patience and making for the child a whole collection of colorful helicopters?
How to make a paper helicopter with your own hands?
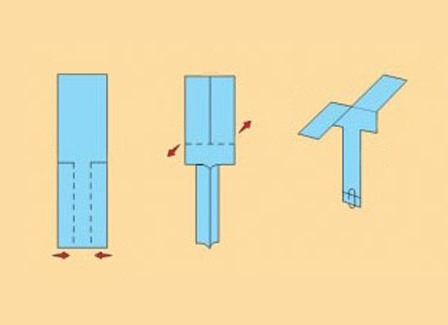
To make this craft, use this scheme. As you can see, it is necessary to make a paper helicopter in three stages, which can be broken down into smaller ones.
- Prepare a rectangular sheet of thick paper, preferably colored. The aspect ratio is about 4 and 15 cm, but you can make a larger helicopter from a paper sheet with the same proportions.
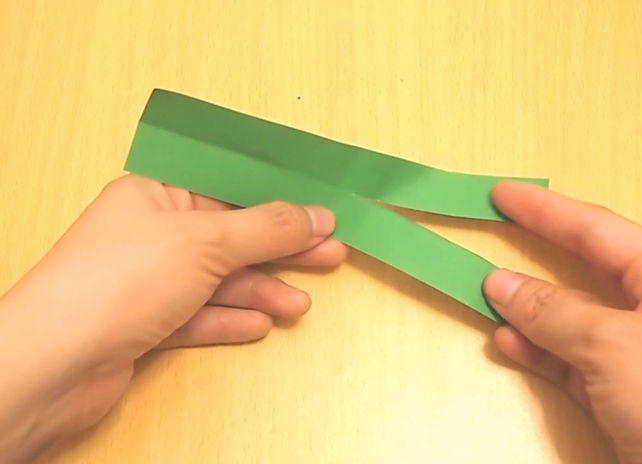
- Bend the previously cut strip in half along.
- Cut it along the center line of the fold to about the middle.
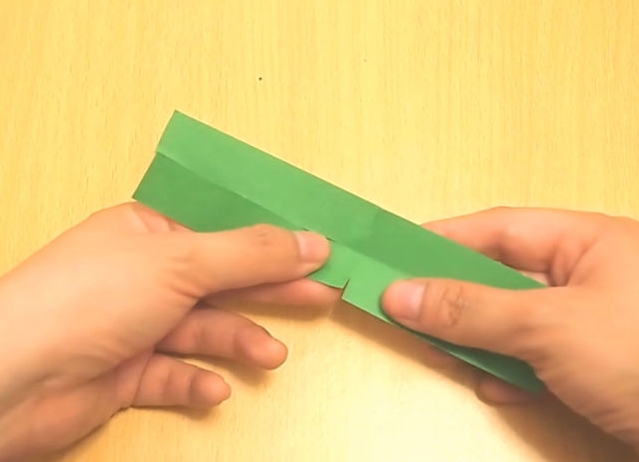
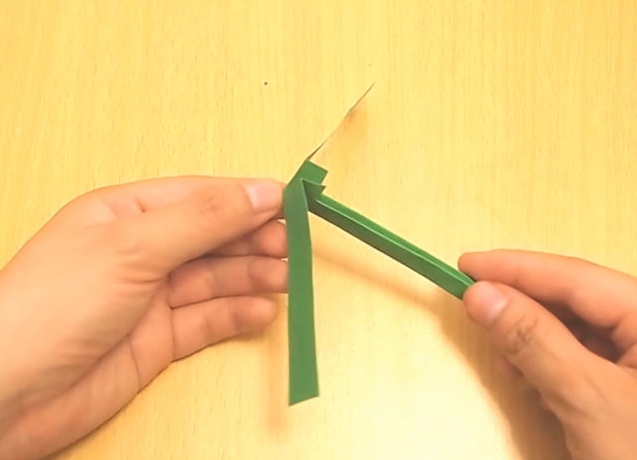
- Then make a small cross-section, as shown in the photo. Its length should be no more than a third of the total distance.
- Duplicate the cut on the other side and make symmetrical folds. This will be the base, the leg of the helicopter, for which you should keep it at start-up. Cut the upper part in the middle, as in point 4.
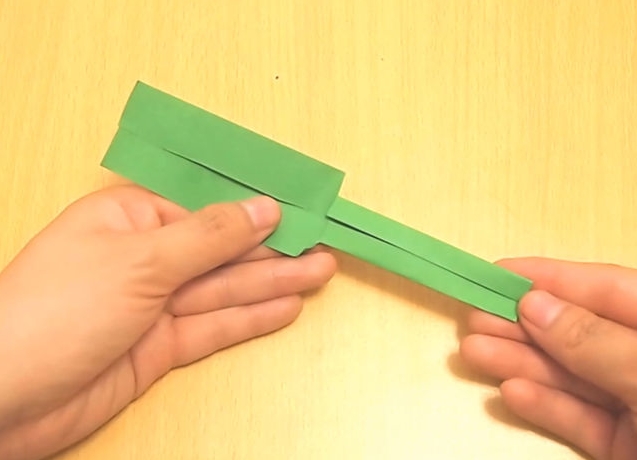
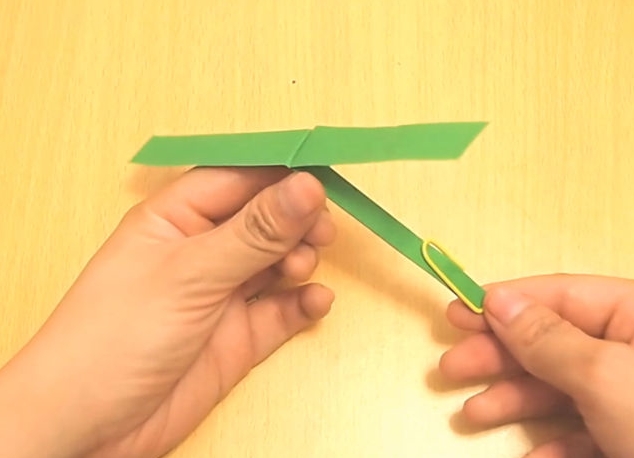
- And, finally, the final stage is the separation of the blades of the future helicopter. Bend them in different directions, and fold your foot in half again, making it narrower.
- The central, not cut part can be accurately fixed with a drop of glue, and the bottom - with a paper clip. Do not replace the glue with a metal clip, because it is needed more to weight our aircraft. With it, it will stay in the air more evenly, without distortions.
The helicopter must be launched from a height or by throwing it up at least 2 m. In the fall, it starts to rotate and then gradually falls to the ground. Note that the rotation speed of the paper helicopter can be adjusted, and this is done by changing the angle of inclination of its blades from the conventional vertical line. It also depends on the width of the blades.
How to make a helicopter from paper in origami technique?
From paper you can make and aircraft of another type, more like a glider. However, it is equipped with a propeller at the top, and this is similar to a helicopter.
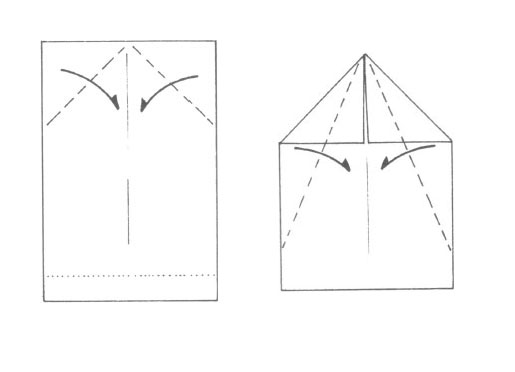
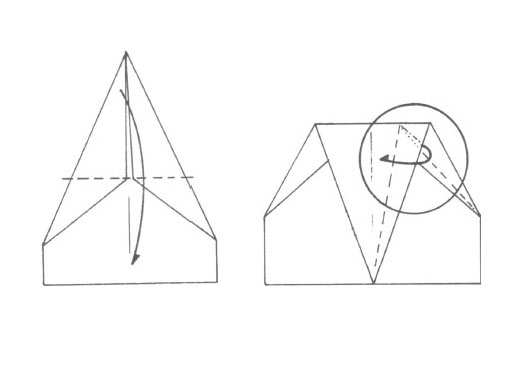
- Take a rectangular sheet of A4 paper and bend the top two corners to the center. For convenience, pre-bend the sheet along the middle. Then cut the bottom strip, giving the sheet the desired shape. The bent sides bend once more inward, as shown in the second figure.
- Now the upper acute angle should be bent downwards along the arrow, and the right part should be bent to the center of the craft.
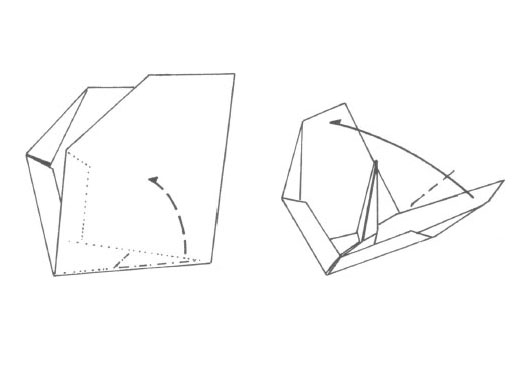
- Just do the same with the left side of the future helicopter, and when it becomes symmetrical, make the top two bends, indicated by a dotted line, and fold the wings of the craft in half.
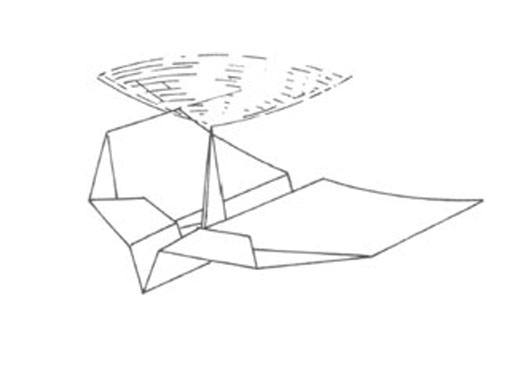
- The spout, which is inside, should be bent upward, like in the whole well-known classical paper airplane. Then fold up the helicopter and smooth it properly.
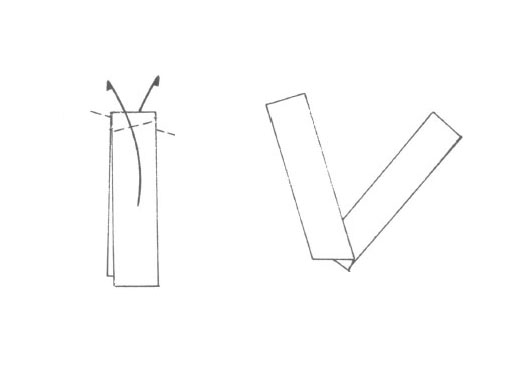
- Take a long strip of paper that you had to cut off during the execution of step 2. Bend it like in the picture and flip it over. You get the blades of the propeller. On the middle part you need to pierce the hole with two holes.
- Unbend the wings of the helicopter and fix the propeller on top of it. Done!
Now you know the whole two ways how to make a helicopter out of paper. And if it seems to you a little, supplement the collection with other flying machines - planes and missiles . Give joy to your child!