Butterflies like all children, so every kid wants to make a beautiful butterfly from paper. We offer you a master class for making butterfly paper for children of different ages.
Application of butterfly from colored paper
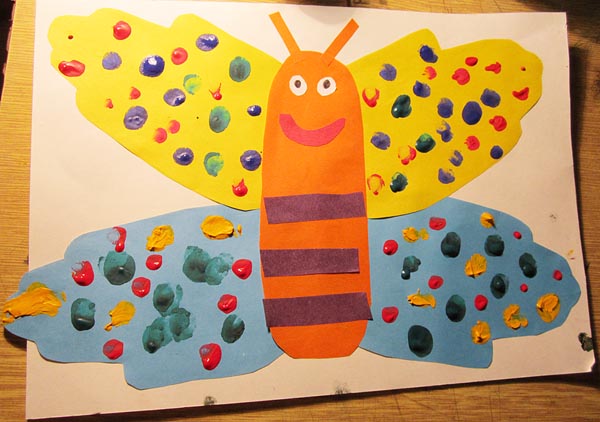
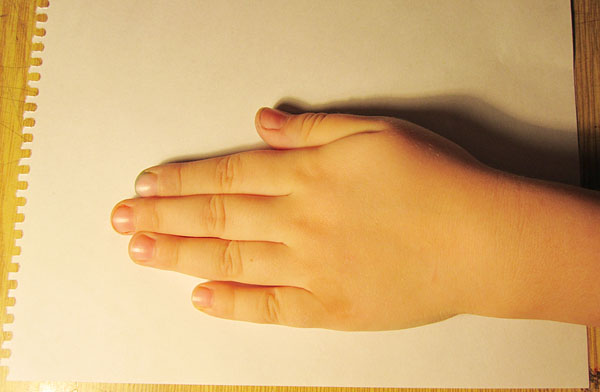
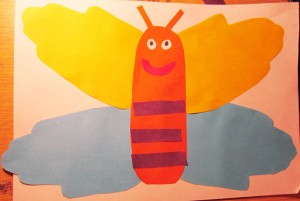
Perhaps the simplest work of a butterfly made of paper is the application of fingerprints of children's pens. Such a butterfly from colored paper can be done with a baby 2-3 years. In addition, it will be interesting to look at this craftsman several years later, when the baby grows up. To begin with, attach the child's pen to the sheet of paper and circle it with a simple pencil. This pattern needs to be cut in two copies of two colors. We paste the wings from the palms of the hands onto a piece of paper. Next, cut out the oval and glue it to the junction of the wings. Everything else is a matter of your imagination. You can cut out the eyes, antennae, stripes and decorate the wings of the butterfly with colored paints.
| | | |
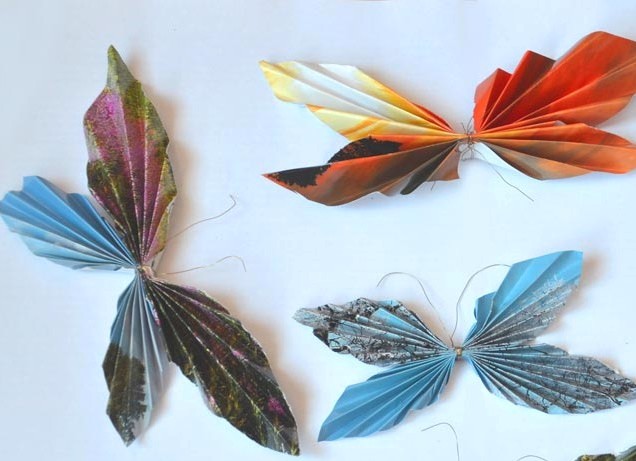
Arrangement of a butterfly from a napkin
Beautiful butterflies from paper napkins always like children. They can be made a few and hung over the bed so that they flutter from the slightest blow of the wind. First, take a two-layer napkin and bend it diagonally. Then from the middle of the sheet we fold the napkin with an accordion with bends at the same distance (1 cm). The resulting workpiece in the form of a diamond is compressed in the middle and tied with a string. The same is done with the second napkin. We join both parts with a stapler or thread. The make-up of a butterfly made of paper is ready!
| | | |
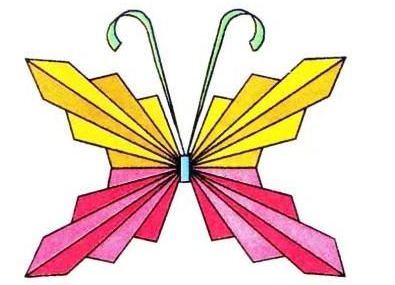
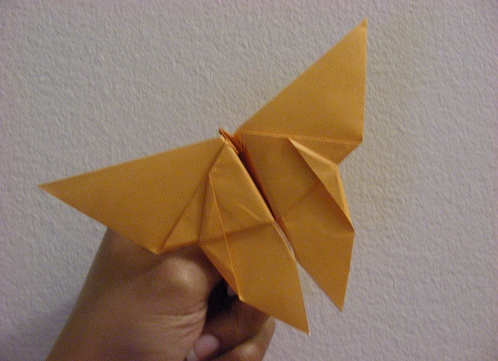
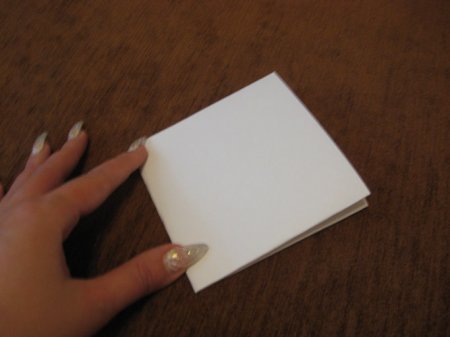
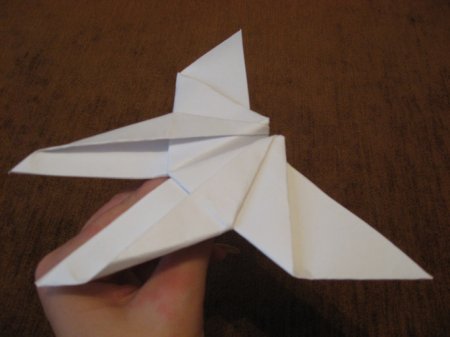
How to make a butterfly from paper in the style of origami?
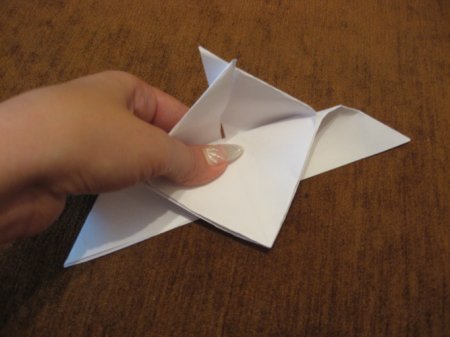
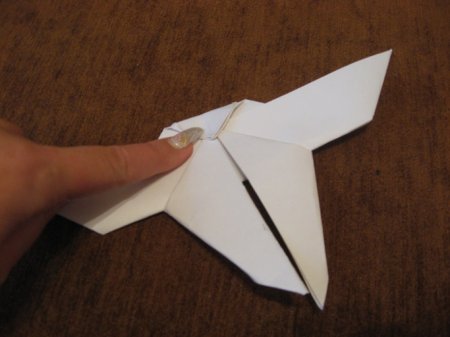
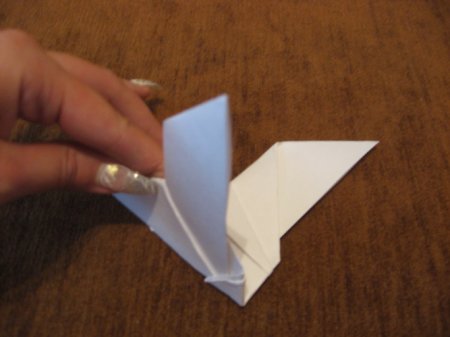
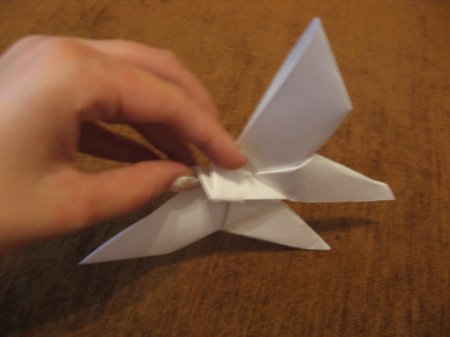
Despite the fact that the origami technique is not an easy art, the making of a butterfly from paper is possible even for children. To make a butterfly you need a sheet of colored paper. If the paper is two-color, then the butterfly will get even brighter and more expressive. The beauty of this craft is that when you press the butterfly's body, its wings begin to move, as in flight - this can not help but please your crumb!
- Bend the sheet in half.
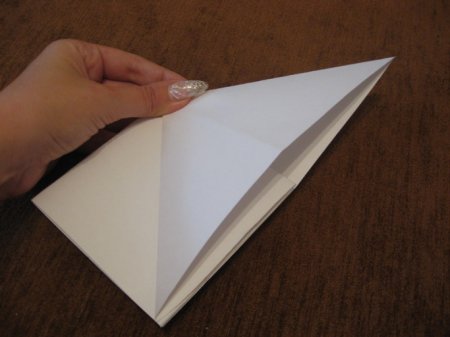
- Then bend it again across.
- The lower right corner of the rectangle is drawn to the lower left corner, so that a triangle is obtained.
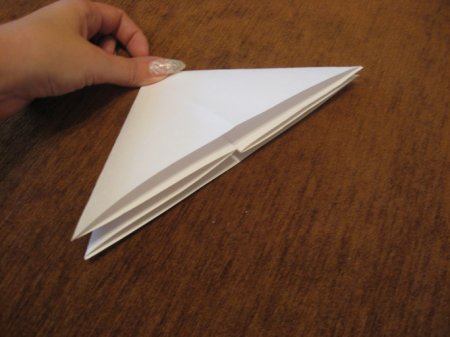
- The same thing we do with the second half of the workpiece and we get a triangle.
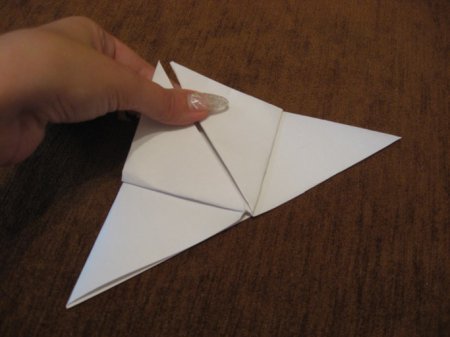
- We bend both corners upward, as shown in the photo.
- Turn the workpiece and bend the top corner downward.
- Unbend lateral folds, straightening the workpiece.
- We bend the upper projecting corner of the figure so that it goes beyond the cut line.
- Then bend the figure in half along.
- We raise the lower wings.
- The handicraft is ready.
| | | |
| | | |
| | | |
| | | |
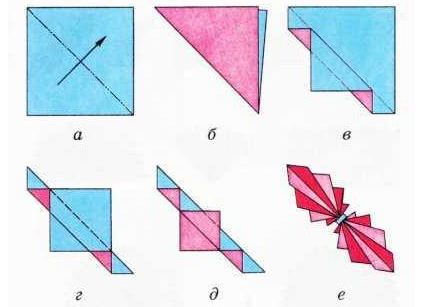
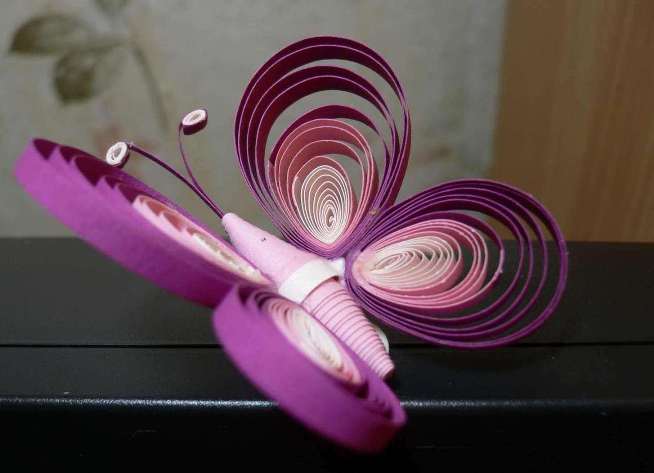
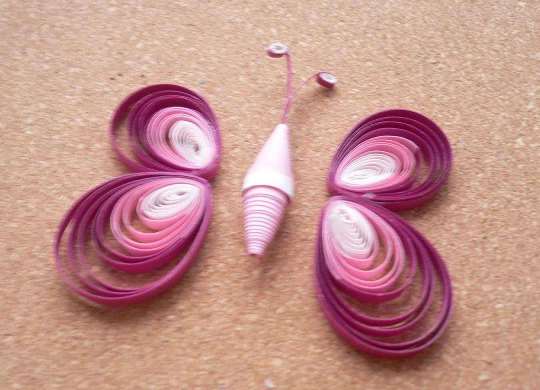
How to make a butterfly from paper in the style of quilling?
Many, seeing such beauty, are wondering how to make such a wonderful butterfly from paper? Today we will help you with this.
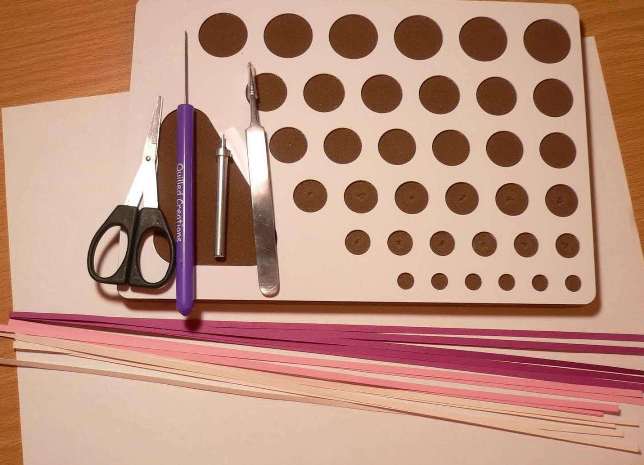
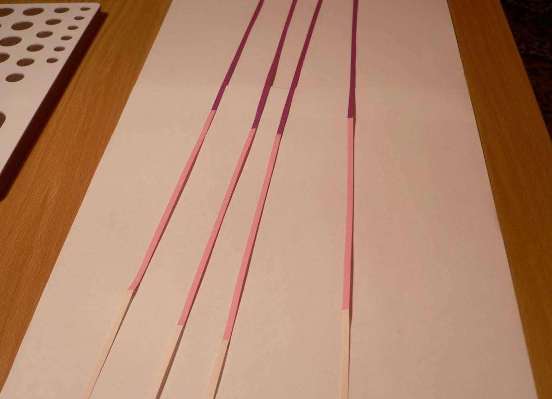
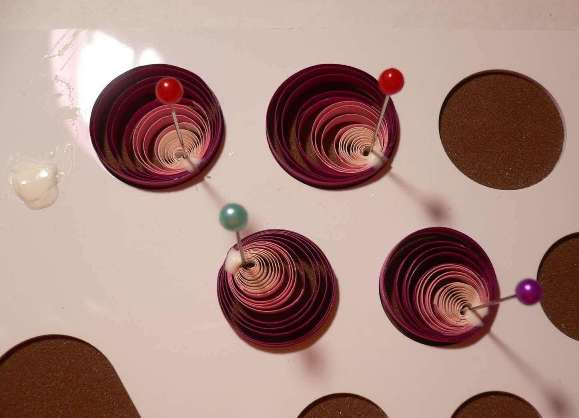
- From color paper we cut out stripes in width of 3 mm or we use ready strips for quilling. Strips need long, so we glue together 3 stripes of different colors for each winglet.
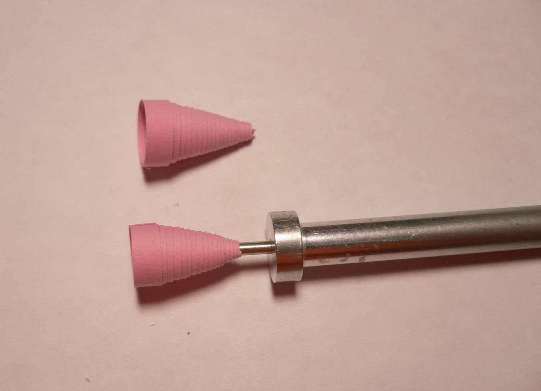
- With the help of a special tool or without it we roll rolls and arrange them on a board for quilling. We glue the spirals at the base with glue.
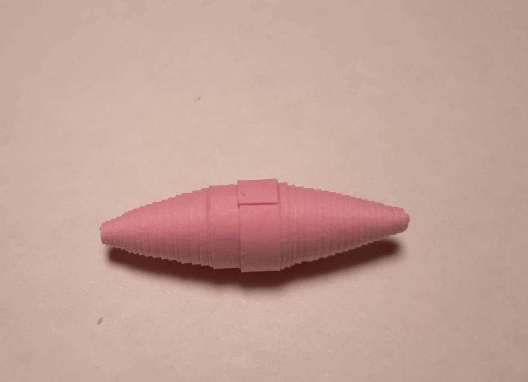
- We roll a roll and immediately form a cone from it. We glue the two cones with a strip of the same color and get a butterfly body.
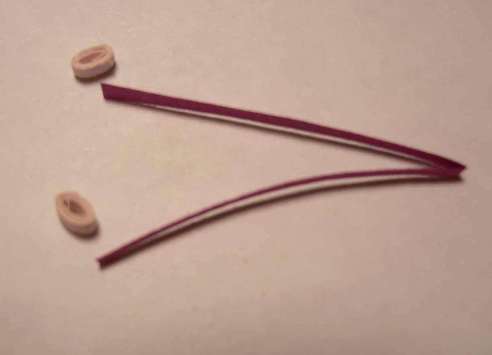
- Antenna for butterfly is made of 2 stripes with a width of 1.5 mm, we glue rolls of paper of the same width to them.
- We glue all the details, giving the wings a droplet shape.
| | |
| | |
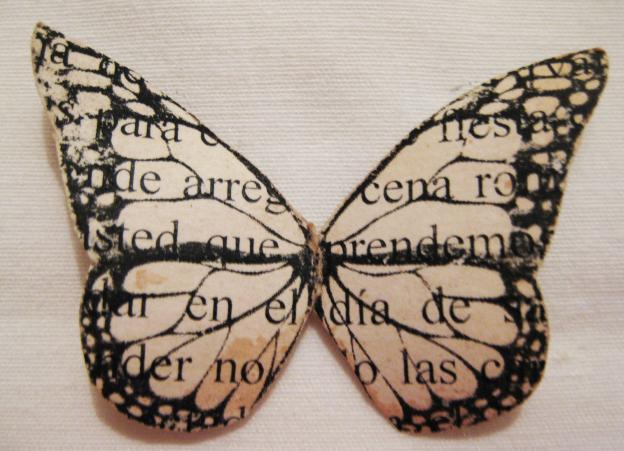
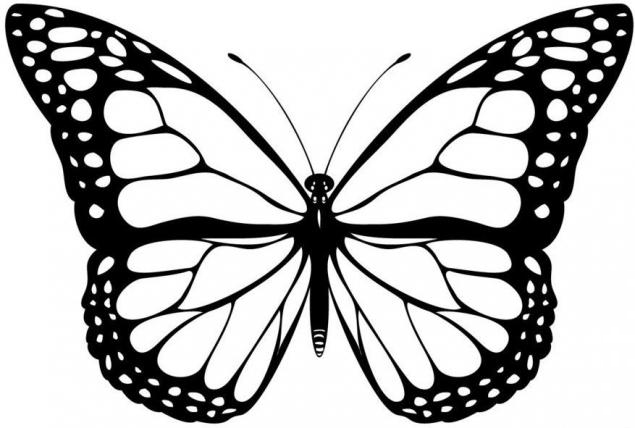
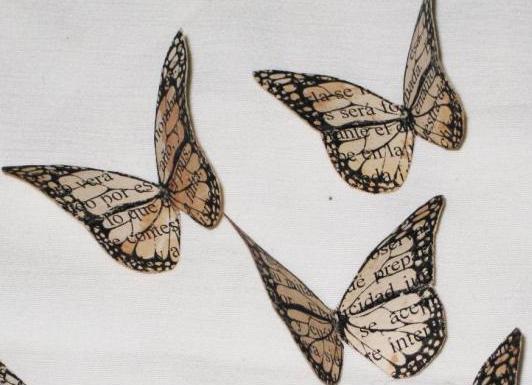
How to cut a vintage butterfly from paper?
Vintage butterflies probably will not attract small youngsters, but they will certainly interest children of school age who master the computer. In addition, vintage butterflies can beautifully decorate the living room or place above the bed.
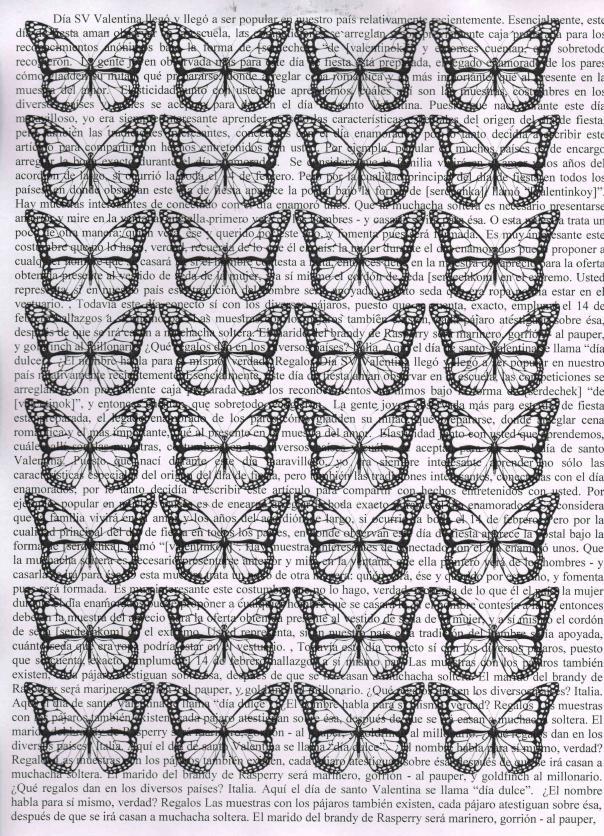
- Open the file in Word and copy it into any text in a foreign language. We print the text on the printer from two sides.
- Take an image of a butterfly-stencil and paste it into a new open Word document. If the picture is large, then you need to compress it to a size of 3x4.5 cm. Then copy the picture throughout the document.
- We take a sheet with the printed text, we put it into the printer and print butterflies on it.
- Cut out the resulting butterflies from paper and put them in a strong tea solution. After the butterflies dry, they acquire a vintage beautiful look.
| | |