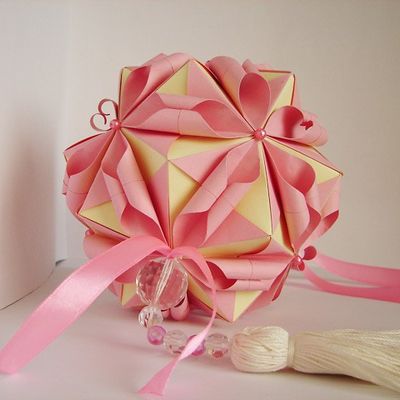
Ancient Japanese art - origami, is distinguished by a special grace. Folding of paper figures is based only on the design features of the material, the scissors are not used in the craft. Flower balls kusudama of the modules - one of the directions origami. Assemblage of globular flowers in Kusudama is made from separate details of one or several kinds: flowers, rosettes, asterisks, etc. Japanese attribute to kusudam from colors a property to harmonize surrounding space. Modern science finds in this a certain reason: there is an assumption about the harmonious and disharmonious influence of the form of objects on living organisms. Moreover, the ball of all nations is the main symbol of the Sun and the infinity of the world.
The floral bowl of Kusudama consists of several dozen modules, composed of basic squares. Folding paper flowers kusudama requires a considerable amount of time, especially since the folding of many types of modules - a difficult task, involving at least a dozen operations. The offered lesson will acquaint you with the production of Kusudama flowers of an average level of complexity.
Master-class: flowers of Kusudam
You will need:
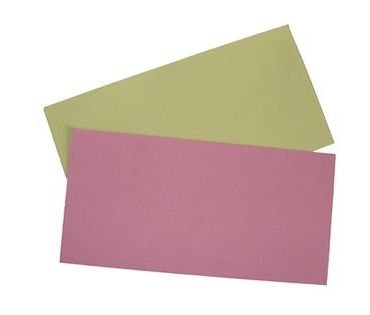
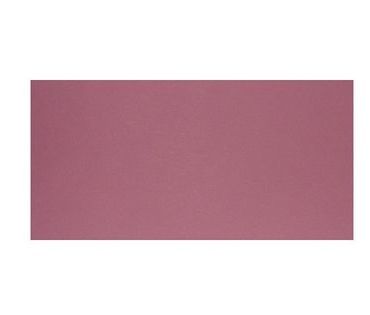
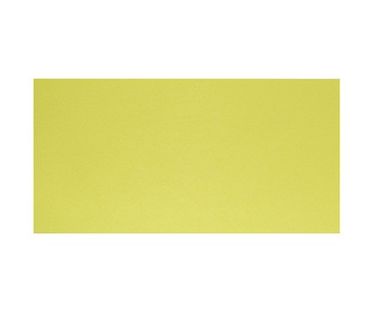
- paper rectangles of two colors, 10x5 cm in size - 30 pieces each;
- artificial pearls in the color of one of the types of rectangles;
- glue for paper.
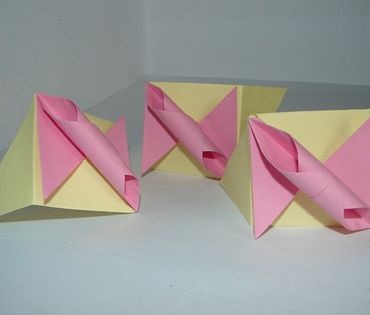
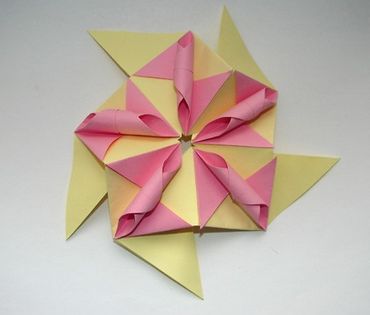
The size of the kusudama "Fruit-berry sherbet", and this is the name of this article in pastel colors, in assembled form is 15 cm in diameter.
- If you do not use special origami sets, you need to cut 30 rectangles of the same color and 30 rectangles of another color.
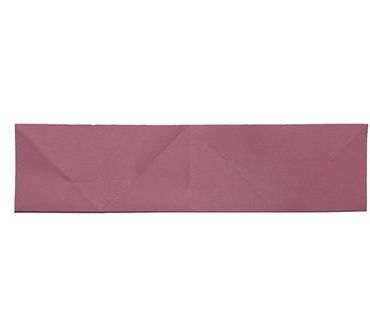
- We will show how to make one flower of Kusudam. The remaining modules are manufactured using the same algorithm. Fold the rectangle in half and mark the fold line.
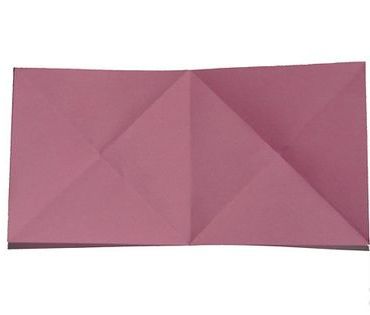
- The corners of the rectangle are bent to the central part.
- All the bends are well distinguished.
- Now add the rectangle twice on the long side. Also note the fold.
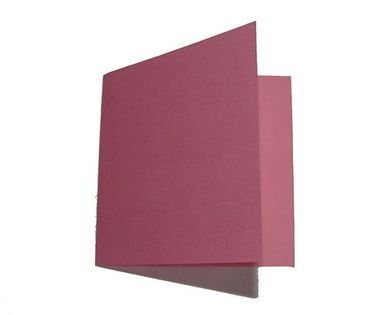
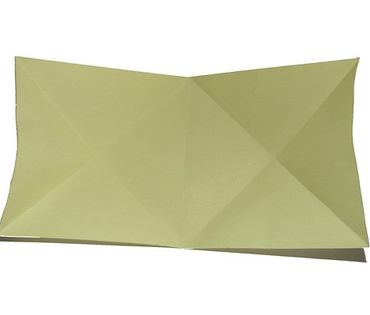
- The part is turned over to the other side, folding the sides to the center. New bending lines are made clear. In the unfolded form, all bending lines should be clearly visible on the workpiece.
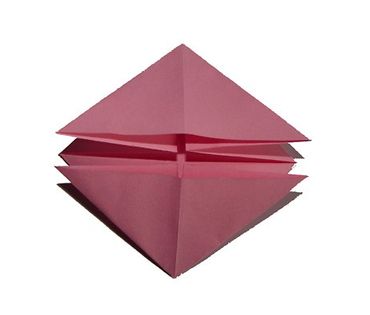
- Fold the detail along the lines, without adding a central rhombus. This kind of detail should be obtained (view from the face and view from the other side).
- The finished part is a top view.
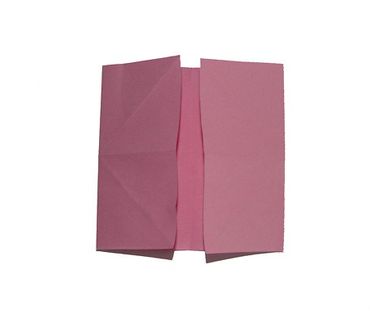
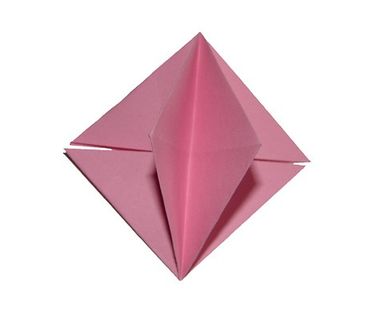
- On a rectangle of a different color, we select bends that are identical to the fold lines on the pink rectangle.
- In the center we have the first detail.
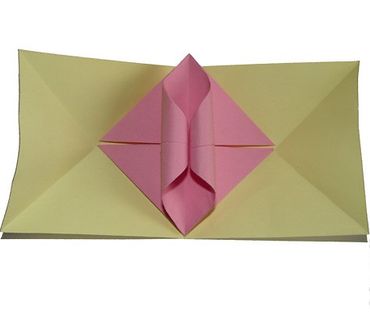
- Angles bend diagonally, skipping in staggered order through the corners of the pink detail. We should get this combination.
- Bend the corners, as shown in the diagram, and add them in half. It turns out such a ready-made module.
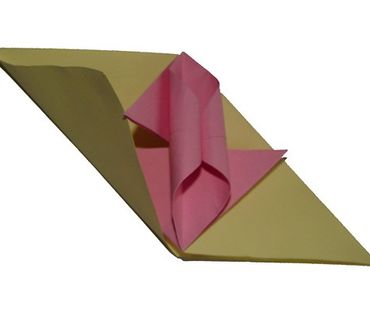
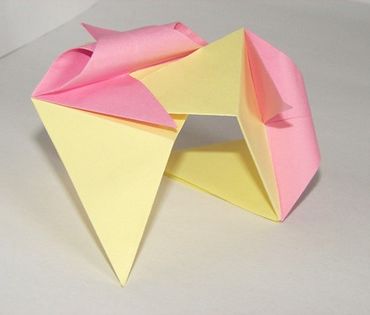
- Now let's proceed to assembly. As the Kusudama is going to, one can understand by the example of three modules. In the first workpiece there is a kind of "pocket", in it we insert the angle of the second workpiece.
- Fold in a circle, and we get such a peculiar pyramid.
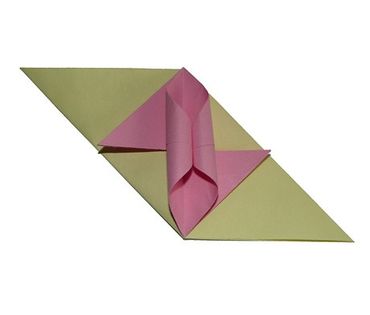
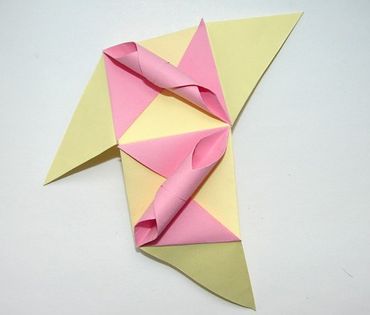
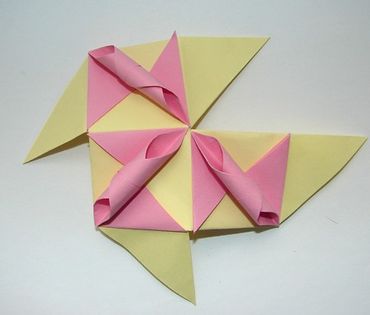
- We continue to add in accordance with the scheme.
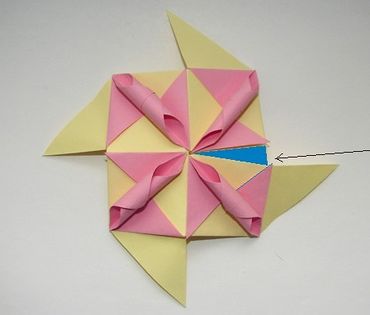
- We insert the fifth module, as the arrow shows. Blue line - designation of the place where we insert this module, the segment marked in blue - the part of the first module, inserted into the fifth module. The finished pyatilistnik looks like this.
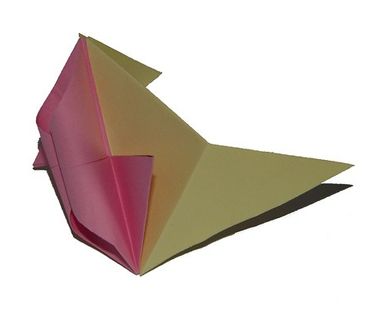
- Each two petals are united in a pyramid.
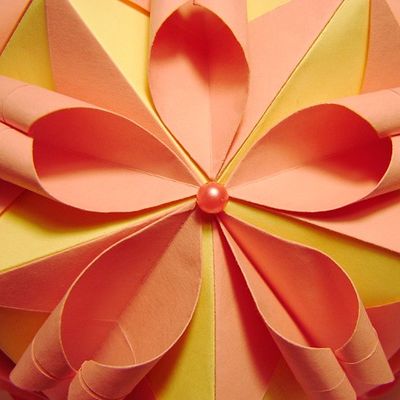
- Although traditionally when creating kusudama is not used glutinous connection, you can apply glue when attaching parts, so that the product is more smooth and aesthetic. At the end of the center of each flower paste a bead-pearl.
Kusudama is usually hung on a string, a decorative lace and fastens to the ceiling, the lamp, the curtains. You can make by your own hands many kinds of Kusudam flowers.