With the help of competently made makeup, you can not only hide any skin imperfections, but also significantly adjust the shape and facial features. To perform this make-up earlier had to contact a professional make-up artist. Today, any woman is able to independently sculpture, because everything necessary to make a face contouring - step by step instruction, make-up brushes, sponges and high-quality cosmetics in the form of highlighter and bronzer .
Contouring of an oval and elongated face
The ideal shape of the face is the oval, it is the base for drawing up corrective schemes. Accordingly, in this case, no sculpture is required, enough use of blush.
If contouring is still necessary, for example, for a photo shoot or performing on stage, you need to use the standard instruction for sculpting.
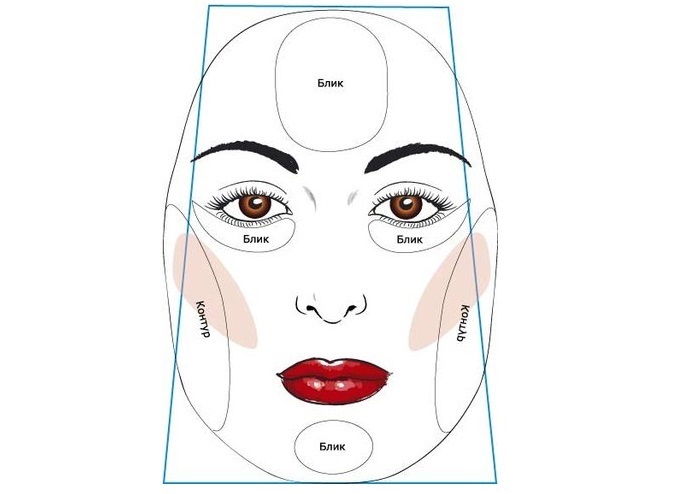
Step-by-step scheme of face contouring:
- Apply a highlight under the eyes, outline the outline in a triangle.
- Highlight the central line of the nose.
- A little highlater to put on the bridge of the nose, also in the form of a triangle.
- Mark the highlight over the upper lip, in the fovea.
- Highlight the center of the chin.
- Conduct haylayterom straight lines from the corners of the lips to the lower jaw.
- Distribute the bronzer along the hair growth line and along the temples.
- Highlight the cheekbones - draw a slanting line starting under the malar bone and ending just above the corners of the lips.
- Apply bronzer on the sides of the nose, outlining the existing line haylaytera.
- Slightly darken the lateral lower parts of the chin.
- Decorate the sculptured lines with a sponge.
- Finish the make-up with crumbly transparent powder.
With an elongated shape of the face, the contouring is also quite simple - it is necessary to slightly darken the top of the forehead, near the hair growth line, and the lower part of the chin. This will make the face visually shorter.
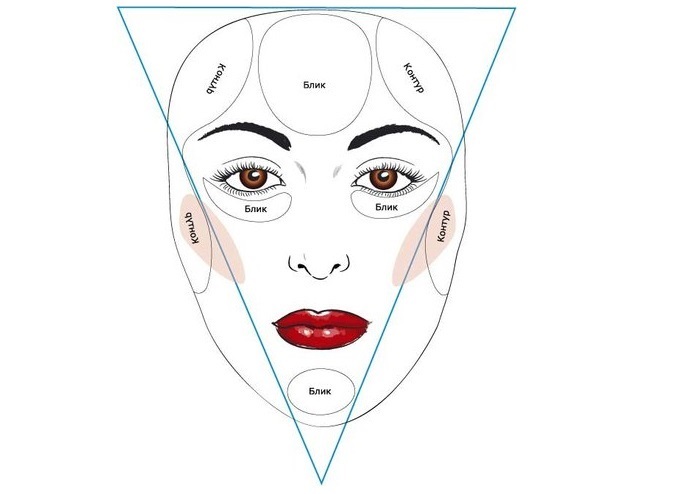
Contouring of a round and triangular face
Correction of the rounded forms assumes deep darkening along the sides of the forehead, temples and most cheeks, including the angle of the lower jaw. The highlighter is applied under the eyes, on the central part of the chin and the forehead (middle).
To sculpt the triangular face, the same zones are displayed as in the case of a round shape. The bronze is used less - only on the sides of the forehead, on the temples and the upper part of the cheeks, just stepping on the cheekbone.
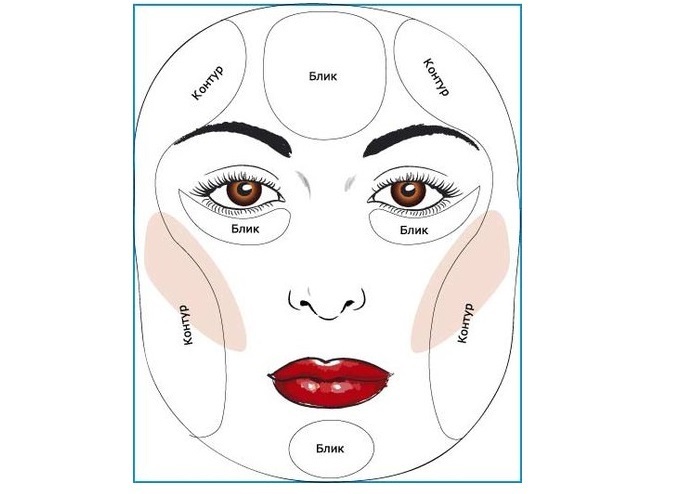
Contouring a square and rectangular face
Adjust wide cheekbones and forehead in the case of a square-shaped face, if you apply a little haylaytera in the center of the chin and in the middle of the forehead, as well as under the eyes. Blind should be whiskey, cheeks, corners of the lower jaw, lateral frontal lobes.
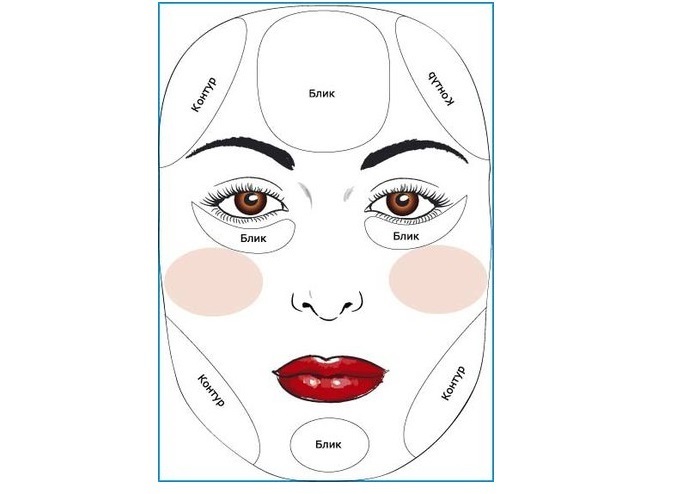
With a rectangular face, highlighting is necessary only in the center of the forehead and chin. Bronzator is applied over the lower jaw and forehead, on the sides, whiskey is not necessary to process.
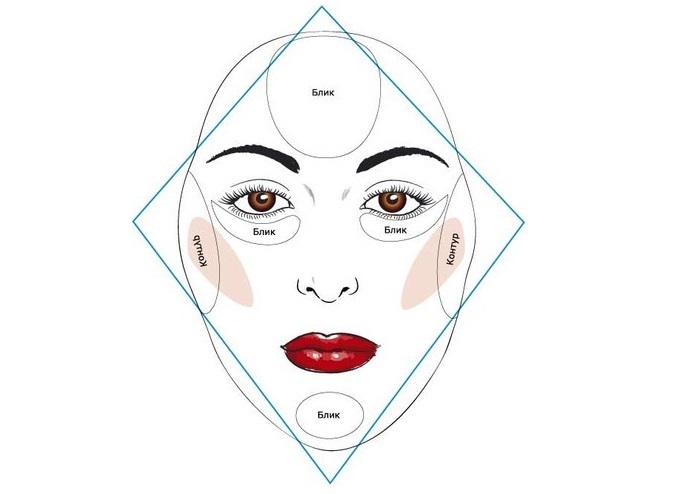
Correct contouring of a rhomboid and pear-shaped face
To improve the facial features in the form of a rhombus, the highlighter is distributed in the center of the forehead and chin, and glare under the eyes is also formed. The blackout is done exclusively to the side of the zygomatic bones.
The face in the form of a trapezoid or a pear is sculpted in a similar way. The same parts as in the diamond-shaped form are brightened, the bronzer is applied straight down, from the malar bone to the corner of the lower jaw.