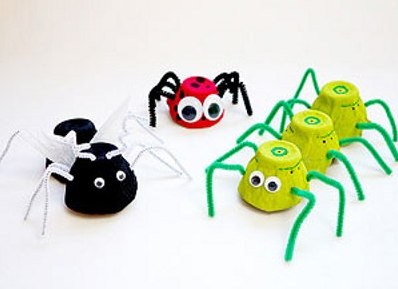
Cute beetles from cardboard boxes for eggs
You will need:
- 1 cardboard from eggs;
- black, red and green tempera paint;
- glue;
- brushes;
- eyes for toys;
- White paper;
- needle or pushpins;
- markers;
- tubes for drinks;
- gun with hot glue.
Such crafts can be done not only from cardboard, but also colored paper, preferably of high density. For this:
- Separate from packing from eggs separate one, two or three cells. Cut off the top of the box, leaving only the bottom. When using colored paper, you will need to make such semicircles by gluing them together.
- Paint the blanks. Such crafts made of paper and cardboard, made by themselves, can represent a caterpillar, a ladybird or any other insect known to you.
- After the paint has dried, draw any missing details with a marker: dots, mouth, nose, etc.
- Glue the eyes to the front of the cardboard or paper cell and cut the beverage tubes into pieces of different lengths: these are the legs and antennae of the insect. Do it on paper and cardboard artwork of this type for children is not difficult.
- Using a needle or a button, make holes in the cardboard or paper in the places where these additional parts will be inserted. Insert the tubes in them and fix the ends from inside, bending or turning them inside the cell. If desired, such beautiful crafts made of paper and cardboard can be supplemented with wings made of tissue paper.
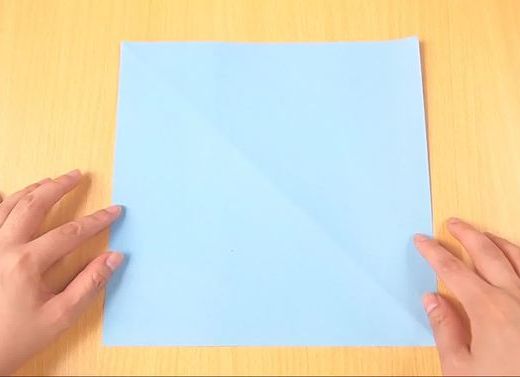
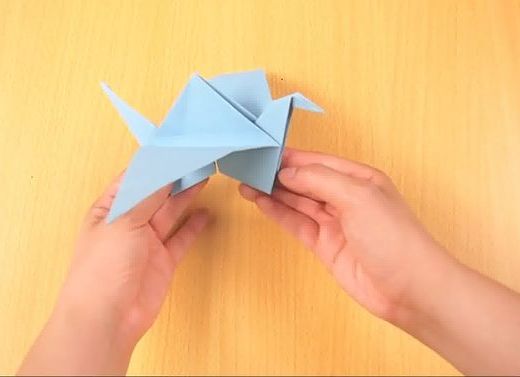
Paper or cardboard birdie
To make it, you must stock up:
- colored paper or cardboard;
- glue;
- scissors;
- with a pencil;
- two toy buckets with a round bottom of different diameters.
Of all the voluminous articles made of paper and cardboard, this is one of the most simple. Now let's start making:
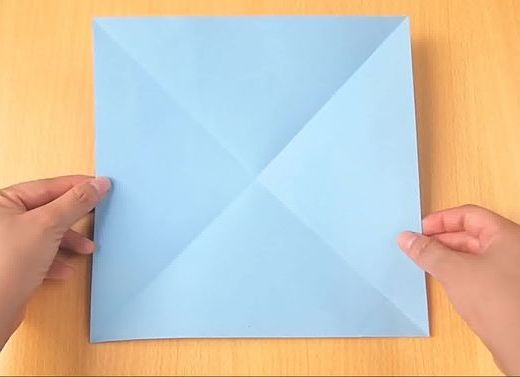
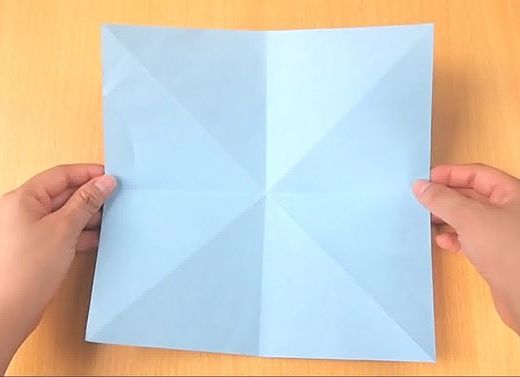
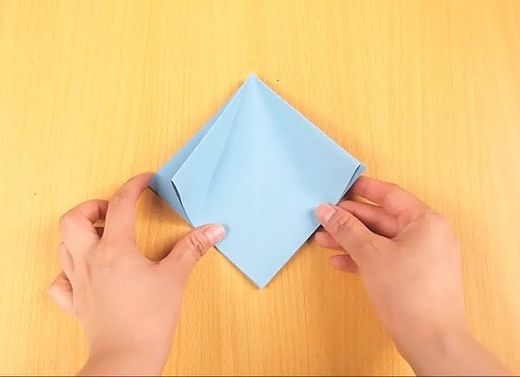
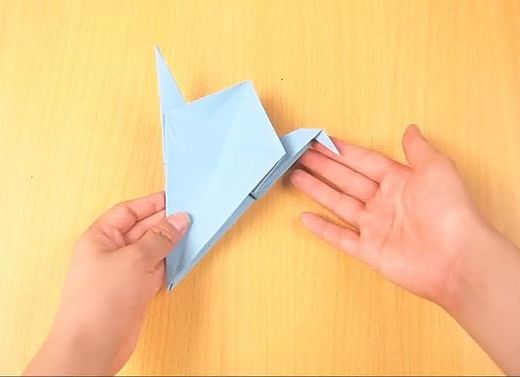
- Take a square sheet of paper and fold it in half diagonally first one way, then the other. Then expand it: you will see the similarity of the letter X formed by the folds.
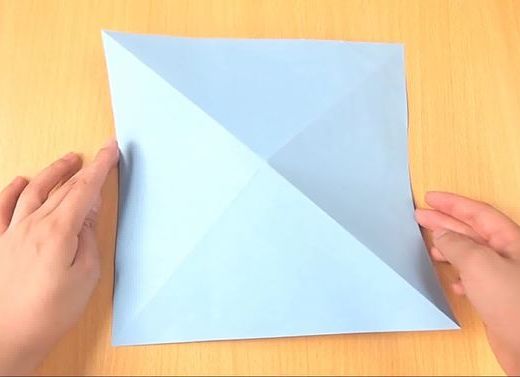
- Turn over the paper and make sure that the center of the improvised X letter is slightly raised.
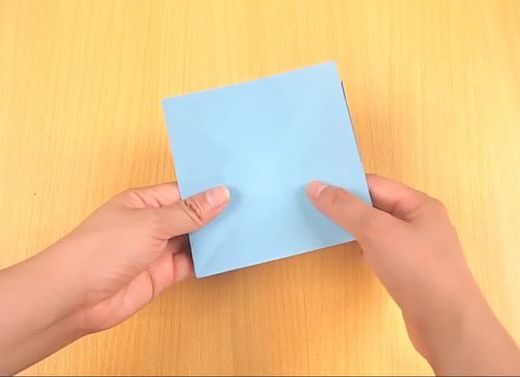
- Make a large "plus" of paper, whose center should coincide with the center of the letter X. Bend all corners towards the center.
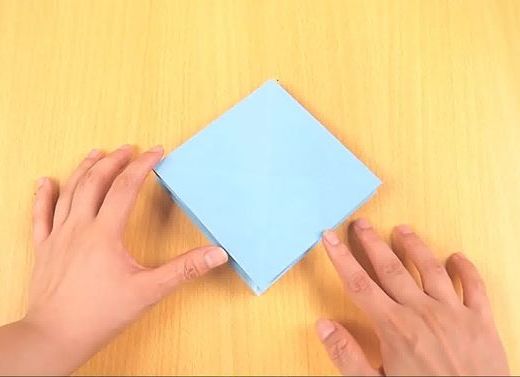
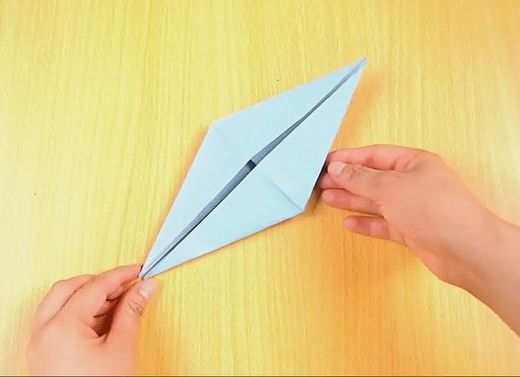
- Straighten the paper into a square and flip it over, so you will get a diamond, the upper edges of which need to be bent inward to the center line. Make sure that there is a hole in the top of the diamond. Take the top layer of paper and fold its right corner down and inward towards the center, repeat the same with the left corner. Turn the paper over and follow the same procedure with another layer.
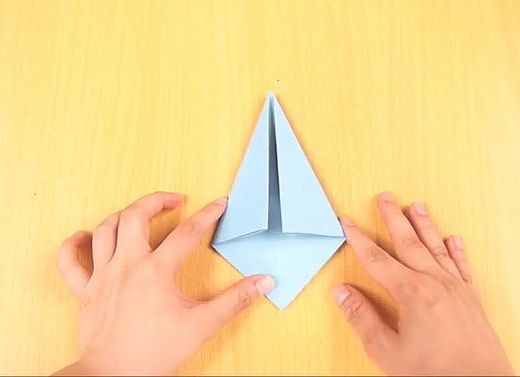
- Gently unfold all the folds and raise the lower corner of the diamond, opening it. Straighten, turn over the paper and repeat all over again.
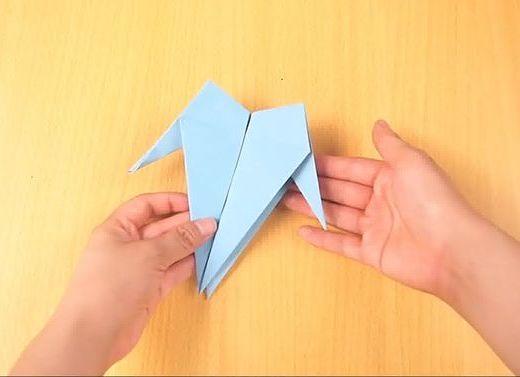
- While holding the diamond where it is divided into 2 parts, fold each of the top points so that they are pointing down and out.
- Fold the remaining layers of the figure down (forward and backward). Take one of the sides of the diamond and fold to form the bird's head. Bend it a little and tilt it down.
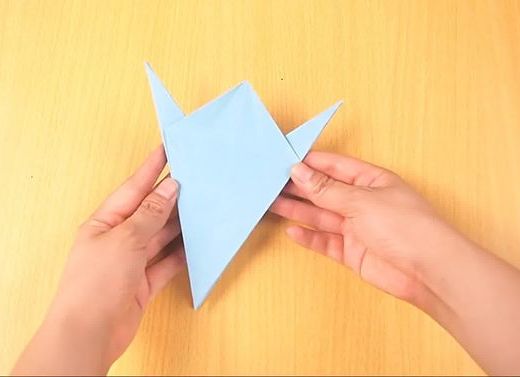
- Pull the wings out of the folds of paper and give them a round shape, and finally complete the product with a nice tail.
| | |
| | |
| | |
| | |
| | |
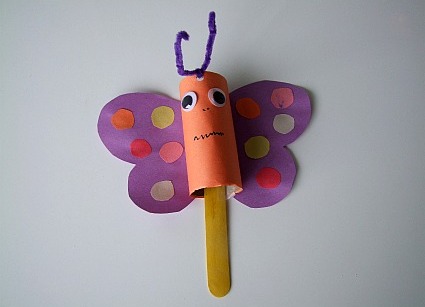
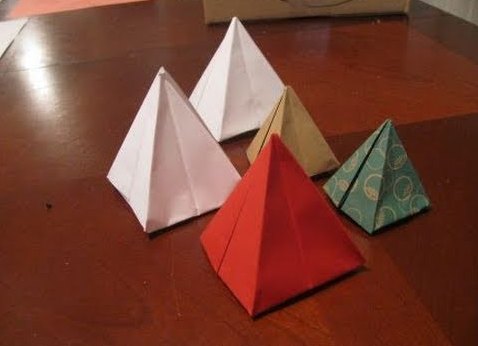
Try also to make other original children's crafts made of paper and cardboard: you are sure to be pleased with the nice chickens from cardboard for eggs, flowers, birds, animals, polyhedra, flashlights and Christmas decorations made in origami technique, as well as birds, butterflies and other animals , the material for which were the sleeves of toilet paper.
| | | |
| | | |
| | | |