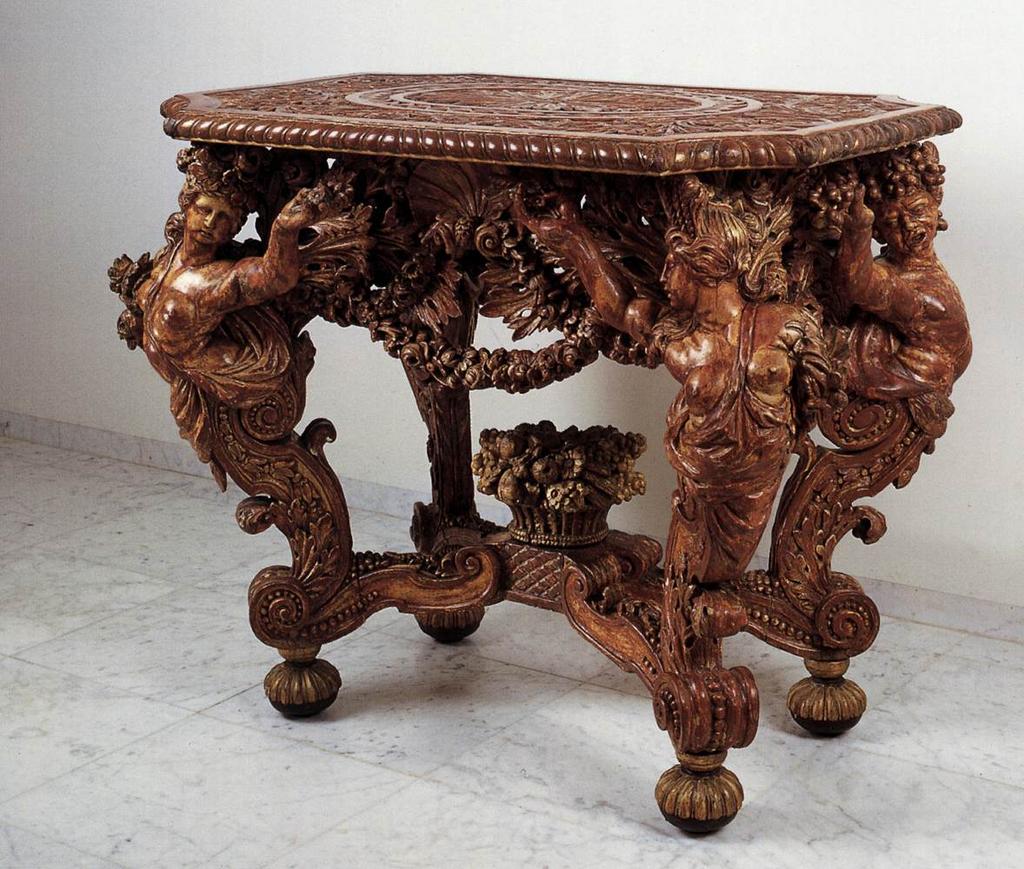
Furniture, which is made of wood, has always been valued and has always been in demand. Products made from natural, environmentally friendly material are not harmful to health in comparison, for example, with plywood or plastic. Furniture in the house speaks of the owner's well-being, and the carved interior objects are immediately distinguished among others, they differ in their beauty and grandeur. Elements of decor, which are made by hand, will be an invaluable decoration of the house, because they feel the soul.
If you decide to independently do the selection of wood for making carved furniture, then it is better to stay on the linden, birch or alder.
Wooden furniture is not everyone can afford, because it is quite rare and expensive. Here we will tell you how quickly, easily and inexpensively to make carved furniture yourself.
Master-class on making a carved table
Simple tables are available in any furniture store, but their uncomplicated square shapes have long attracted no one. Today we will talk in detail about how to make a classic carved table on three legs.
Required Tools:
- Lathe.
- Drill or screwdriver.
- Chisels.
- Incisors.
- Tesla and an ax.
Materials you will need:
- Board of solid wood (chestnut).
- MDF for the table top.
- Dowels.
- Screws.
- Dowels.
- PVA glue.
Master Class
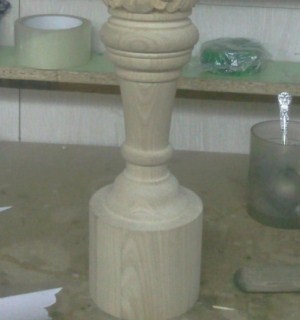
- On the lathe we make the first part of the table - the leg, the central support of the table.
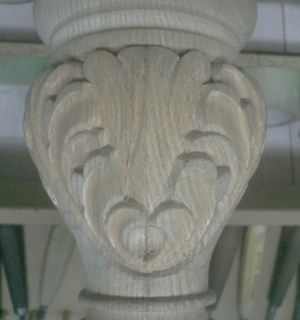
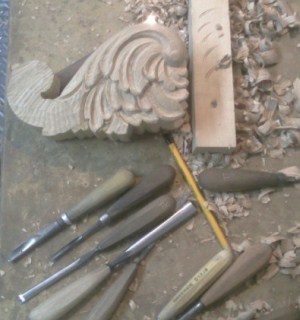
- On the carved leg, we now cut out the acanthus sheet, as well as a scaled drawing, which you will see on the following images.
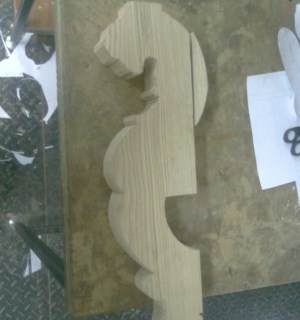
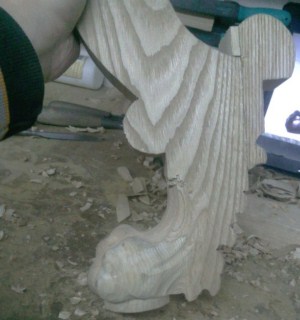
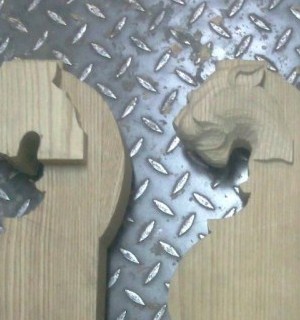
- At this stage, we will cut three legs - lions. On the board, we draw a drawing of a flat lion and then carefully cut out along the lines. The photo shows one of the cut out legs.
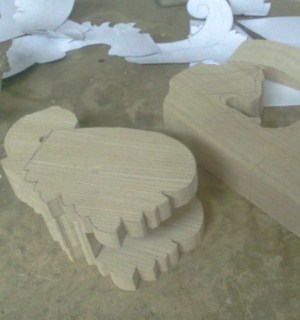
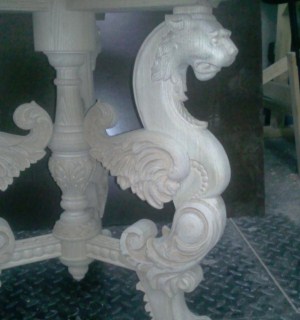
- The legs have a three-dimensional appearance, so in the future they will be additionally glued in places where the muzzle, paw and mane are located. Since the lion is mythical, and thus winged - we begin to make a wing preparation.
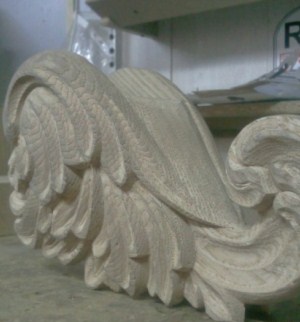
- The wing is fixed quite simply - you just need to put it on the leg of our lion. That's how it looks.
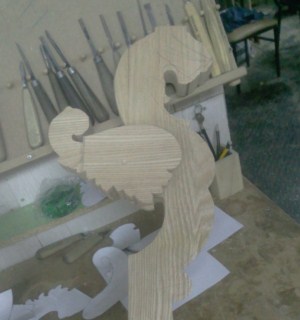
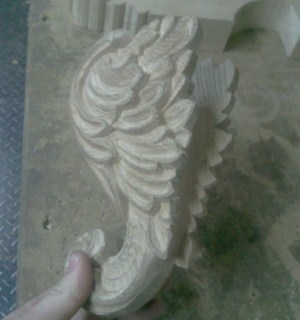
- We proceed to the most responsible stage of our work. We cut out feathers on wings and other conceived small patterns. That's the wing should work out.
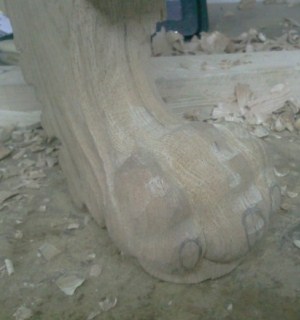
- On the paw of the lion for the thickness, we glue an additional board and begin to make threads on it. In the photo you can see that the volume of the paw is larger than the workpiece itself. The workpiece has a thickness of 46 mm, glue 25 mm on each side. See the side view of the photo.
- At this stage of making the legs, proceed to cutting the muzzle of the lion. Initially, we paste additional layers of the tree , after removing the excess, and finally, we cut out all the details. The photo partially shows these stages.
- Now go to the mane processing. Similar to the previous parts, we glue the wood mass along the sides and make carved elements.
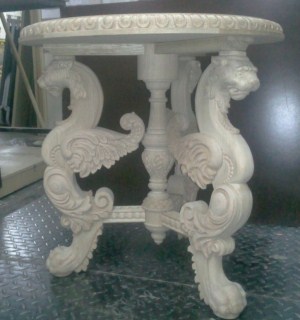
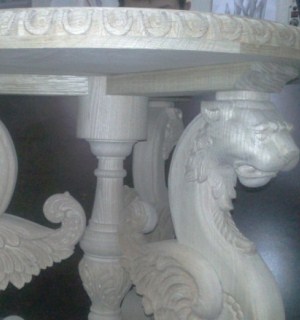
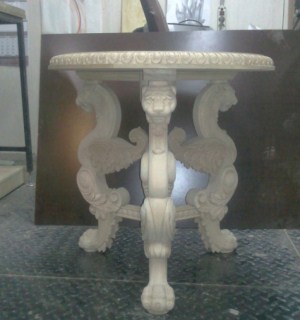
- Next, we make the table cover. We cut an even circle, on the sides we make a figured carving.
- We cut out and cut out the lower footsteps and supports at the top under the cover. And the last job is assembling the table. For this we use dowels, screeds and PVA glue.
Now you can and admire the finished table. And you will agree that it is much more interesting and original look carved wooden furniture , made by own hands.