A dacha bench is not an ordinary piece of furniture, on which you can relax. A garden bench can decorate your site. With its help you can create a whole composition that perfectly fits into the overall design of your site. As a rule, it is not difficult to make a garden bench from a tree with your own hands. Let's look at this process step-by-step.
Wooden garden bench
If you decide to make a bench yourself from a tree, then before starting to work, you need to decide on the design of the future product, and also decide in which place of the garden your bench will stand.
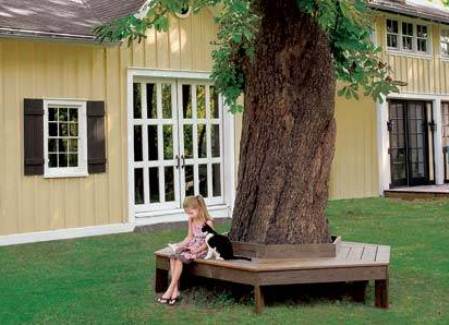
Wood is an ideal material for making a summer benches. If you have a separately growing tree on the site, you can build an original bench around this tree. Such a bench will be comfortable at any time of the day, since one of its parts will always be in the shade.
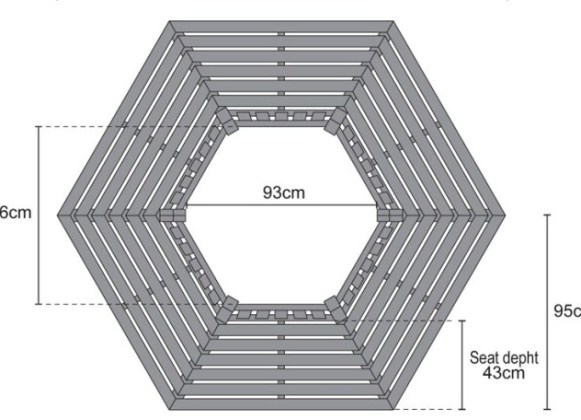
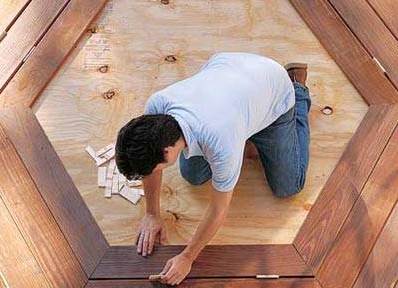
The bench around the tree is most often made in the form of a hexagon. And the diameter of the tree trunk should exceed 500 mm. A good material for the bench is a well-dried and specially treated pine.
To produce a garden bench, we will need such tools and materials:
- planed boards with a section of 70x70 mm, length 480 mm;
- sawn timber sectioned 45x70 mm;
- boards with a section of 22x95 mm;
- bolts, washers and nuts;
- drill;
- adjustable wrench;
- varnish and paint.
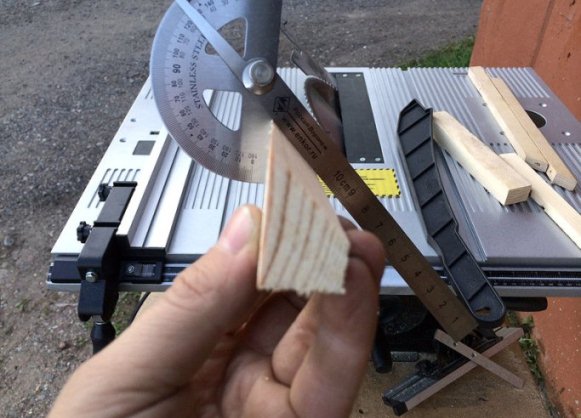
- First you need to draw a drawing of the future bench. We measure the diameter of the tree. If it is still young, then add another 30 cm to the size obtained. To add the diameter of an adult tree, add 15 cm. To determine the length of a single short element, it is necessary to divide the resulting diameter by 6. We mark this length on a measuring rod and cut edges at it at an angle of 30 °.
- We make 6 such rails. Connecting them around the tree, we check the correctness of their manufacture.
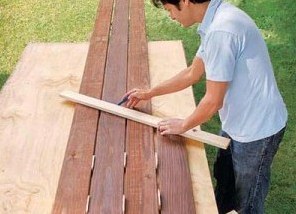
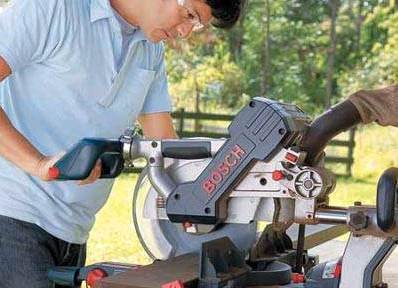
- We put three boards parallel to each other. Insert between them gaskets of 1 cm. Applying to the boards a measuring rail, we mark places for sawing. In this case, do not forget to mark the thirty-degree angles along the edges of the boards.
- We saw off the boards according to the planned lines.
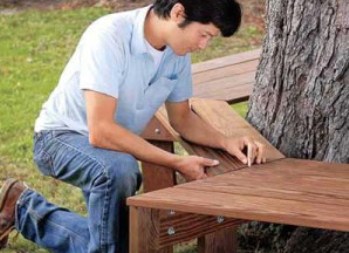
- On a flat surface we spread from the received elements a hexagon - the future seat of a bench. It is necessary to start with the shortest internal parts. Between all boards should be gaskets. Check the alignment of all corner elements.
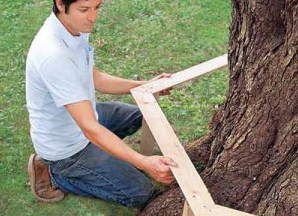
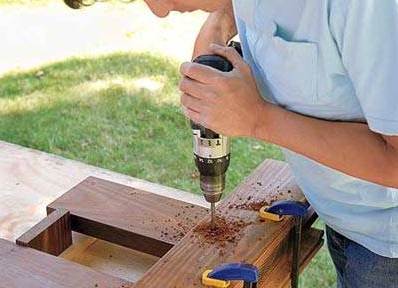
- We make legs for the bench. They consist of two elements: the inner and outer legs, between which is the support. Cut into the required sizes of 12 legs and 12 supports with ends at an angle of 30 °.
- With the help of a drill we drill holes on the one side of all the supports for bolts, having deviated from the edge of the support of 5 cm. We also do the same on the other side of the supports.
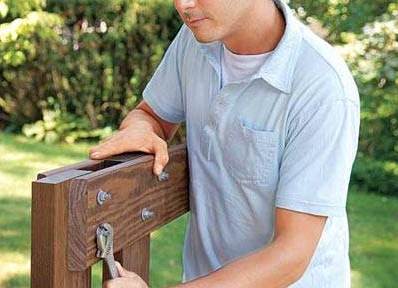
- We fasten bolts with washers and nuts with legs using the adjustable wrench.
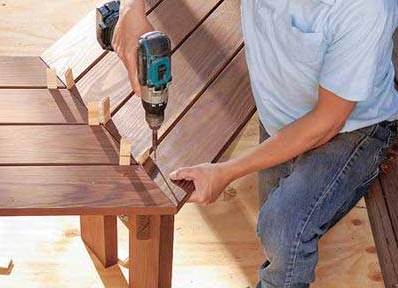
- Fixing the legs on a flat surface, we lay on them the seating boards, making sure that the joints between the boards are strictly in the center of each leg.
- We connect two adjacent seats. The same is done with the opposite sections of the bench. Now we fix the remaining boards of the seat, connecting them to the hexagon.
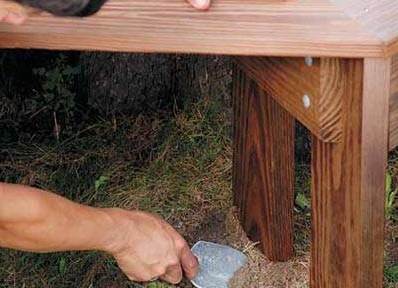
- With the help of a shovel, we remove the earth from under the legs of the bench until its surface is leveled. You can check this with a level.
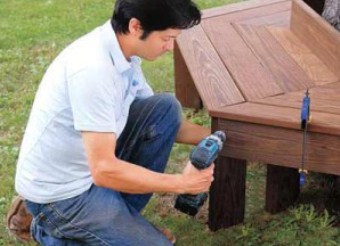
- We make an apron for our bench. To do this, we cut 6 bars, the length of which is equal to the distance between two outer legs. Drilled holes in them, attach bars to the outer legs of the bench.
- Now it remains to paint our bench or varnish. This is how the bench for the dacha, made of wood with its own hands, will look like.