On any holiday it is pleasant to receive original gifts made by own hands. To such handicrafts it is possible to carry a vase made of paper triangular modules in origami technique, as it can put artificial flowers and decorate the interior of the apartment.
In this article we will consider several schemes, how it is possible to make different vases from the modules, folded in the origami technique.
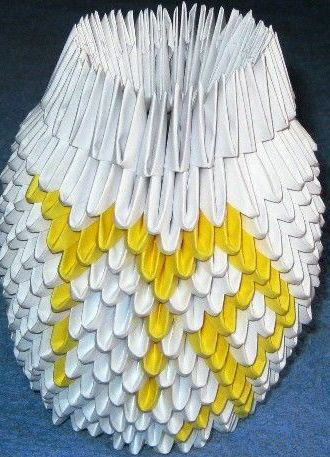
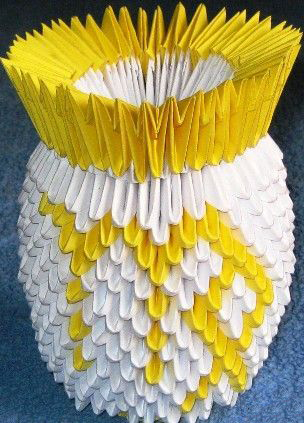
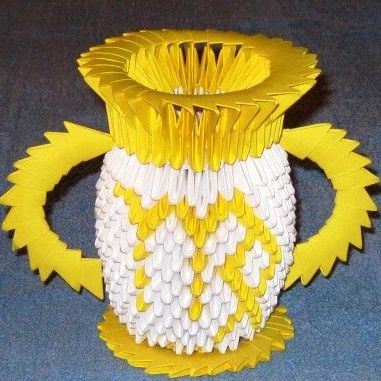
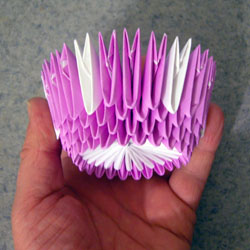
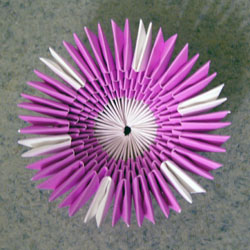
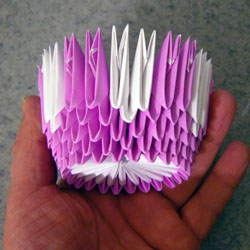
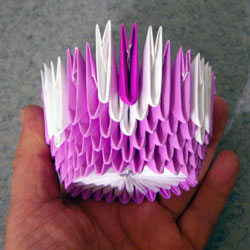
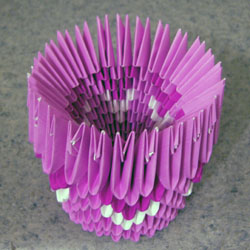
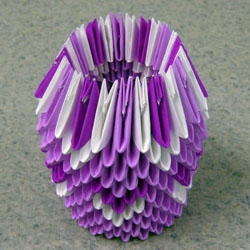
Master class 1: a simple vase made of triangular modules
It will take:
- 28 sheets of white and 14 sheets of colored paper;
- stationery knife or scissors;
- glue.
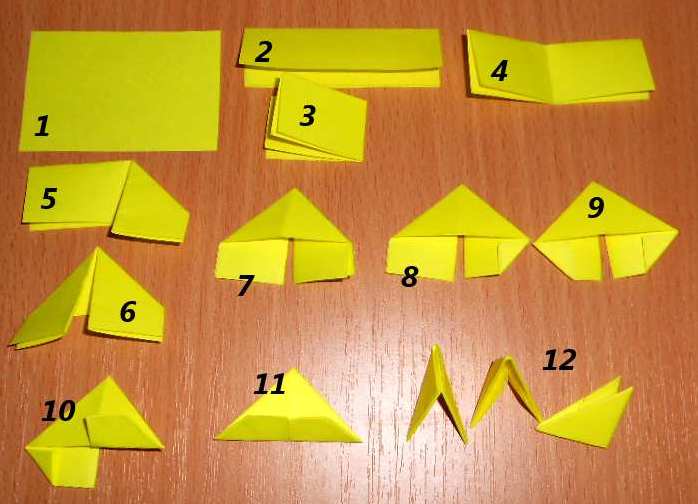
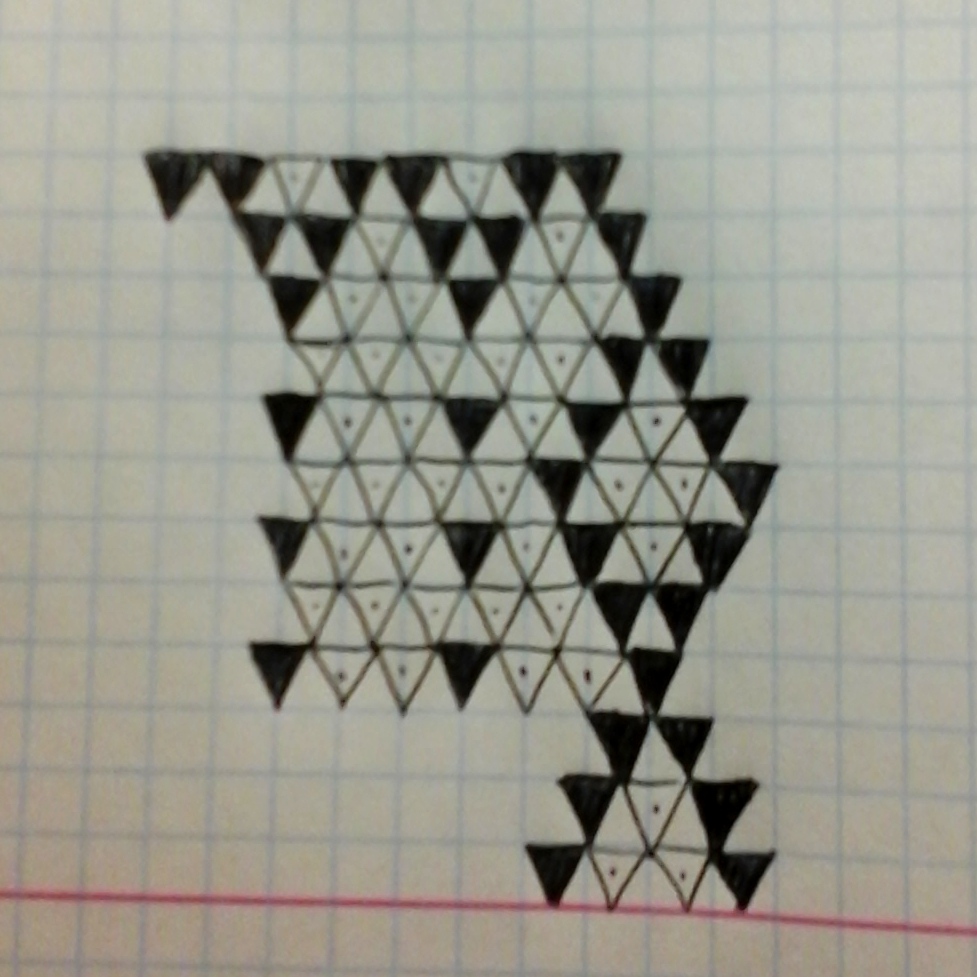
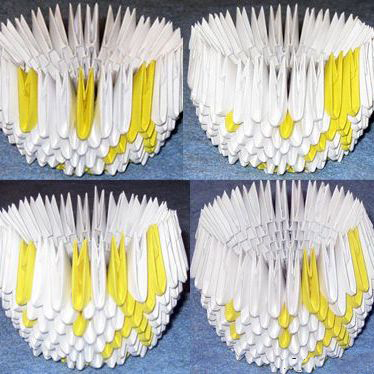
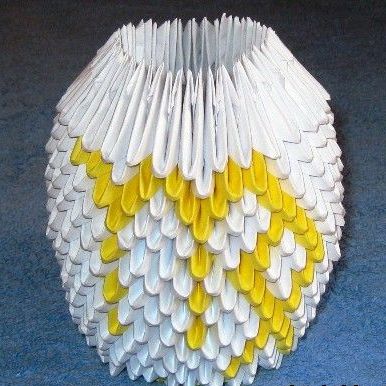
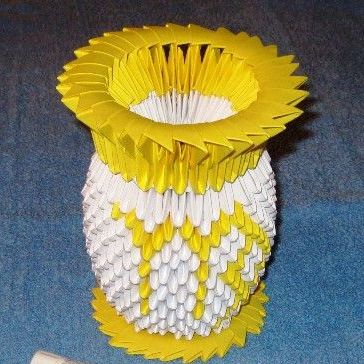
- We add triangular modules in the usual way. We need 433 white and 211 yellow modules. When you change the pattern on the vase, the number will change.
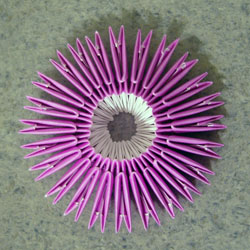
- For the 1st row we take 20 whites, and for the 2nd row we take 20 yellow modules and connect them.
- We make the third row of 20 yellow modules and turn the resulting circle in the other direction.
- We make the 4th row of 30 yellow details. To add 10 modules, first dress as usual, and for the second and third leave the adjacent pockets empty (in the photo they are marked with an arrow).
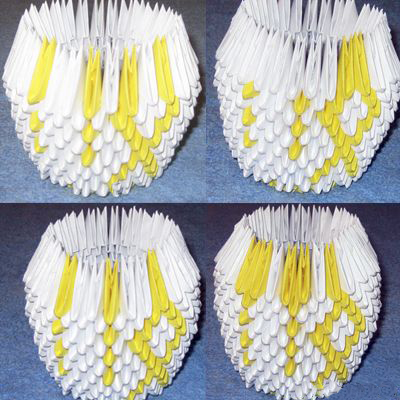
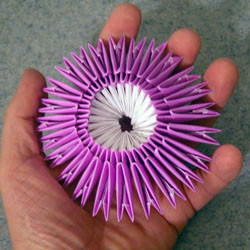
- Then we add rows (from 5th to 16th) of 30 modules, making a drawing on this scheme using yellow modules.
- After finishing the 16th row, we get the whole picture and in the 17th row we use only white modules (30pcs)
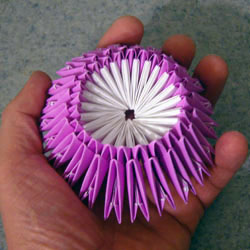
- For the 18th row, we take 30 white modules and put them back in front of the previous row.
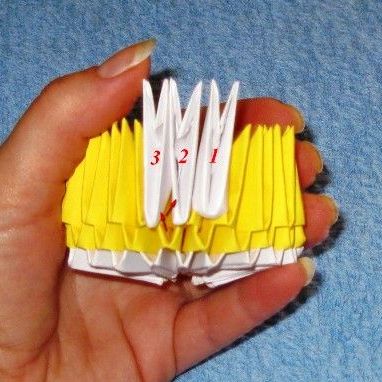
- The 19th row is made of 40 yellow details, evenly added in a circle.
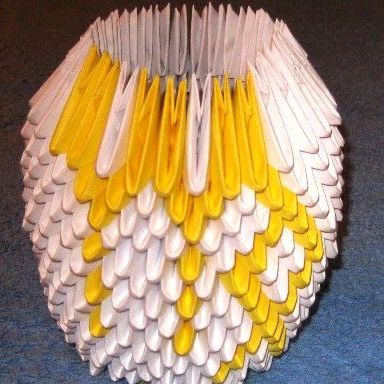
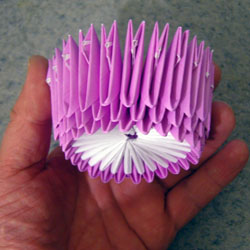
- The final row of 40 yellow parts is done like this: the left corner is inserted into the left pocket of the second module, and the right corner is inserted into the gap between the modules of the previous row.
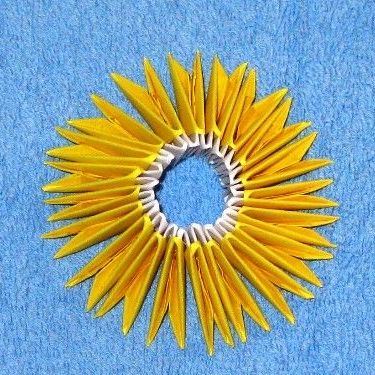
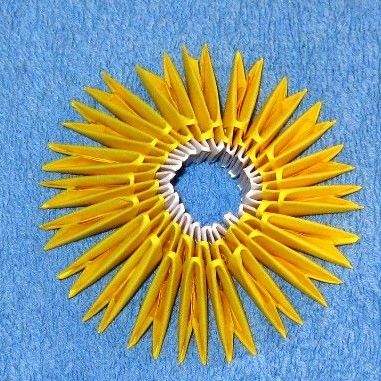
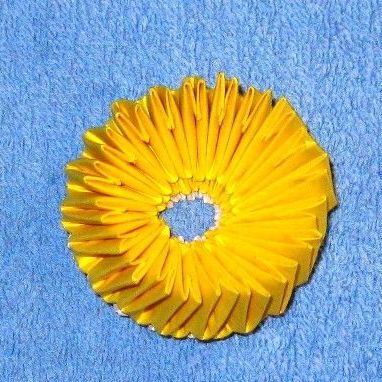
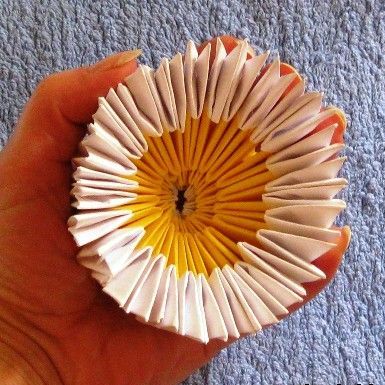
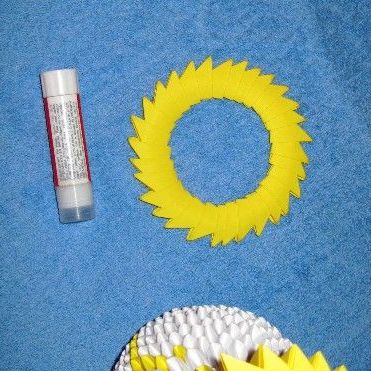
- The bottom of the vase is made of 30 yellow modules inserted into each other. The resulting ring is glued to the main workpiece.
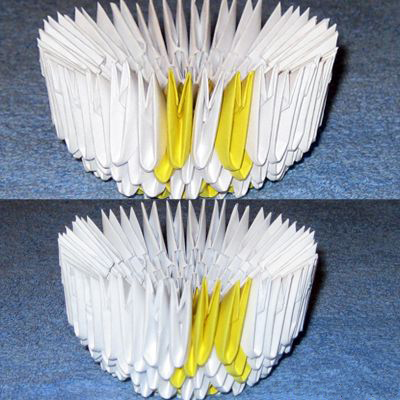
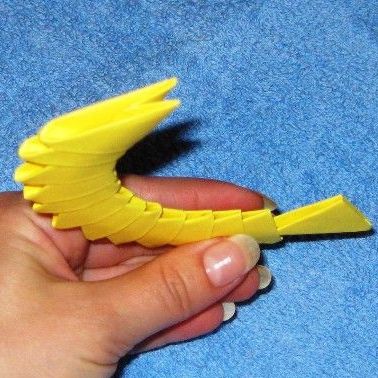
At will, you can make handles for a vase of 12 yellow details inserted into each other.
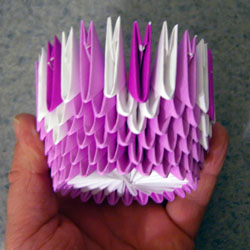
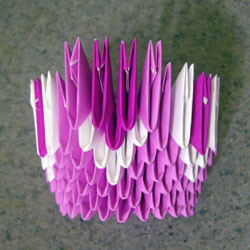
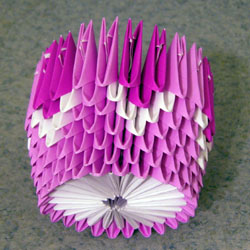
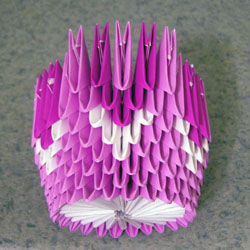
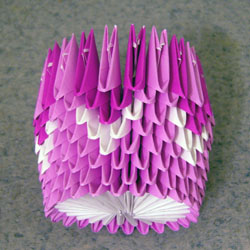
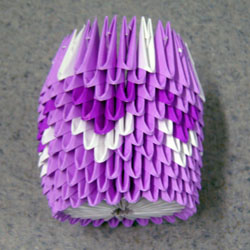
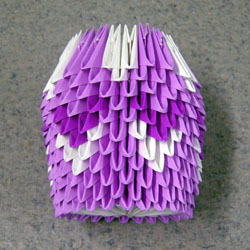
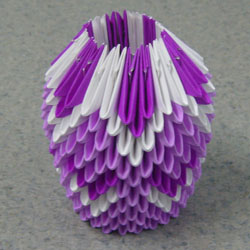
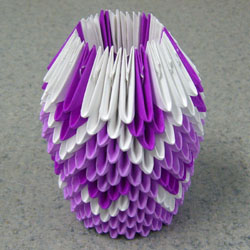
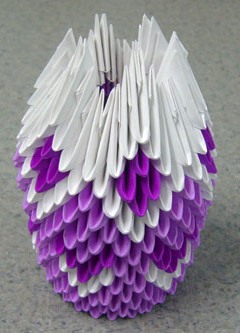
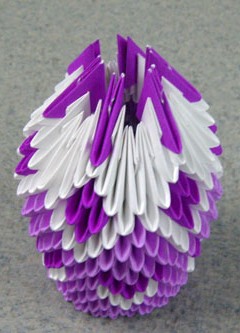
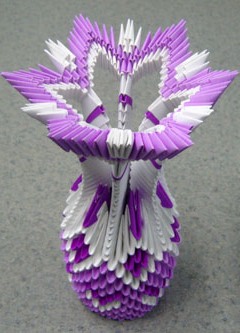
Master Class 2: exquisite vase from modules
It will take:
- white, light pink and bright pink paper;
- scissors and glue.
- Taking the white parts for the 1st row, and for light and pink ones for the 2nd and 3rd rows, we connect three rows of the chain in a standard way until the circle turns out.
- The resulting circle is compressed, turning it into a cylinder.
- The next series is made only of light pink details, for him and for all the subsequent series we will take 24 pieces.
- We begin to create a drawing.
- In the 4th row upwards through every three pink details we insert one white.
- In the 5th row we alternate white and pink details in two.
- In the 6th row we use such a combination of modules: white, light pink, white and bright pink.
- In the 7th row, alternate two light pink and two bright pink details.
- In the 8th row we alternate light pink and bright pink details through one.
- The 9th is made only of light pink details.
- From the 10th to the 12th series, we repeat the combinations of 4, 5 and 6 rows.
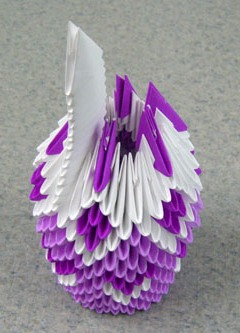
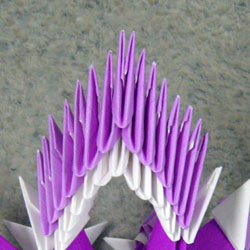
- In the 13th row we alternate white and bright pink details in two, and in the 14th - between the three white details we insert one bright pink.
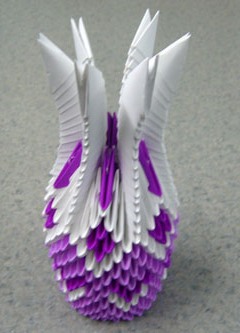
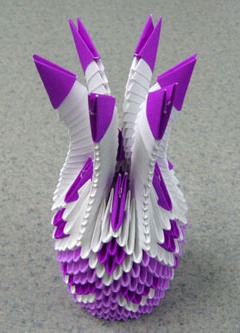
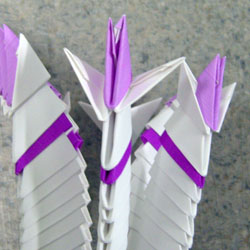
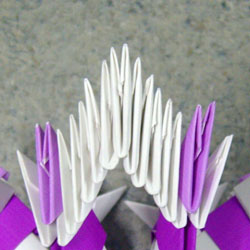
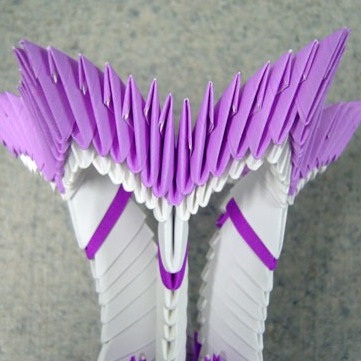
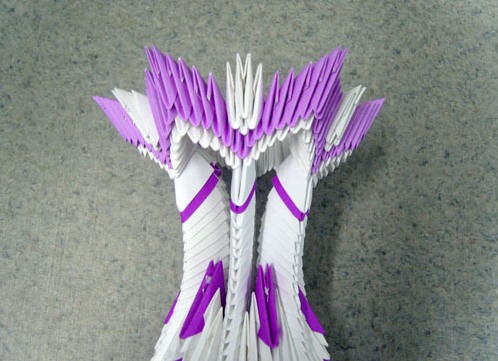
- On the 15th and 16th rows we make six pointed protrusions. The top of each ledge is designated by a bright pink module.
- We make 6 rows of 12 white modules and install them between the projections. At the end of each of them put on a bright pink and then white modules.
- To create a vase neck, you need to use smaller modules (1/32). For each stretched row we put on two white modules, fastened with pink.
- We make a ladder of 11 white modules and connect the tops made by it. We strengthen such ladder with pink details. We connect all the tops with such petals.
- Between the main lobes we attach 4 white modules.
Our elegant beautiful vase from paper modules is ready!
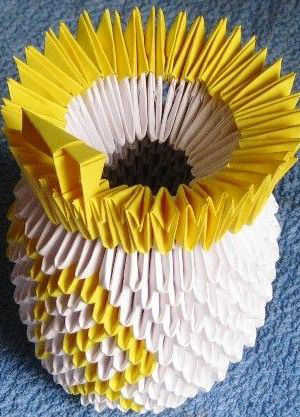
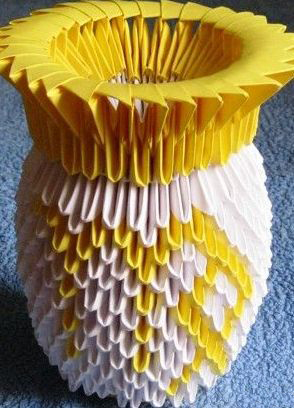
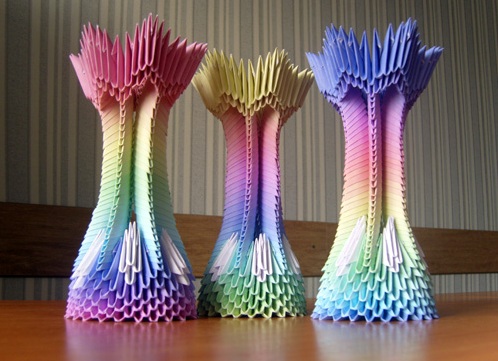
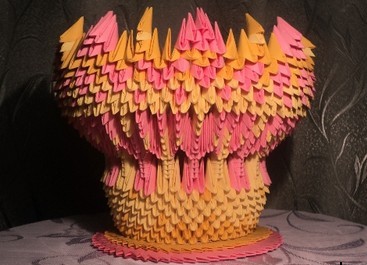
Using different color combinations and connection methods, you can make very beautiful and interesting vases from the modules.
From the modules you can make other interesting crafts, for example, a bunny or a snowman .
Subscribe to receive the best articles on Facebook
I already like Close |