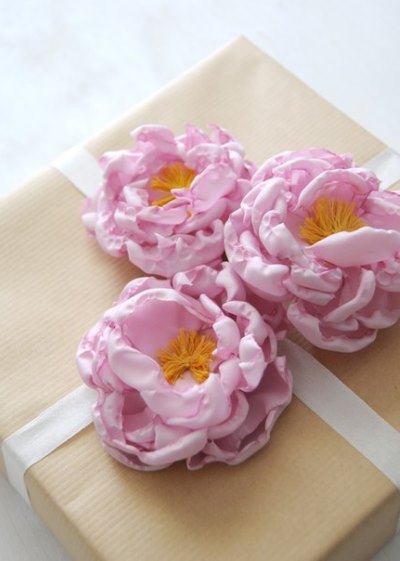
Probably everyone knows what the peony looks like, this big, bright and unusually beautiful flower that decorates parks, gardens and gardens from spring until late autumn.
At the same time, it is known that some types of pions are medicinal, they are widely used in medicine. However, the miraculous properties of the peony are not forgotten, and some now believe in its ability to drive away evil spirits and bring health and longevity. Of course, a living flower can not be carried with itself as an amulet. Let's try to find an alternative - we'll make a peony flower from a fabric that you can always carry with you as a brooch or just decorating your favorite clothes.
How to make a peony from a fabric?
To make a peony flower out of cloth, we need the following:
- one candle;
- material chiffon or light satin - in the fabric should be 100% polyester gently pink or white;
- scissors;
- thread yellow mulina;
- sewing needle;
- double sided tape.
Peony from fabric: a master class
If everything is ready for work, proceed!
1. Cut out the chiffon (in our case, gently pink) patterns in the form of five circles - four of them with a diameter of 7-8 centimeters. The last circle will make a little smaller. The contour of the circle does not have to be perfect.
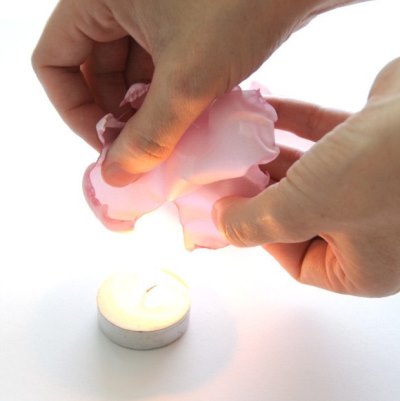
2. Make the petals. To do this, light the candle, take the first chiffon circle and put it to the candle flame. Gently rotate it until all the edges are evenly bent. The main thing here is not to overdo it, chiffon melts very easily. Repeat this step with all the remaining petals.
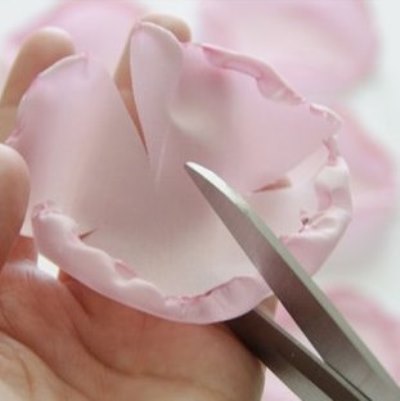
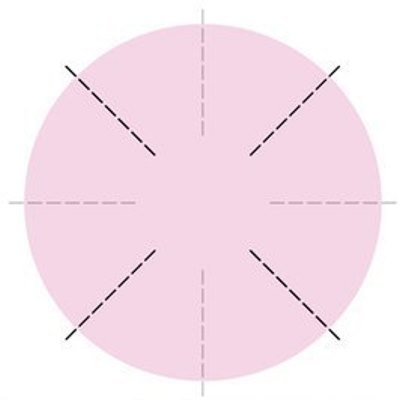
3. Next, on each edge melted around the edges, we make incisions in the manner shown in the diagram.
4. Now place the incisions above the flame of the candle, allowing them to melt in the same way as the edges, while the fabric is gently stretched in the places of incisions. We make a step with all five petals.
| | |
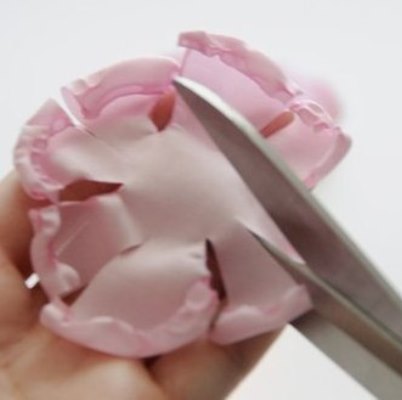
5. Create the middle layer. On two blanks in the form of circles, prepared earlier, we will perform four more incisions as shown in the diagram.
| | |
6. We will again melt the places of incisions above the flame of a candle.
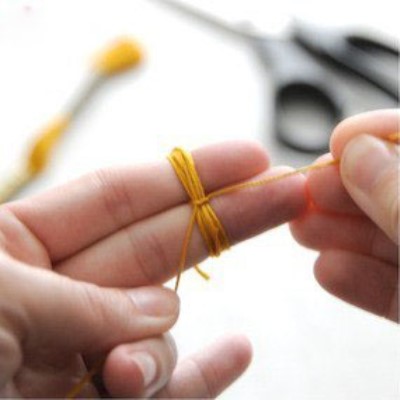
7. Now prepare the middle of the peony. To do this, take the hank of the yellow mulina and tie it in this way, as shown in the picture.
| | |
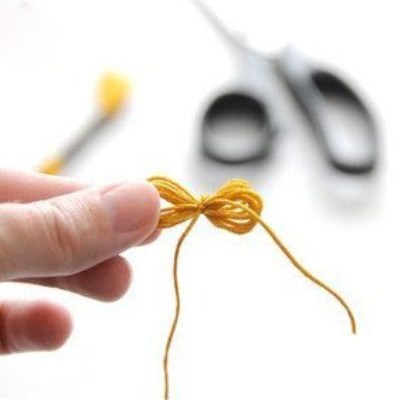
8. Cut the resulting bow around the edges.
9. Then gently straighten the thread and get a ready center for our flower.
10. Now everything is ready for the peony, it's time to start assembling the flower. First we lay two large layers, having only four petals, they will appear at the very bottom. Gently glue them together. Then we attach the other two, we put the smallest preform on top and also gently glue it together.
11. At the very end of the work place the yellow center of the floss in the very center of the flower. In this case it is better not to use glue, as any carelessness can spoil everything. It is better to use the same thread from which the middle is made, and gently sew it across all layers of the flower. Then straighten the middle, making it evenly lush.
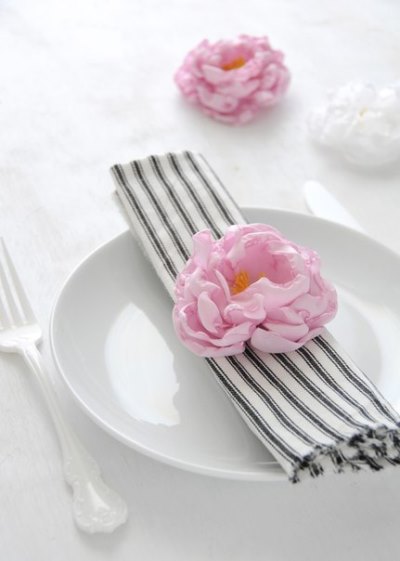
12. Now our flower is completely ready to become your amulet or just decoration. You can attach it to the product in any way - you can fasten it using a pin, you can sew it or just stick it with a double-sided tape.
| | |