As practice shows, most of the repair can be done with your own hands. As for laying the floor covering, then the amateur easily manages it, enough to take into account all the tricks and subtleties of this process. There are several options for laying laminate , and below we will consider the simplest of all.
Correct laying of the laminate
The whole process of work can be divided into several stages. The order of laying the laminate is as follows: preparation of the surface, processing of the edges along the perimeter, and directly fixing the details of the floor with a locking mechanism. Preliminary it is necessary to make measurements of the room and calculate the necessary number of boards. Never take exactly as many as counted. You always need a reserve, since the lock mechanism in the hands of a beginner will almost certainly break down for the first time.
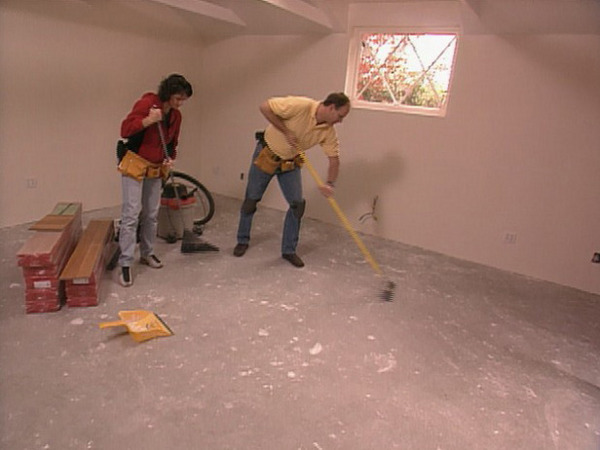
- The first thing you need to lay the laminate, qualitatively prepare the floor. It is clear that all dust and dust must be removed carefully. But it is advisable to check the floor with a level. If the screed is of poor quality and there are large differences in height, eventually after work you will notice the so-called "walking floor" when the surface is walking like walking.
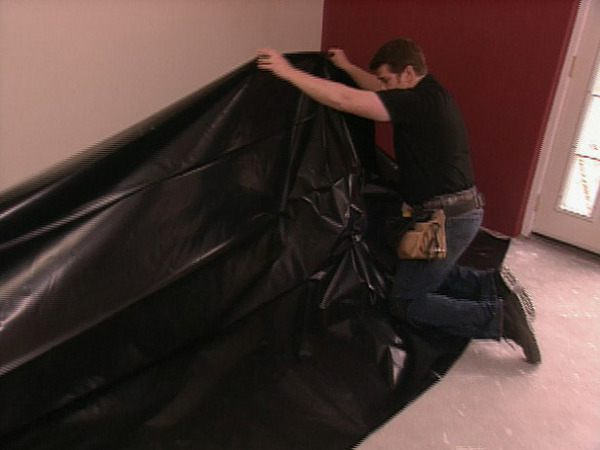
- The second point is waterproofing. On the prepared floor we put a layer of polyethylene. It can be found in the same building hypermarket. Usually all this is sold in one department. To fix sheets of polyethylene among themselves it is possible by means of a blue adhesive tape.
- Now let us touch on the question of what is needed to lay the laminate immediately before starting work. With the help of construction tape, you need to fix special spacers. These are thin boards (sometimes also pieces of the laminate itself). We have them all along the perimeter, but they should not be wider than the plinth .
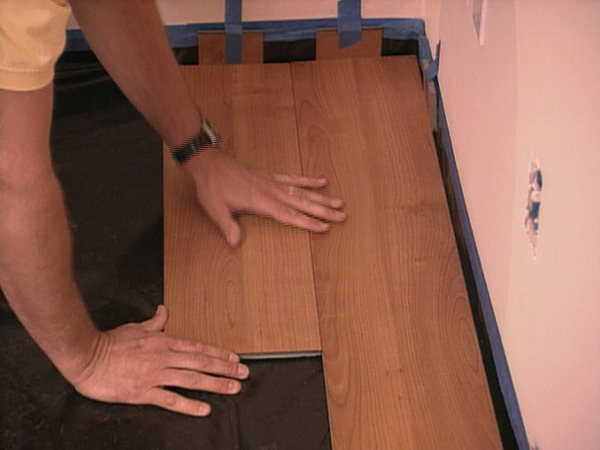
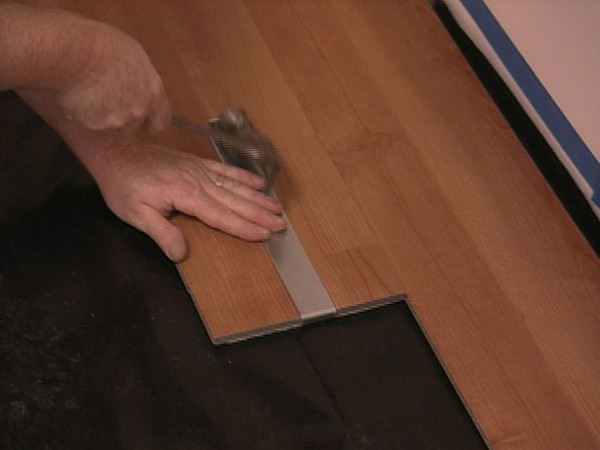
- Now proceed to the first row. It should fit very tightly to the struts. Your task is to spread the entire length of the wall of the board so that the latter is a quarter of an inch from the perpendicular wall.
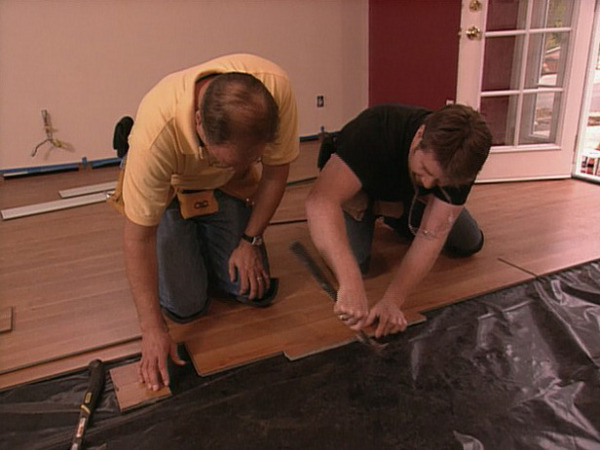
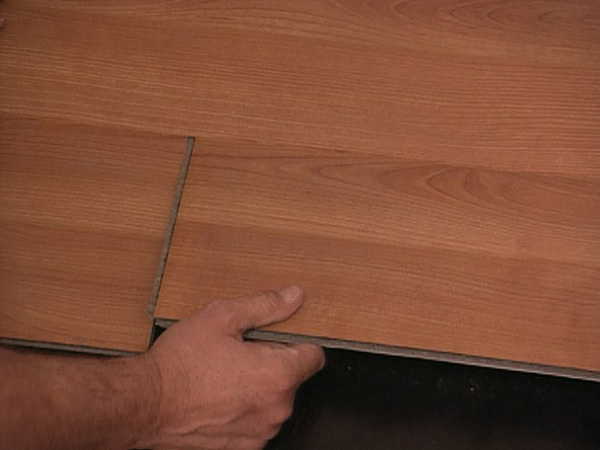
- Then follows the second stage of laying the laminate with their own hands, namely fixation of subsequent details. Typically, the stowage is done with a half-board offset. The second row starts with the short part. First, we start the board at an angle, and then we begin to level the surface and put all the parts in place.
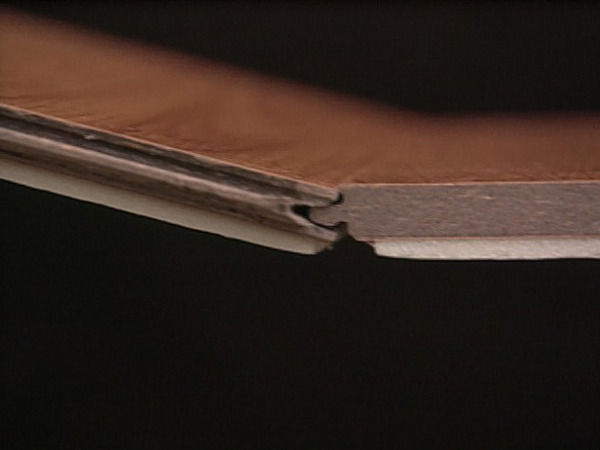
- When laying, you have to tap the edges of the boards a little. In order not to damage the soft lock mechanism, you should use a wooden plank. The lock mechanism itself is something like a puzzle at the end: one board has a special groove, the second has a so-called tongue that enters this groove. In this case, the tongue itself is pointed slightly upward, and therefore it is necessary to start the board at an angle, and then lightly press the boards and level the surface.
- How is the correct laminate laying: you start the next board at an angle and insert the parts of the lock one into the other, and then slightly tap the edge to make the board fit into its place. It is important to use something like an iron bar so that the hammer does not damage the surface of the boards.
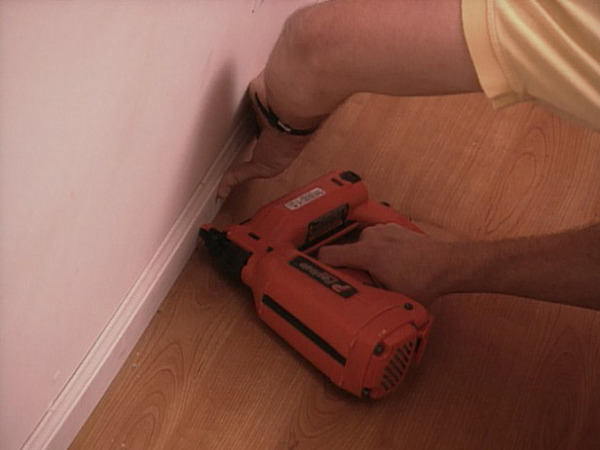
- After all the boards are in place, you can remove temporary curbs from the planks. Next, you need to install a skirting board around the perimeter of the room. Usually, plinths made of plastic or polyurethane are used most often, they are fixed with self-tapping screws. Then plots with screws are covered with a special putty and stained in the desired color.
- Laying the laminate with your own hands is completed. You can wipe the floor with a damp clean cloth and enjoy a new floor.
| | |
| | | |